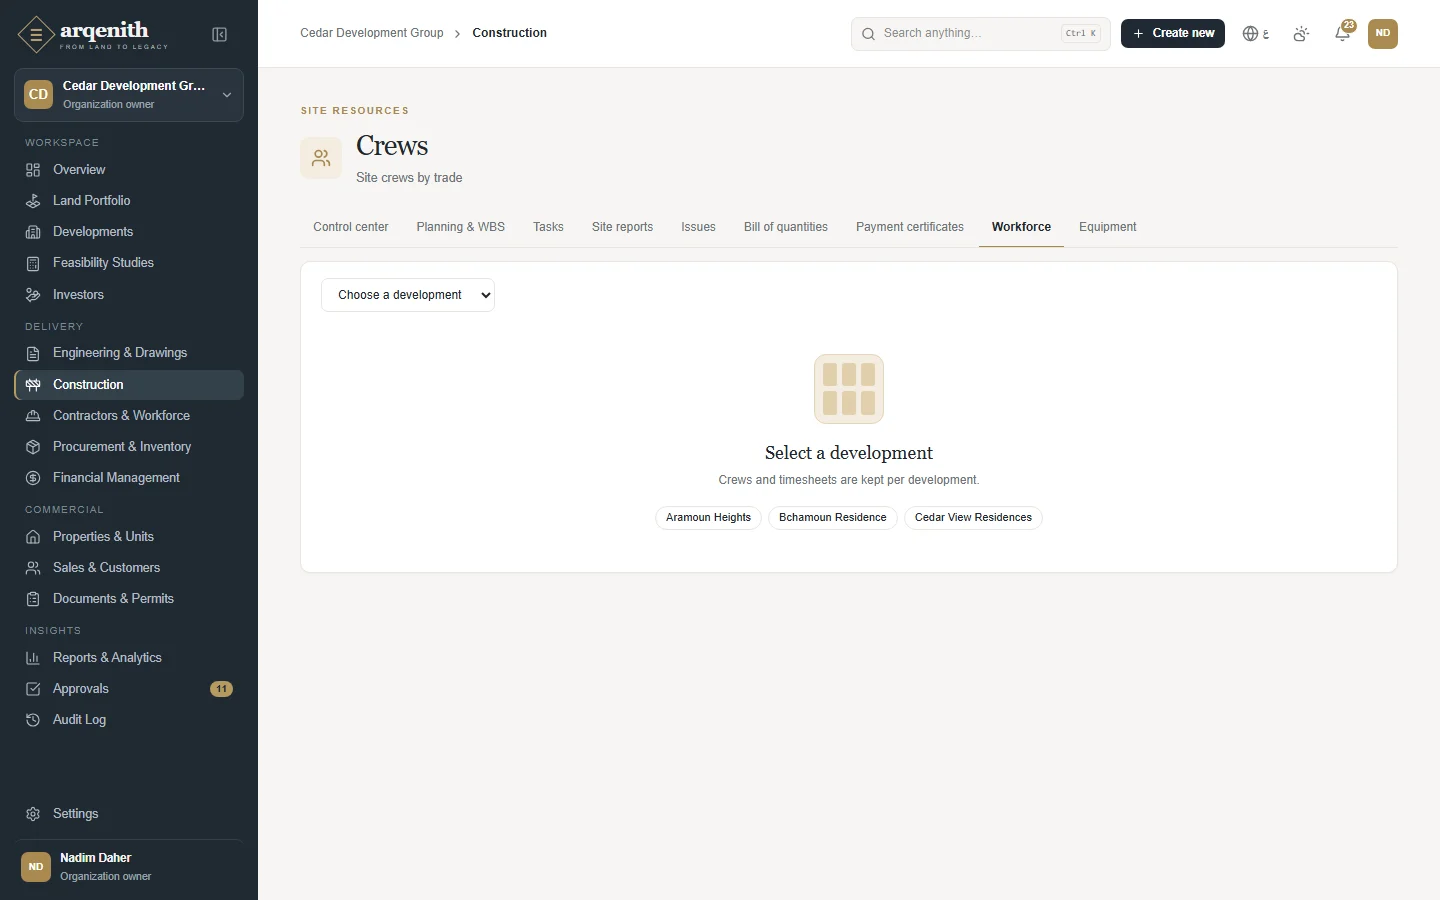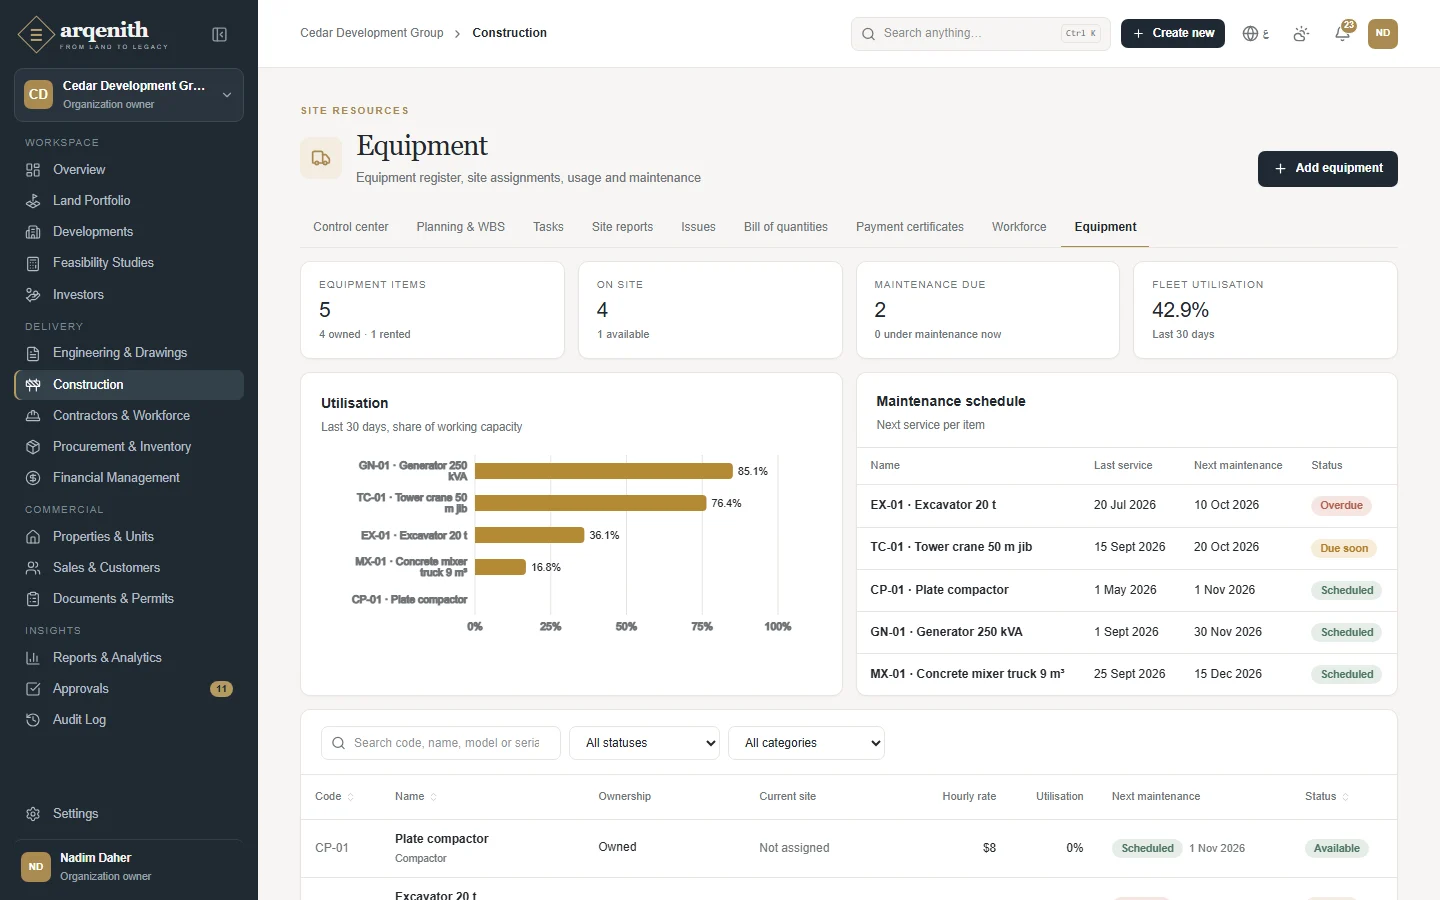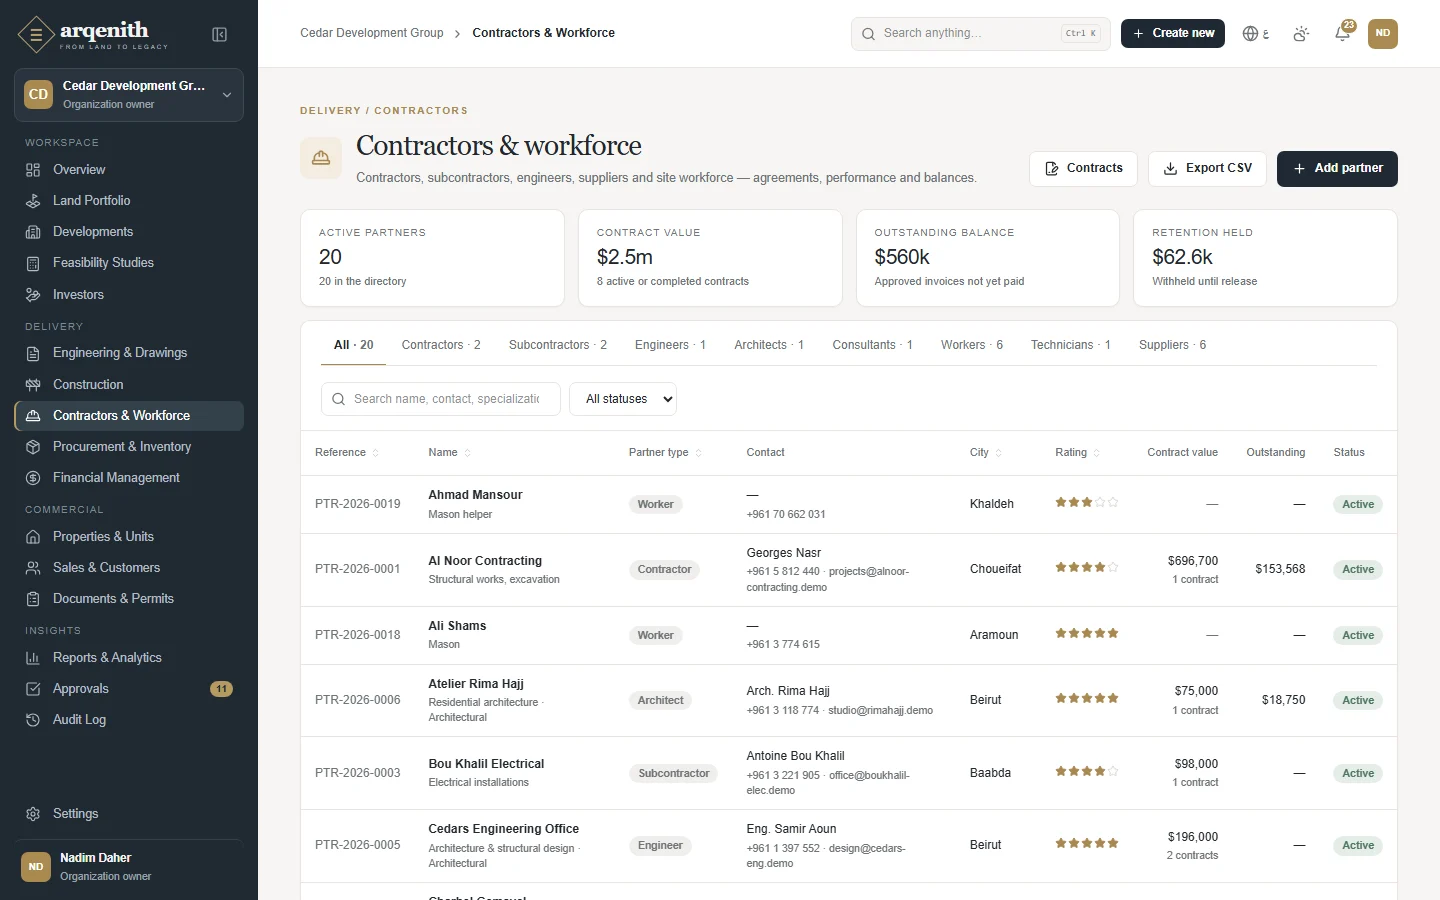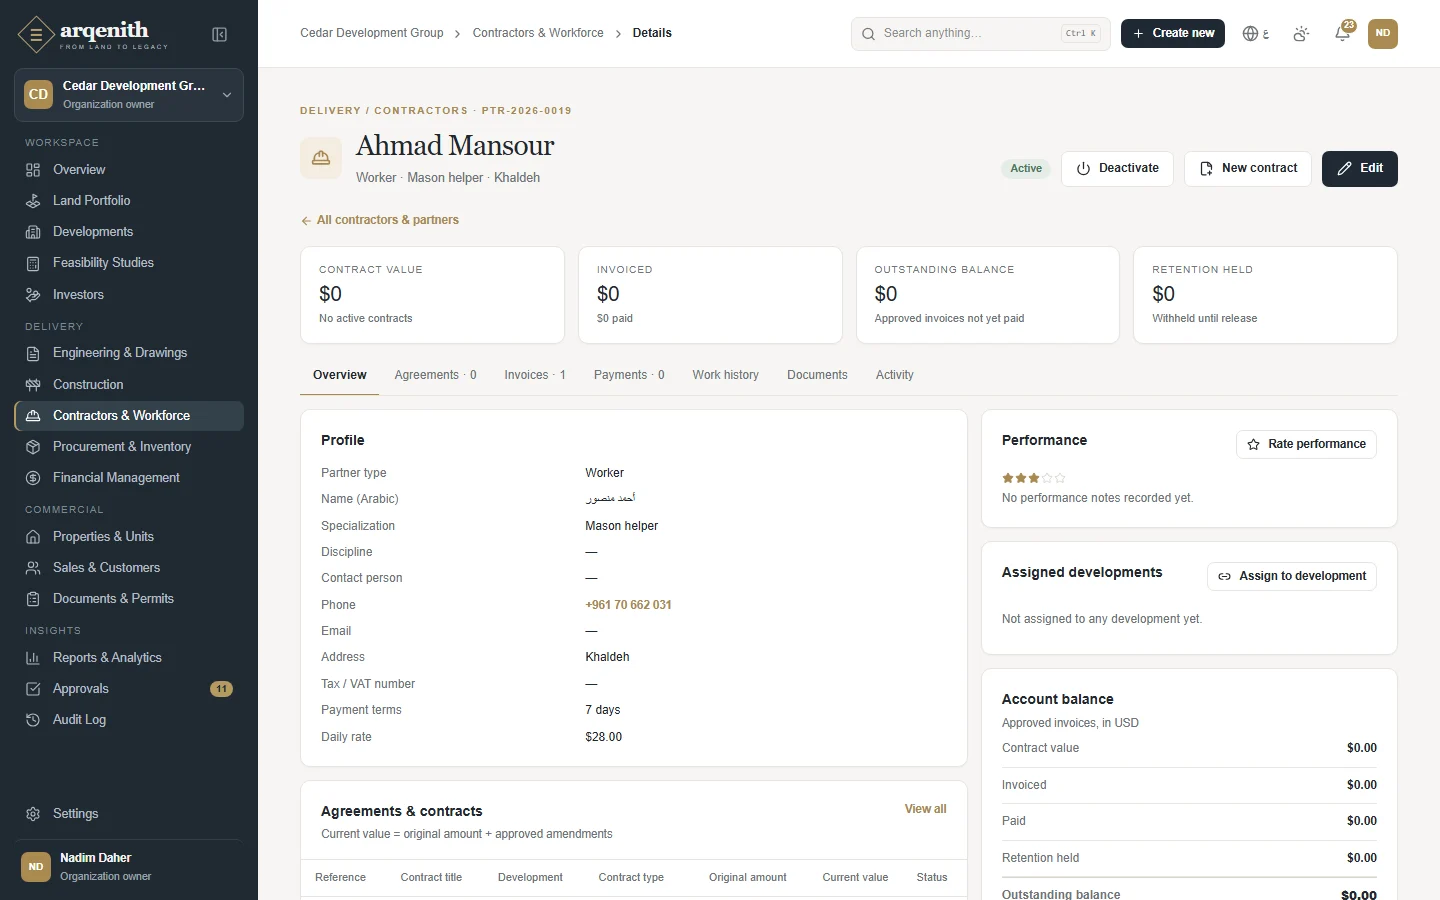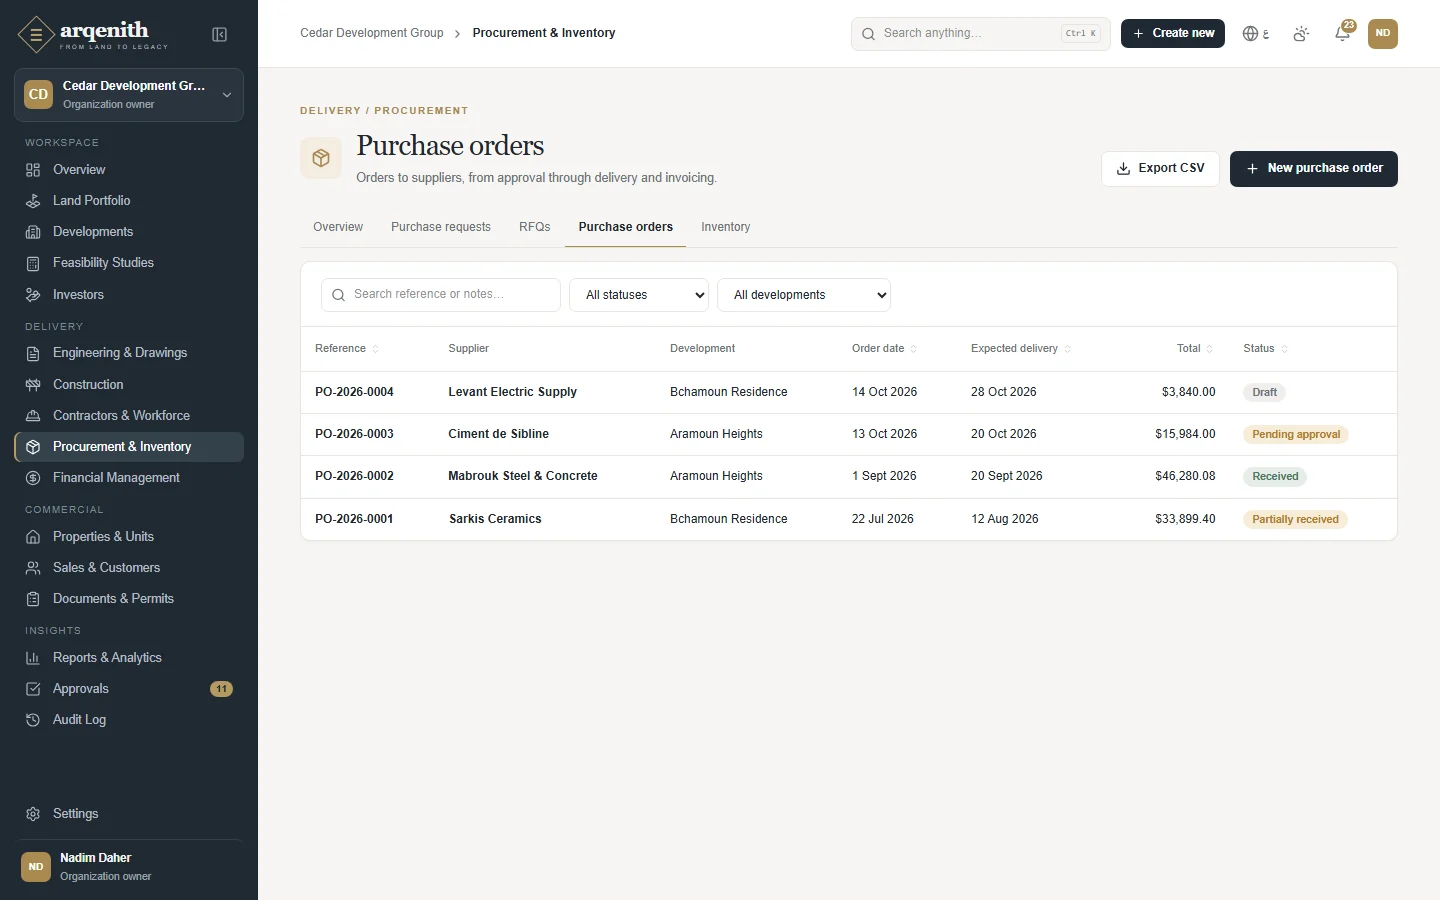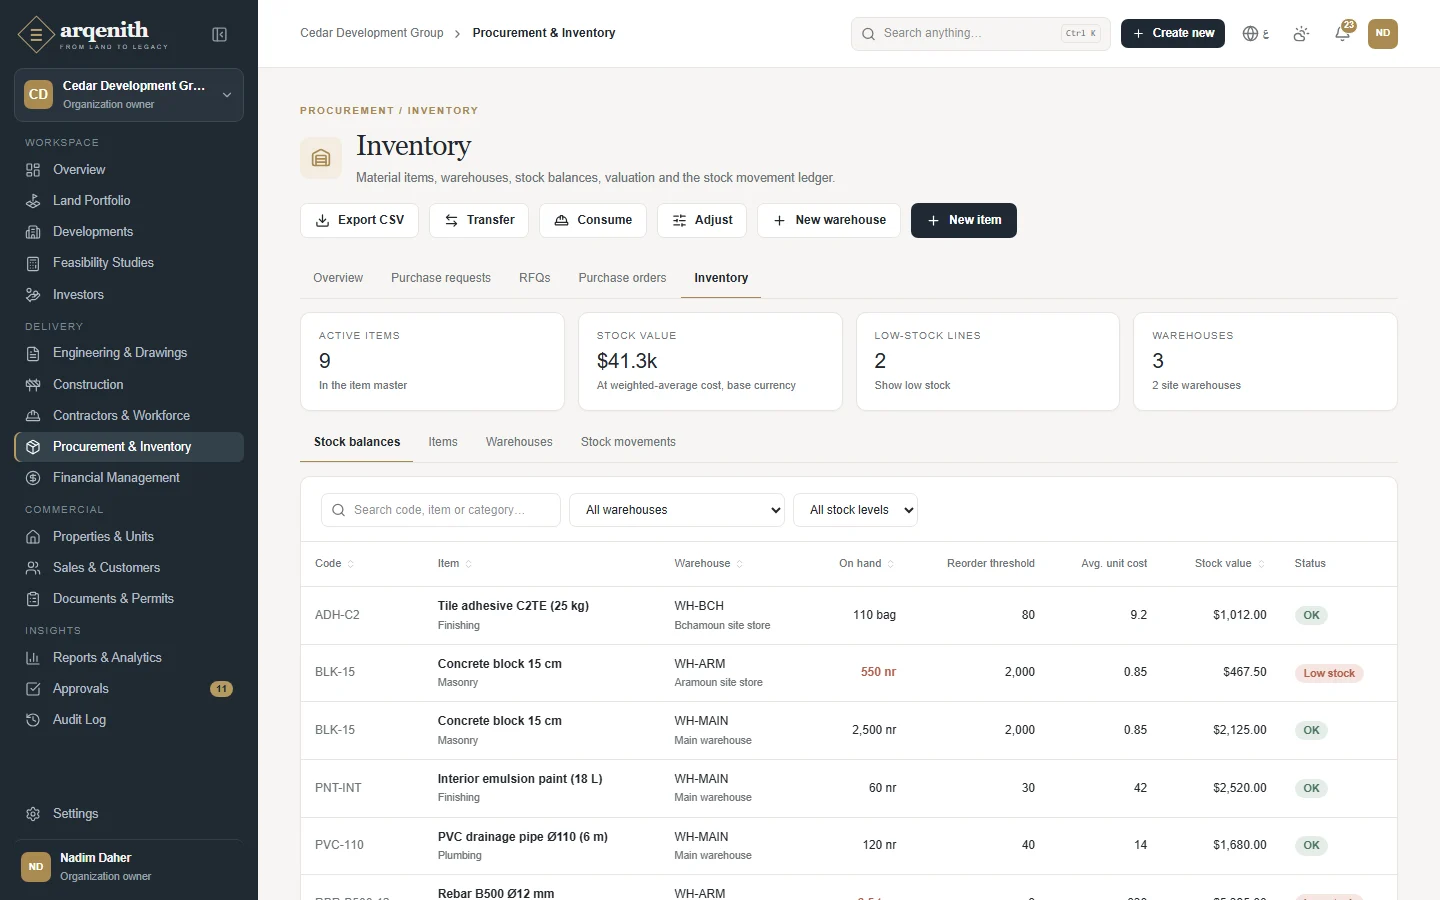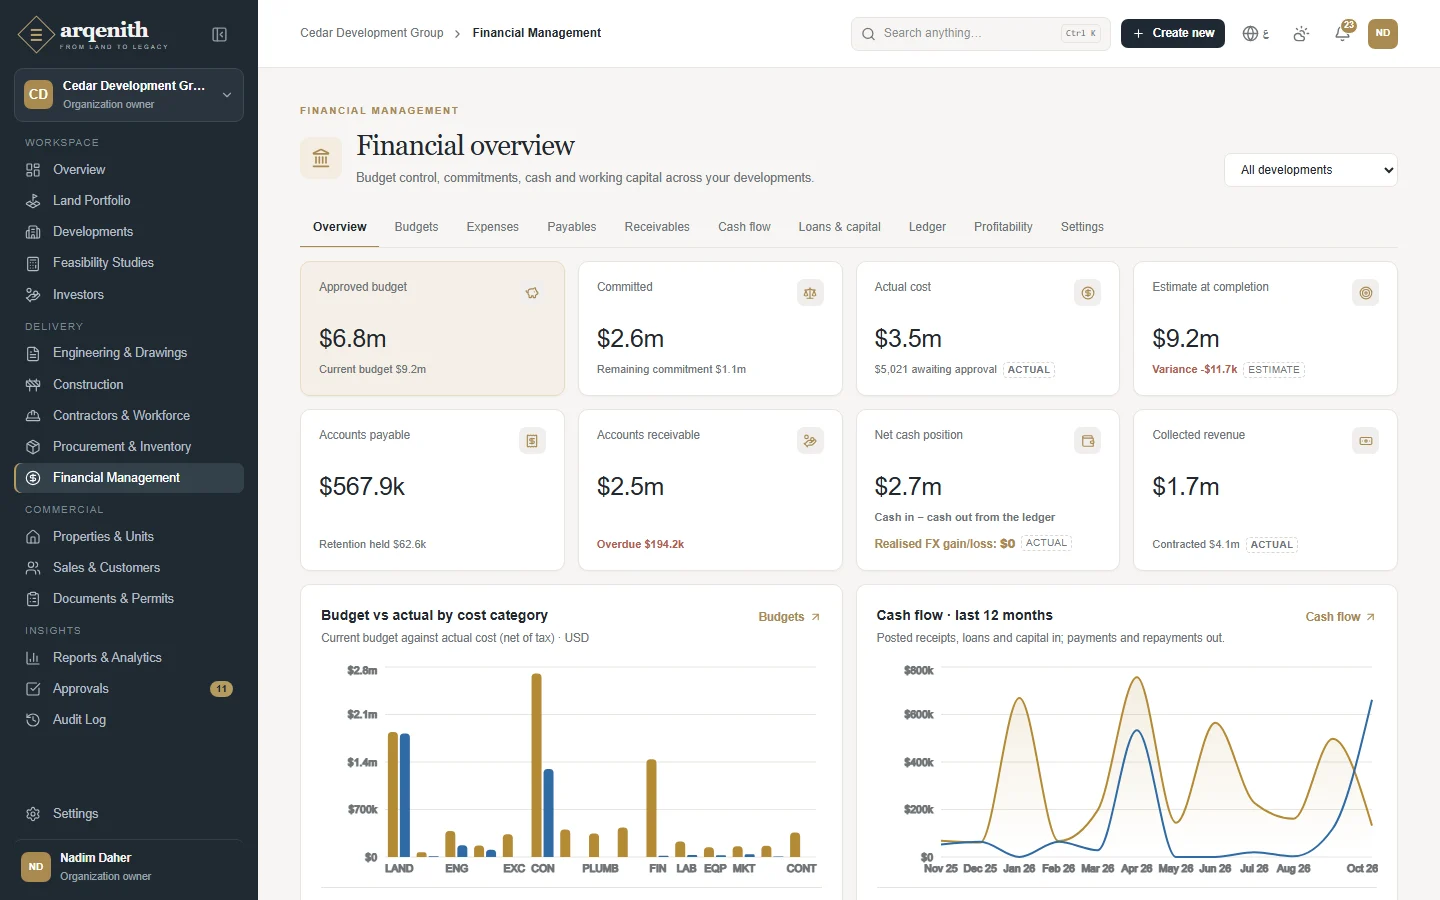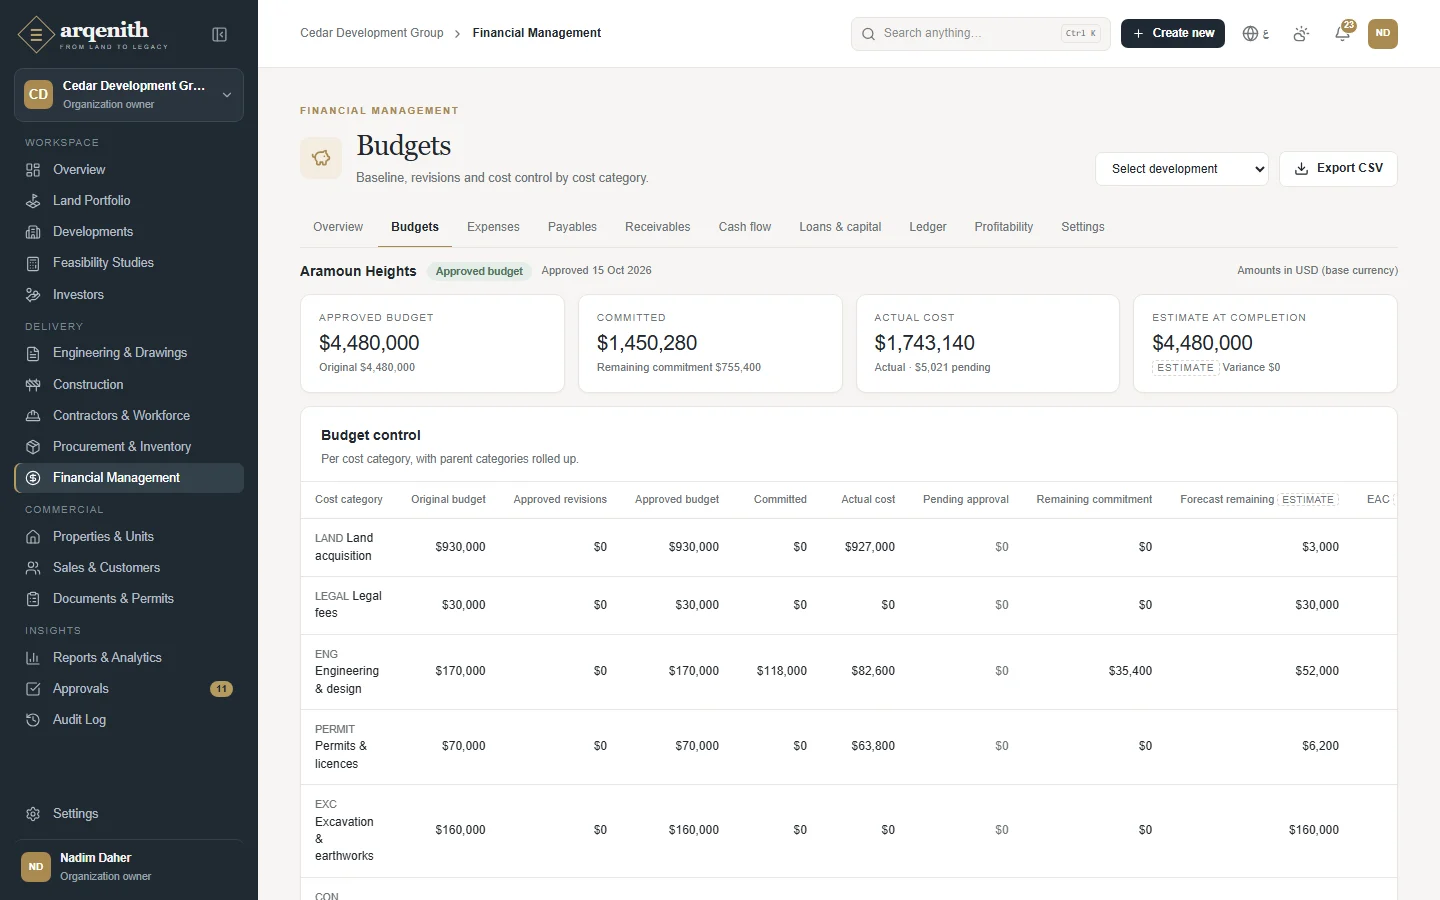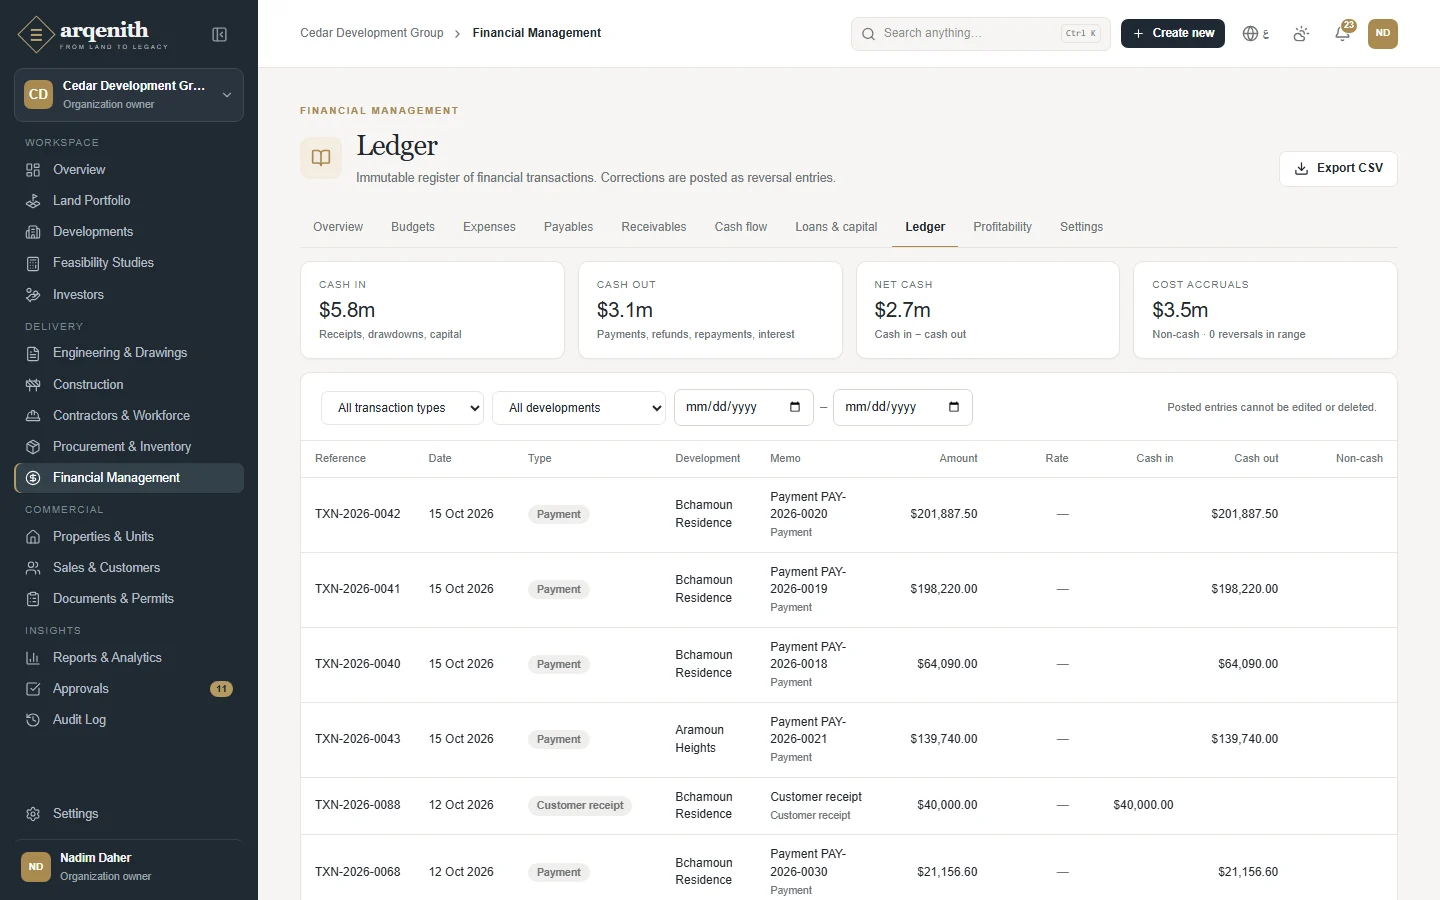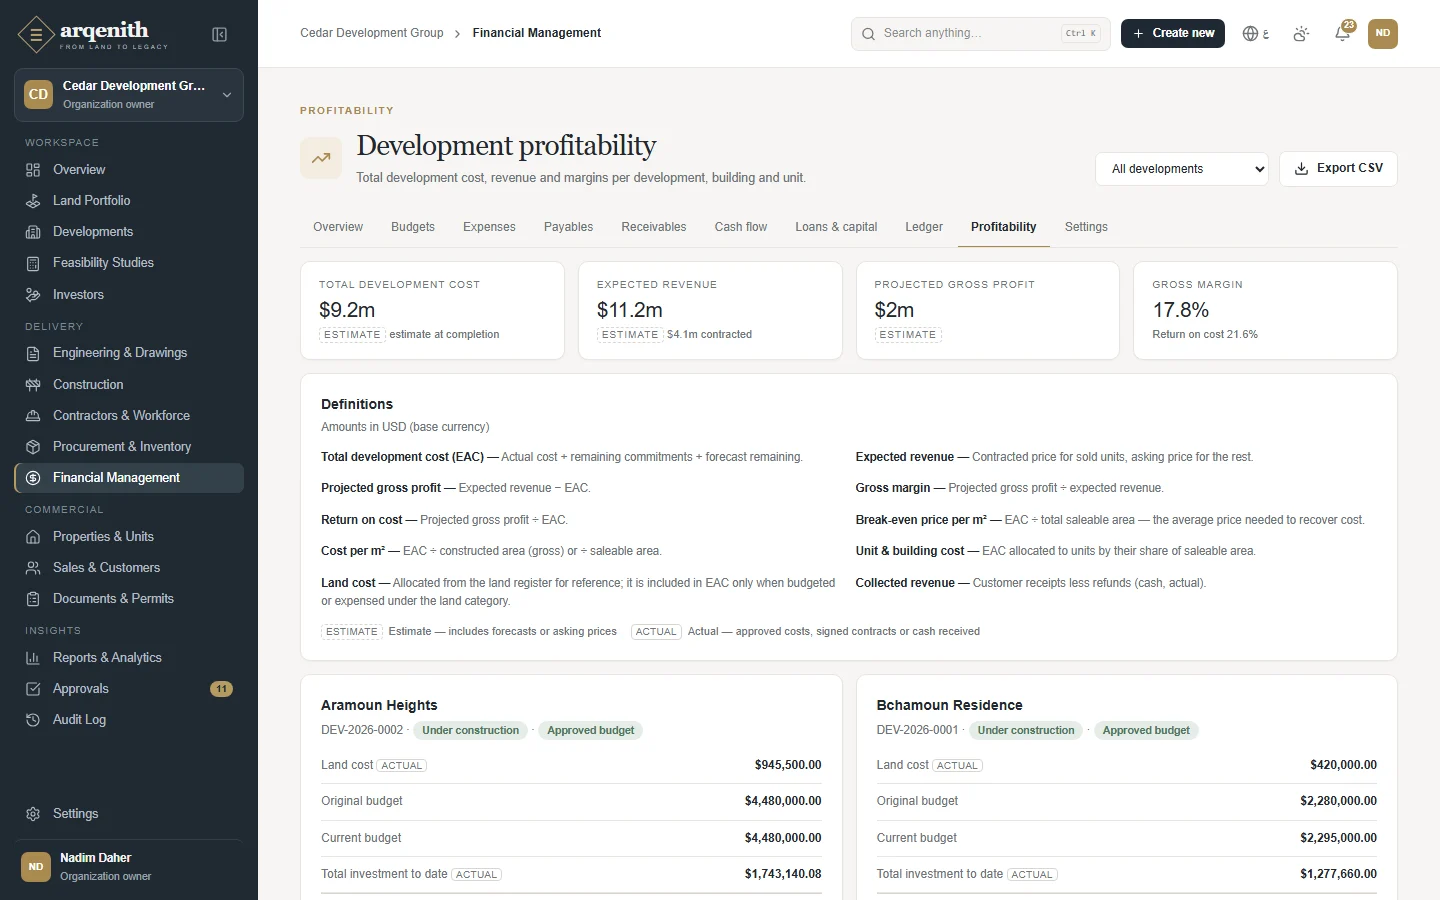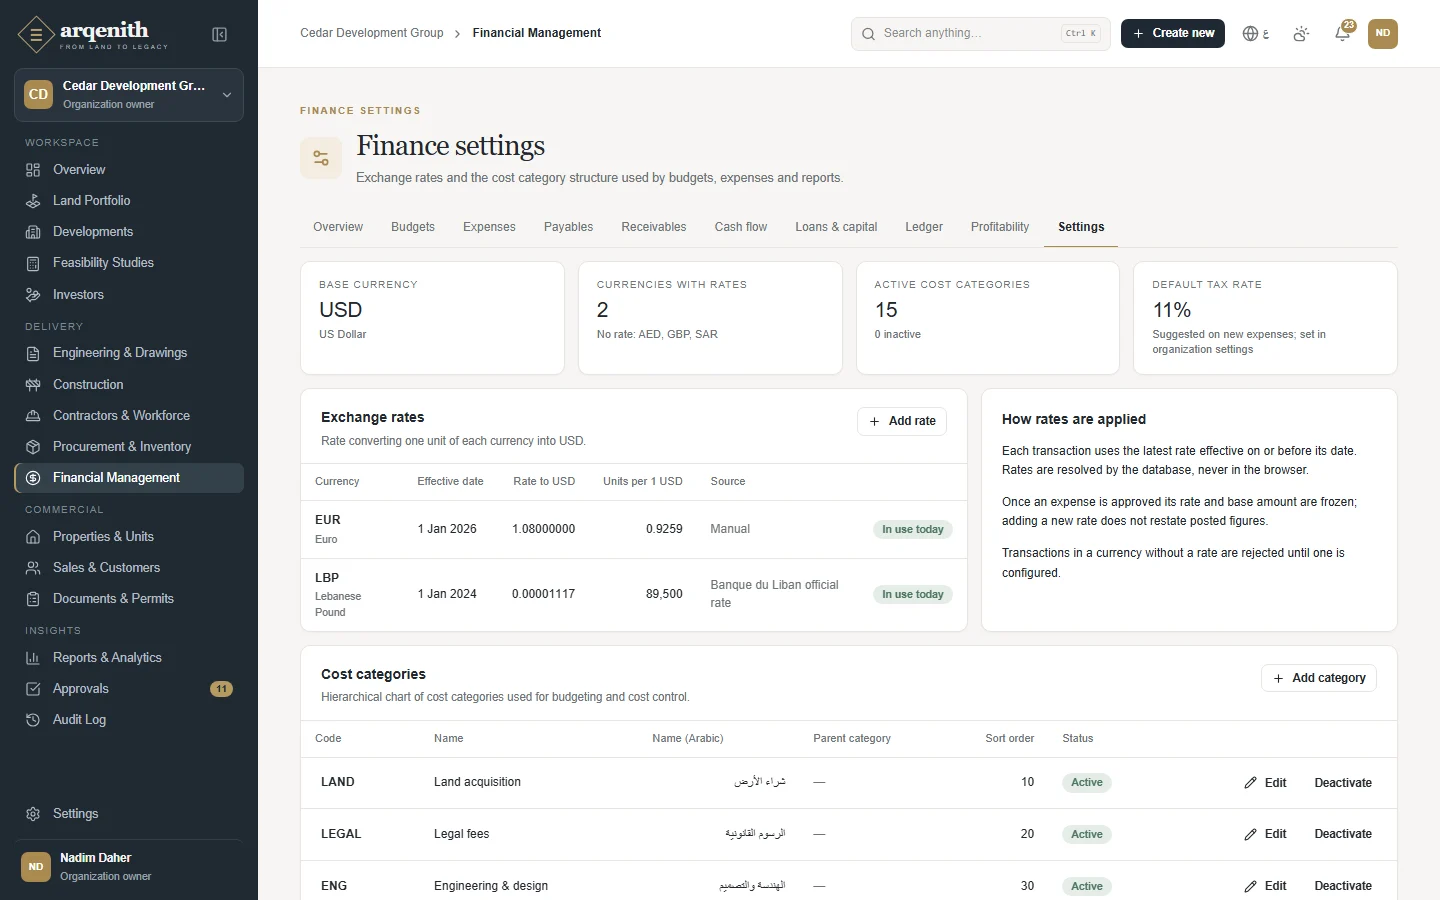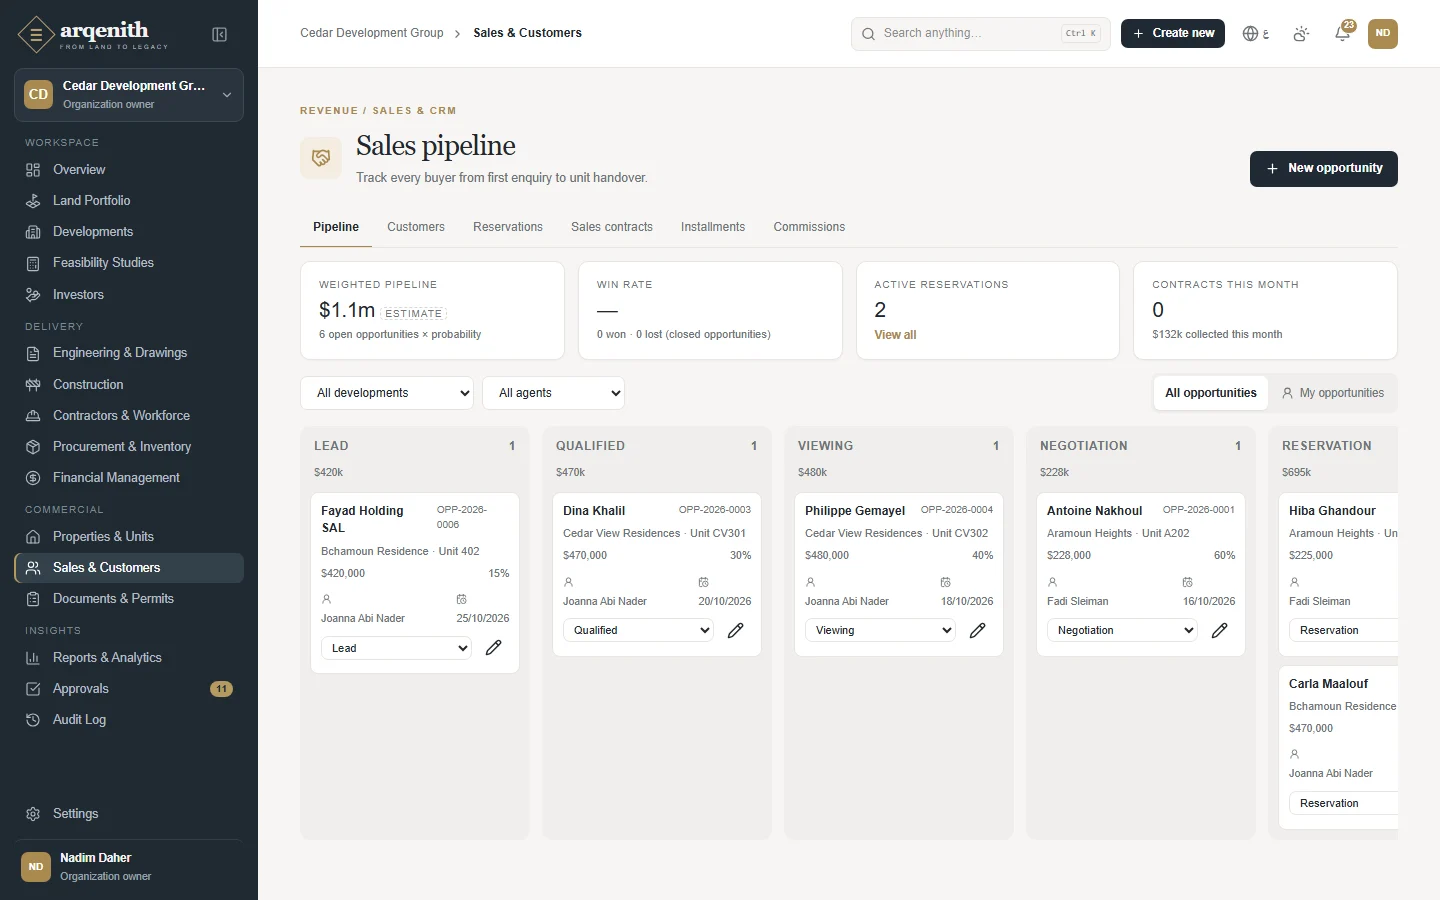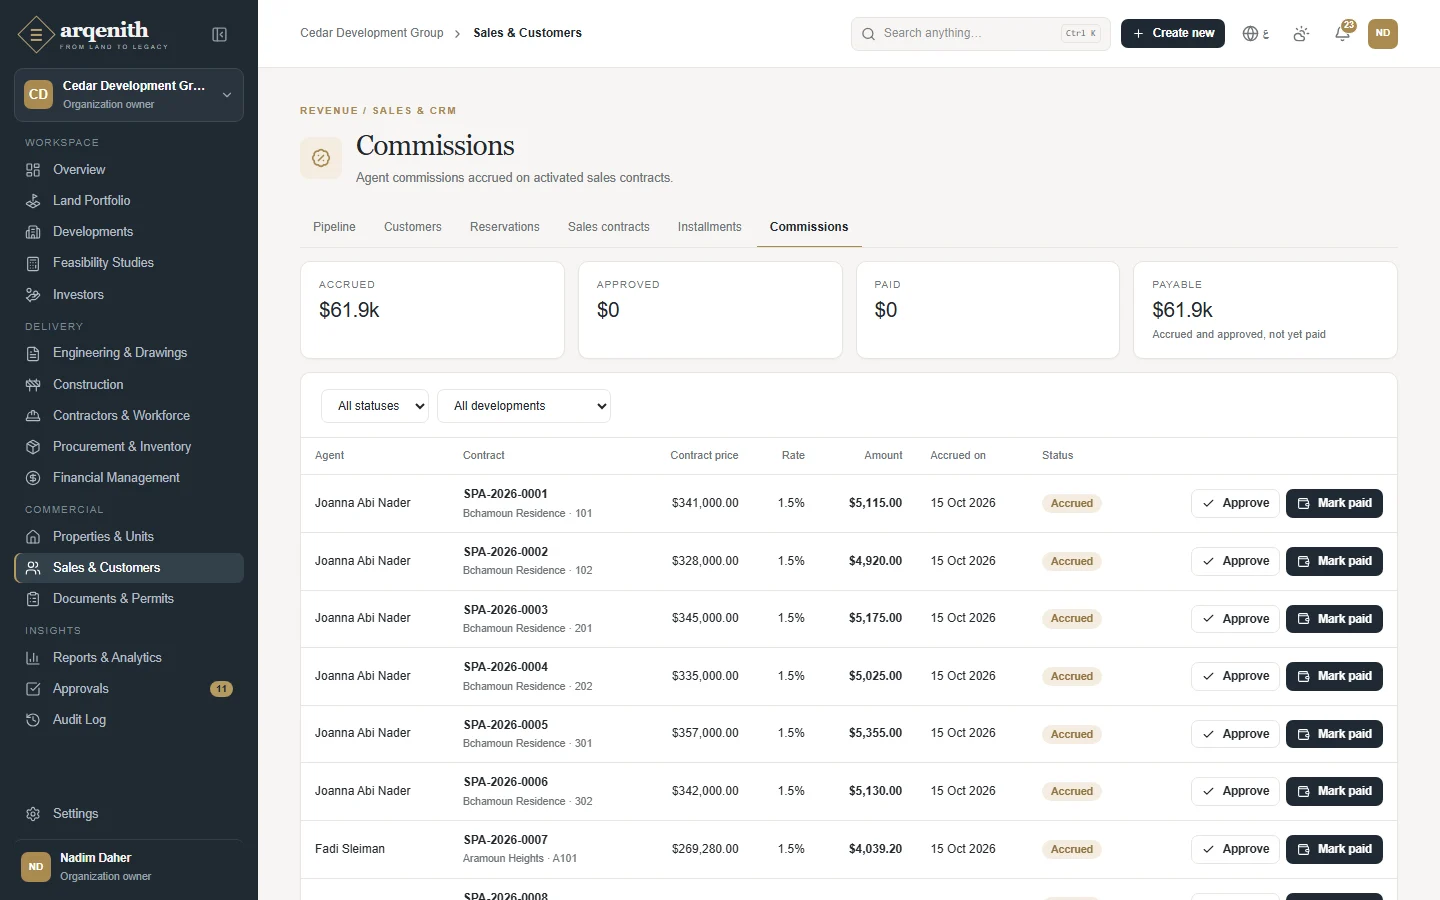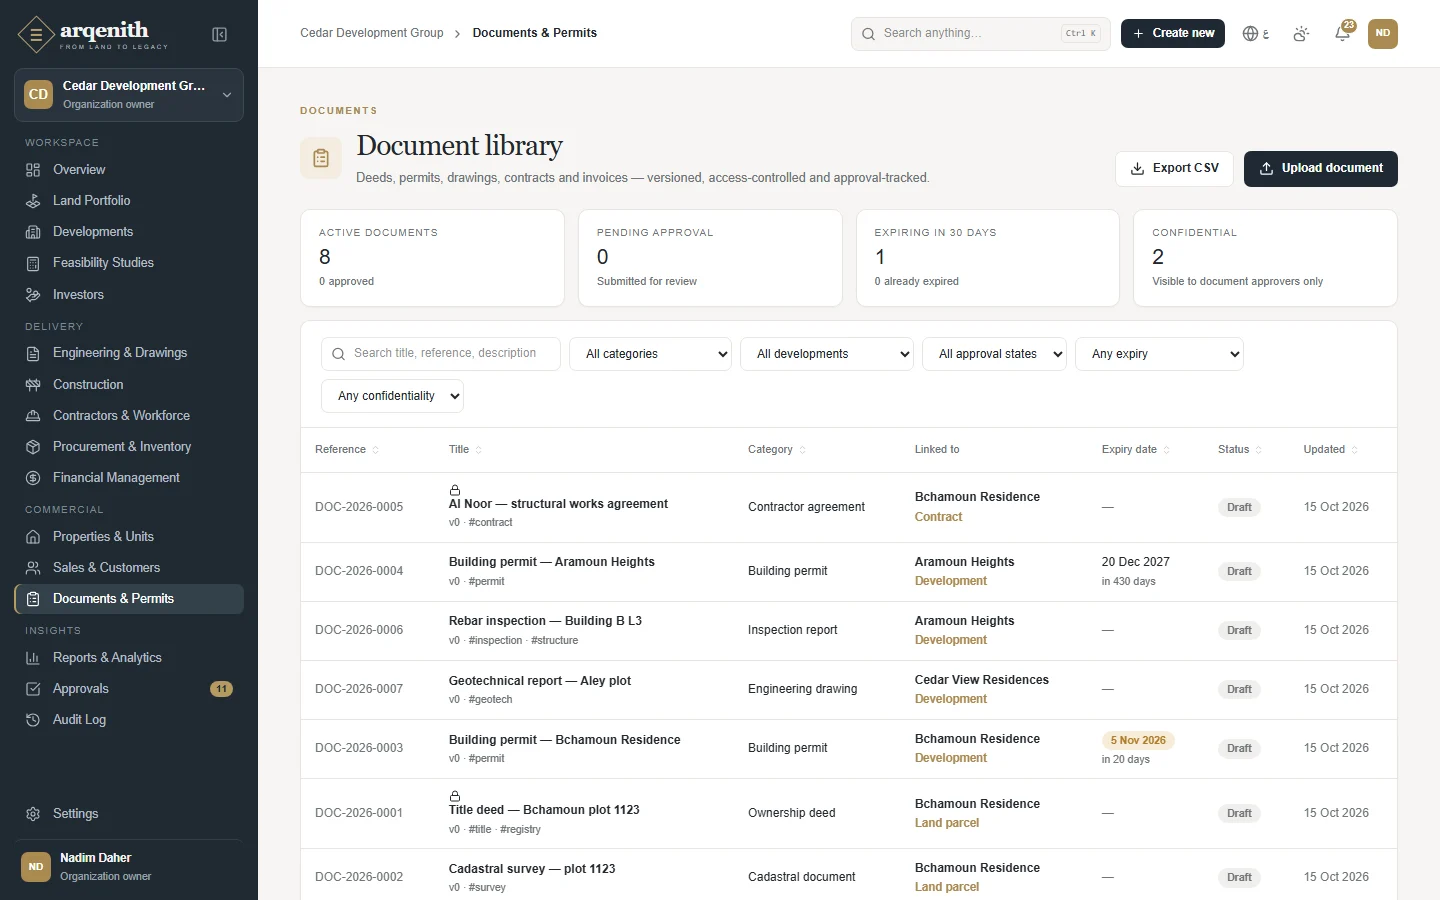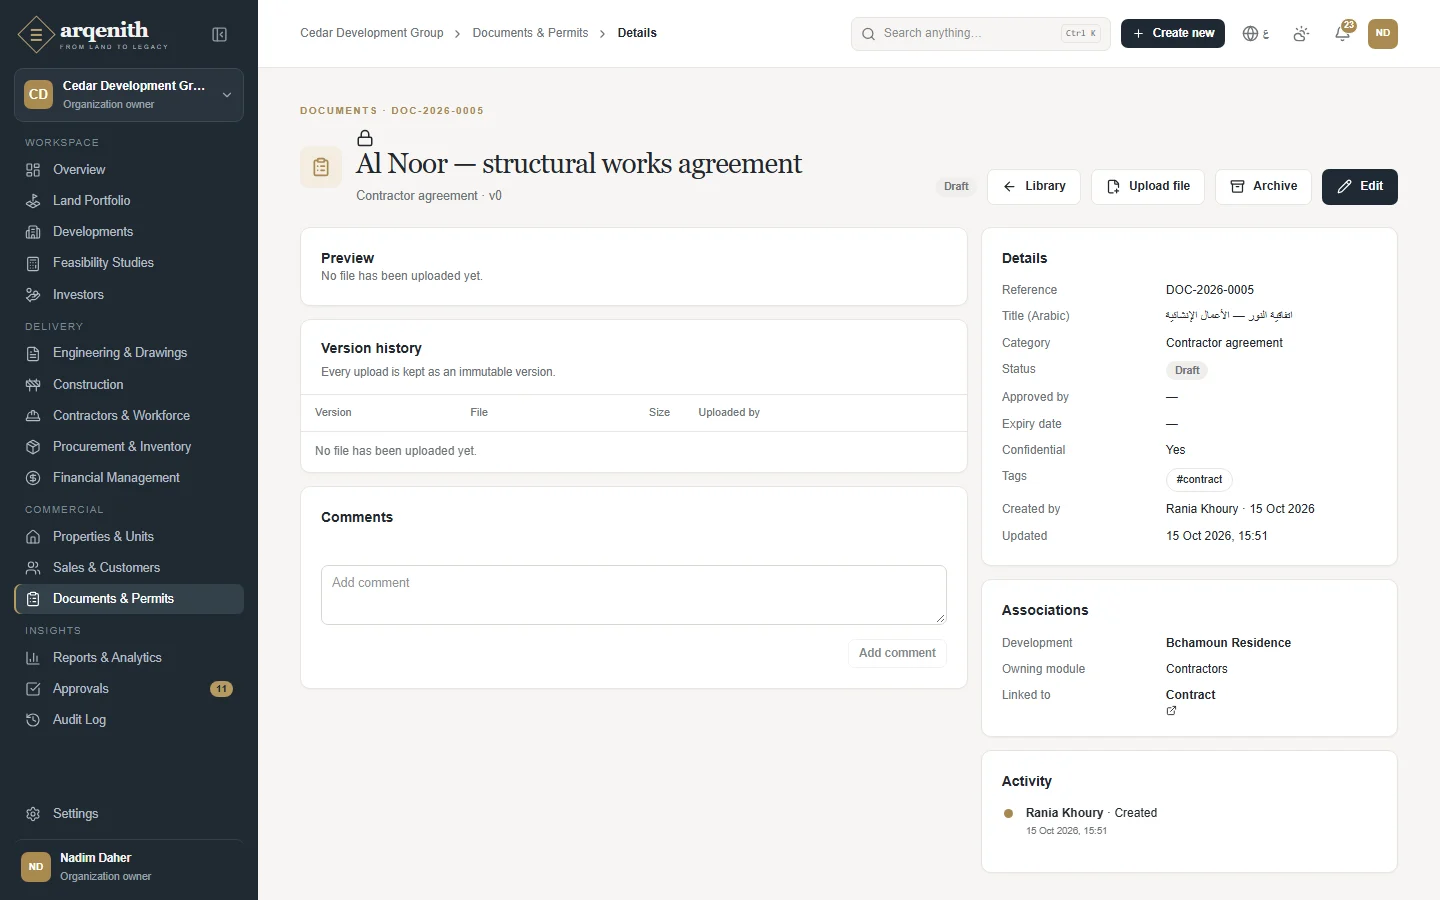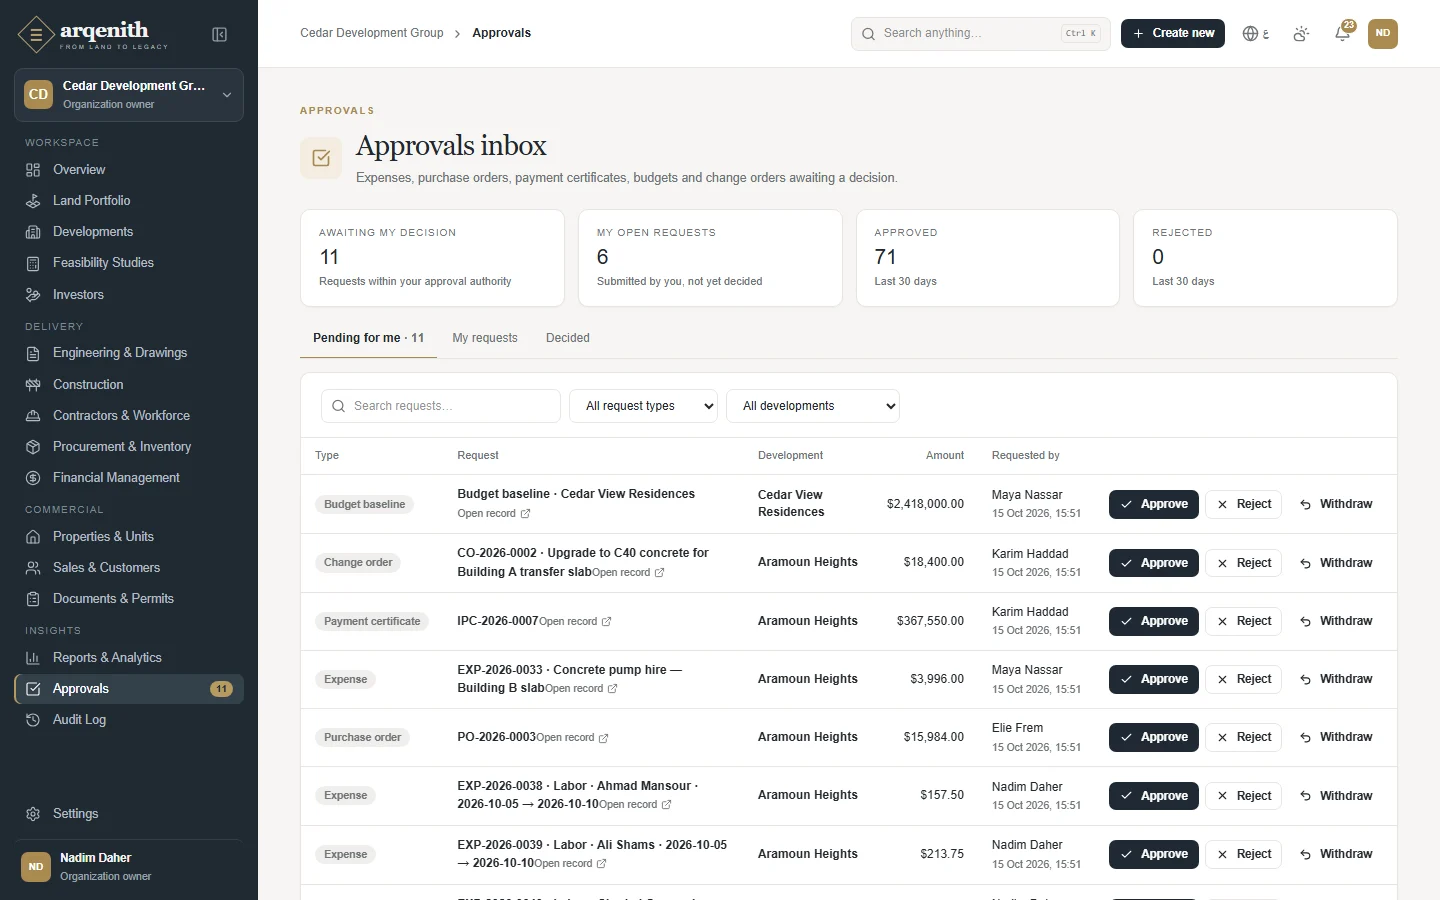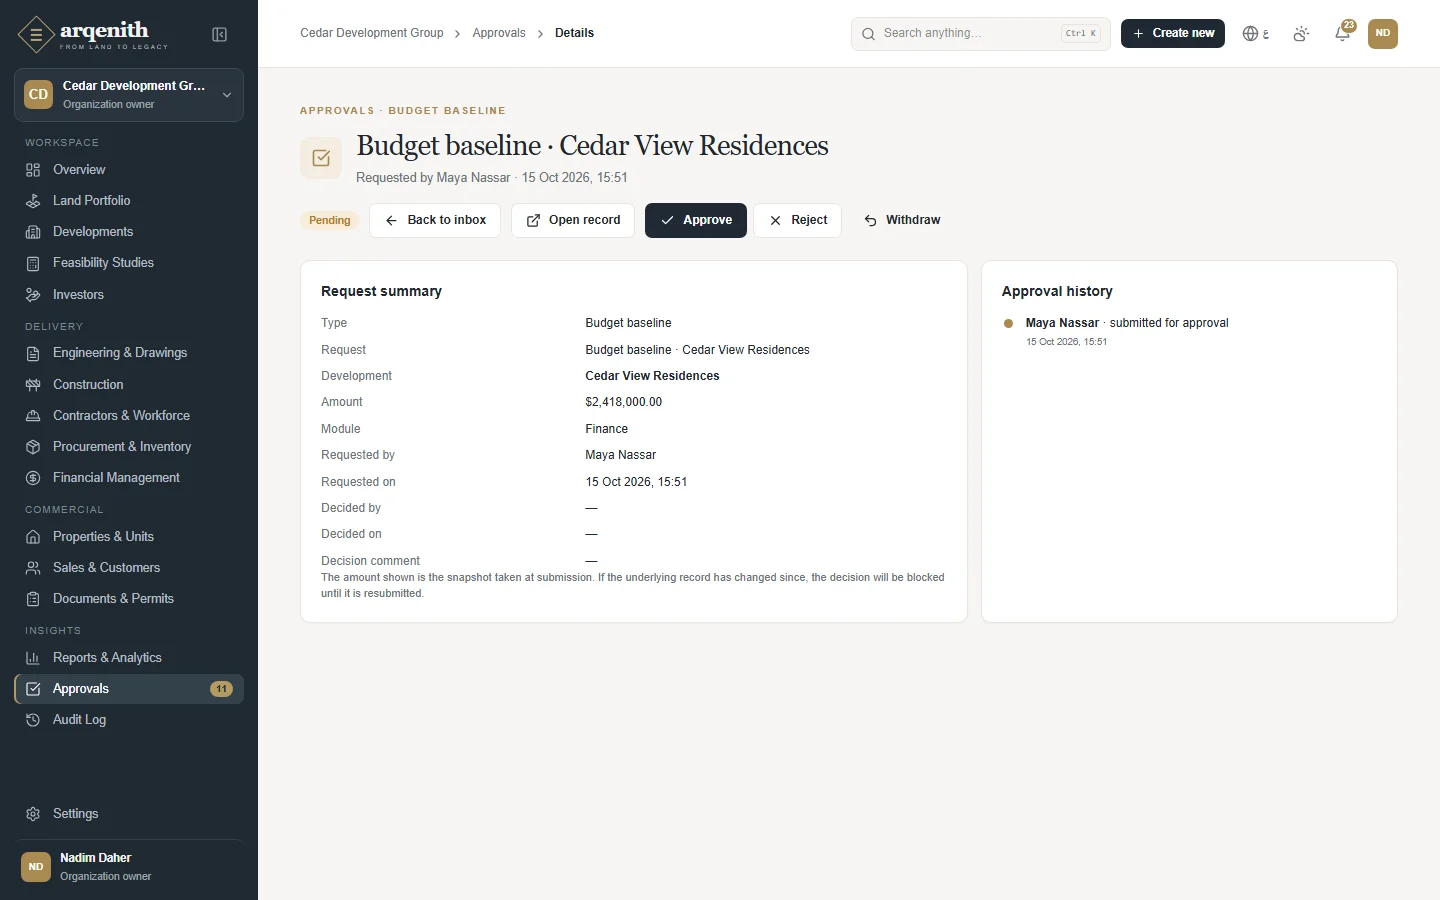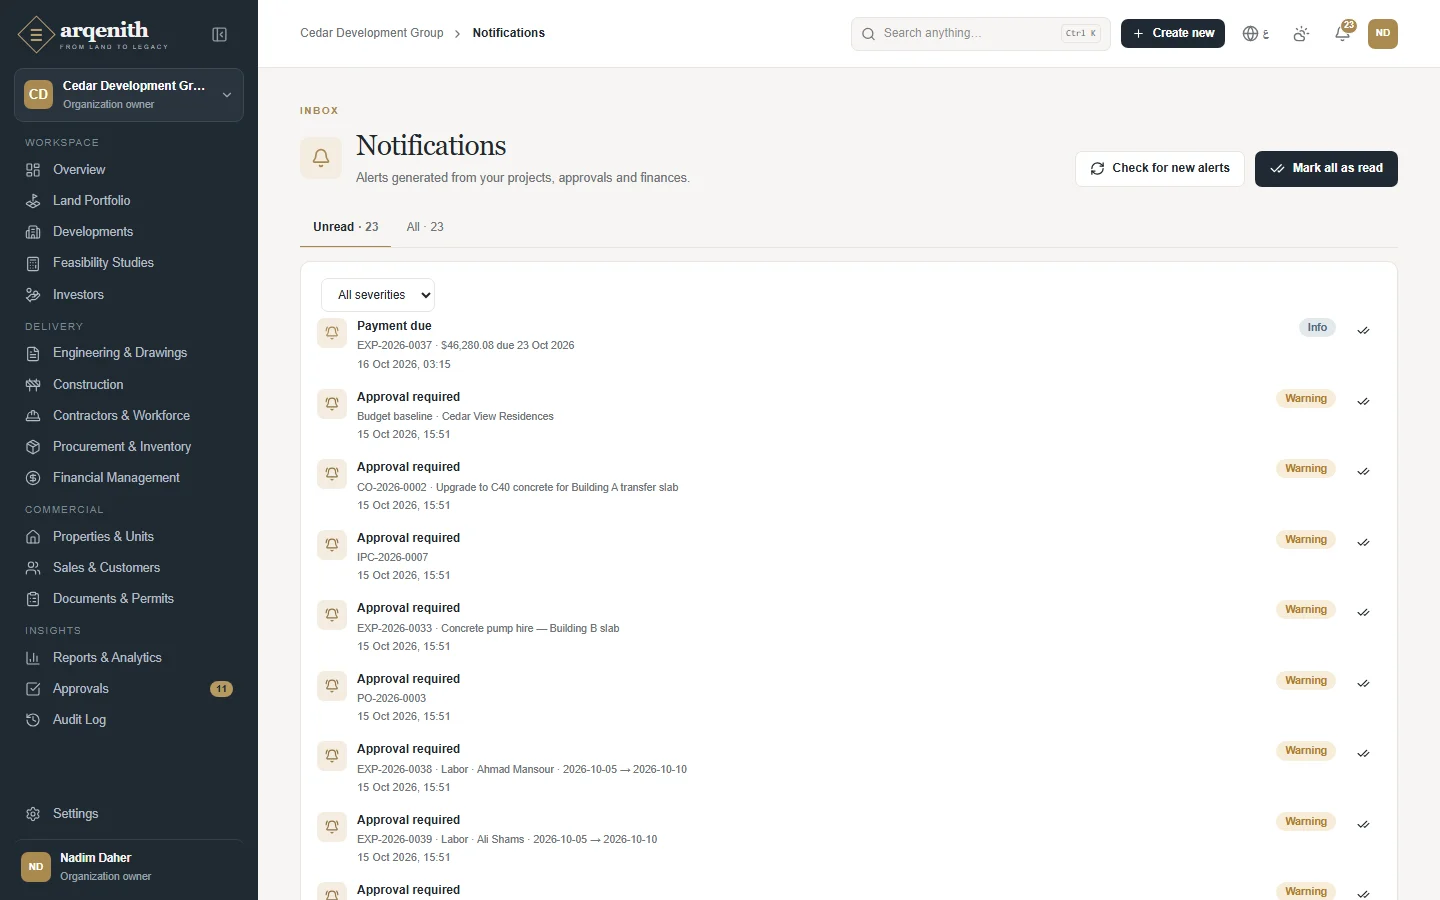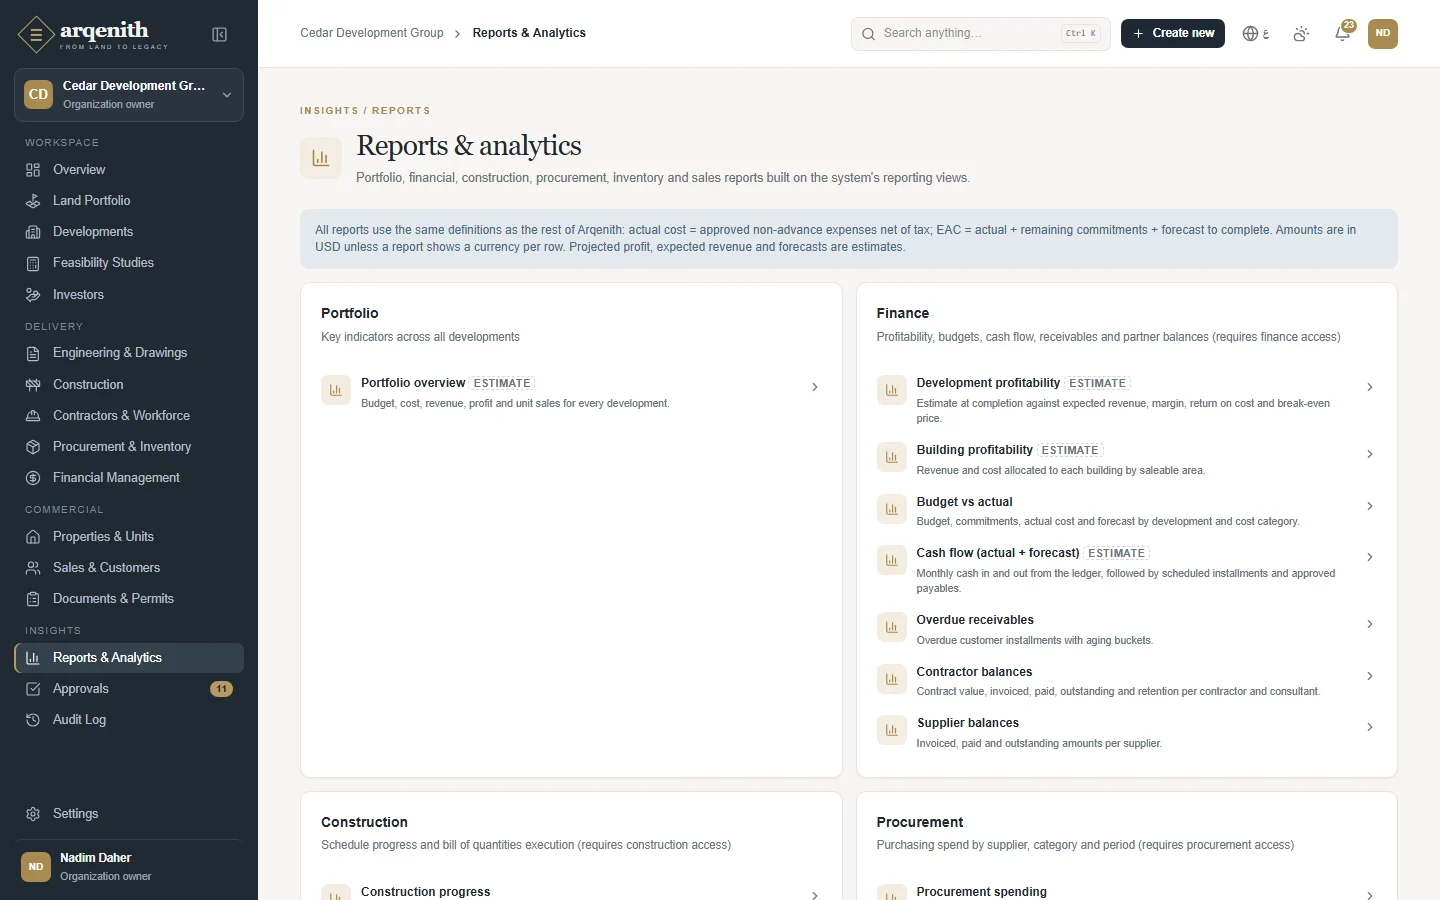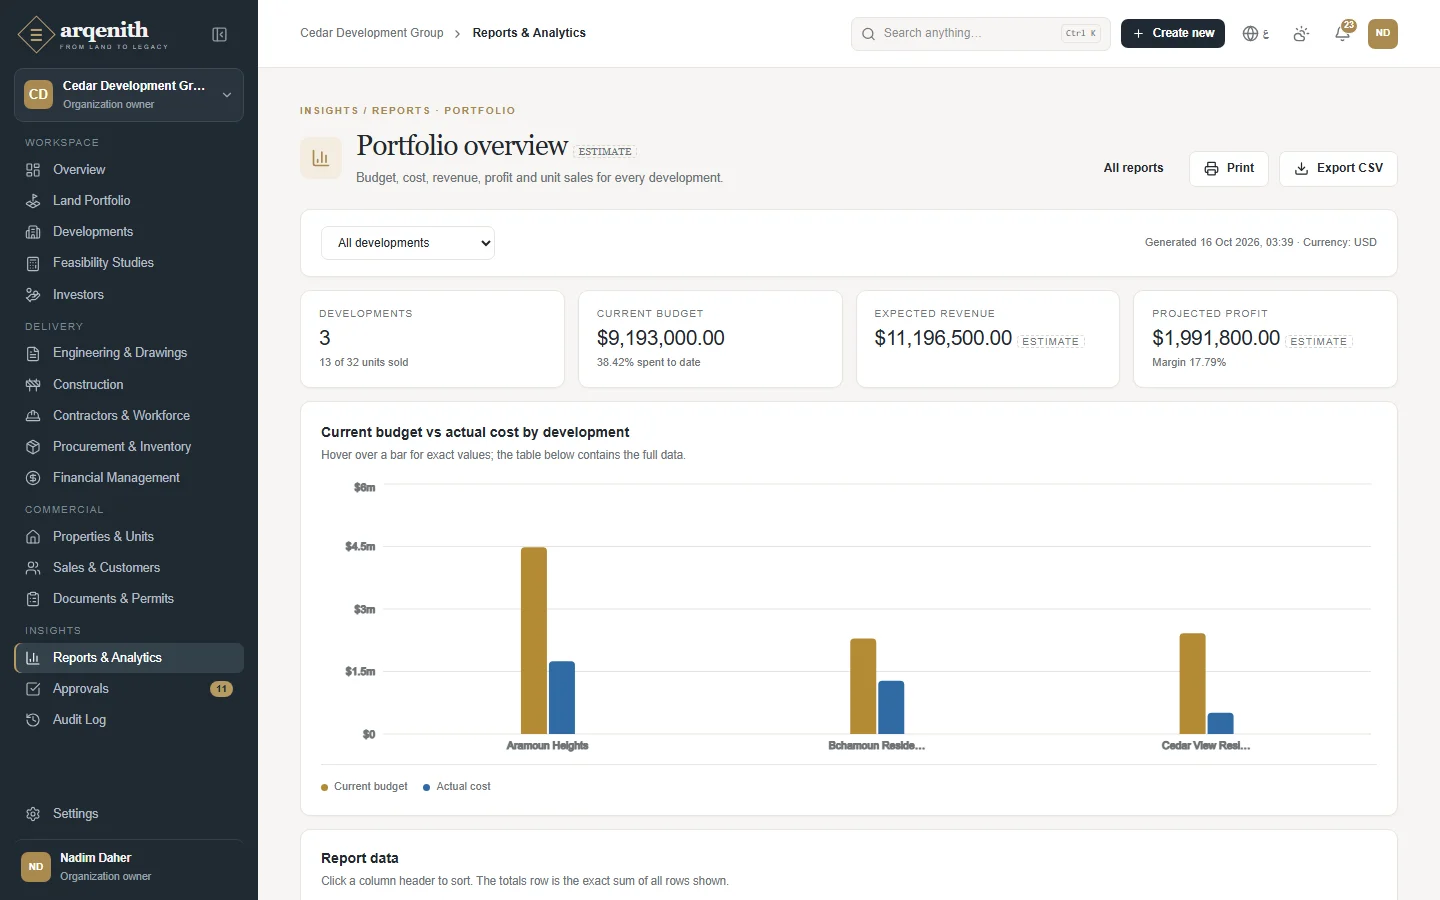

Edition 1 · October 2026

Arqenith Product Guide

Real estate development and construction ERP by QLS: every module, every workflow, every screen.

Prepared by Quantum Logic Systems (QLS)

www.qlsystems.net · arqenith.qlsystems.net · info@qlsystems.net

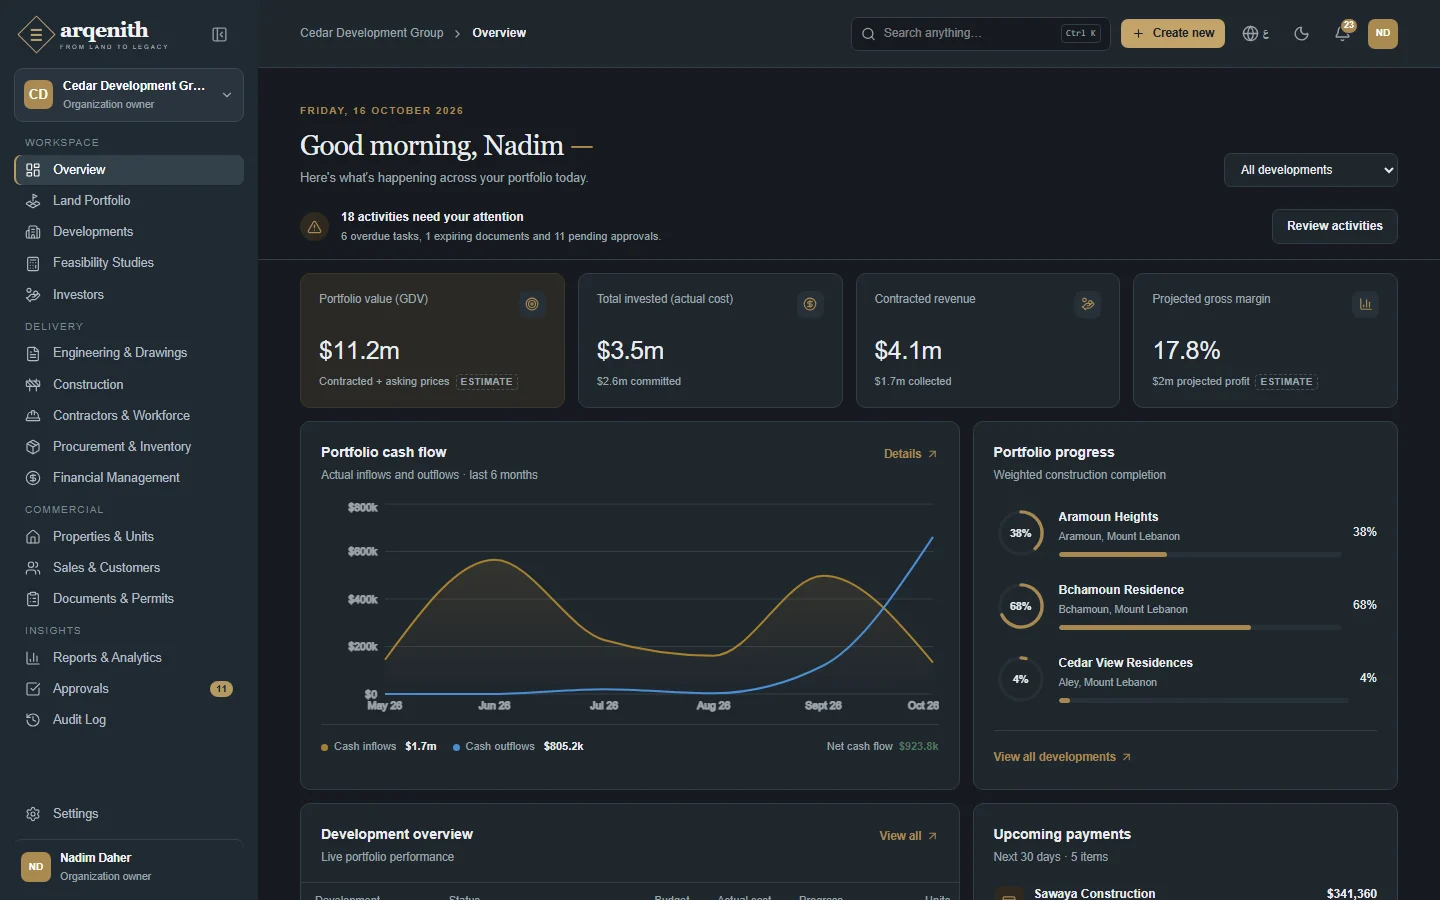
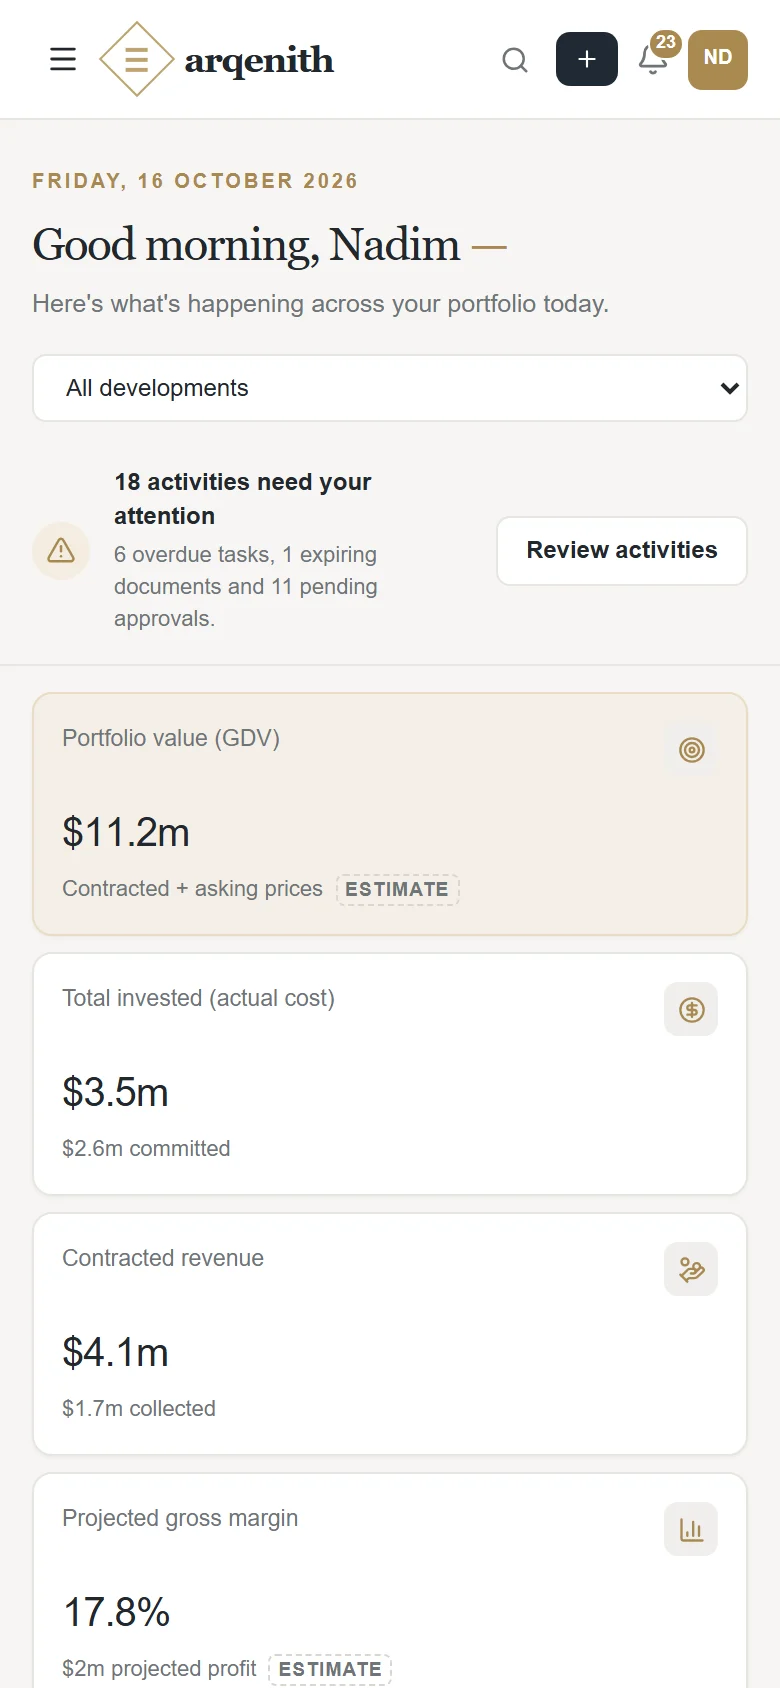
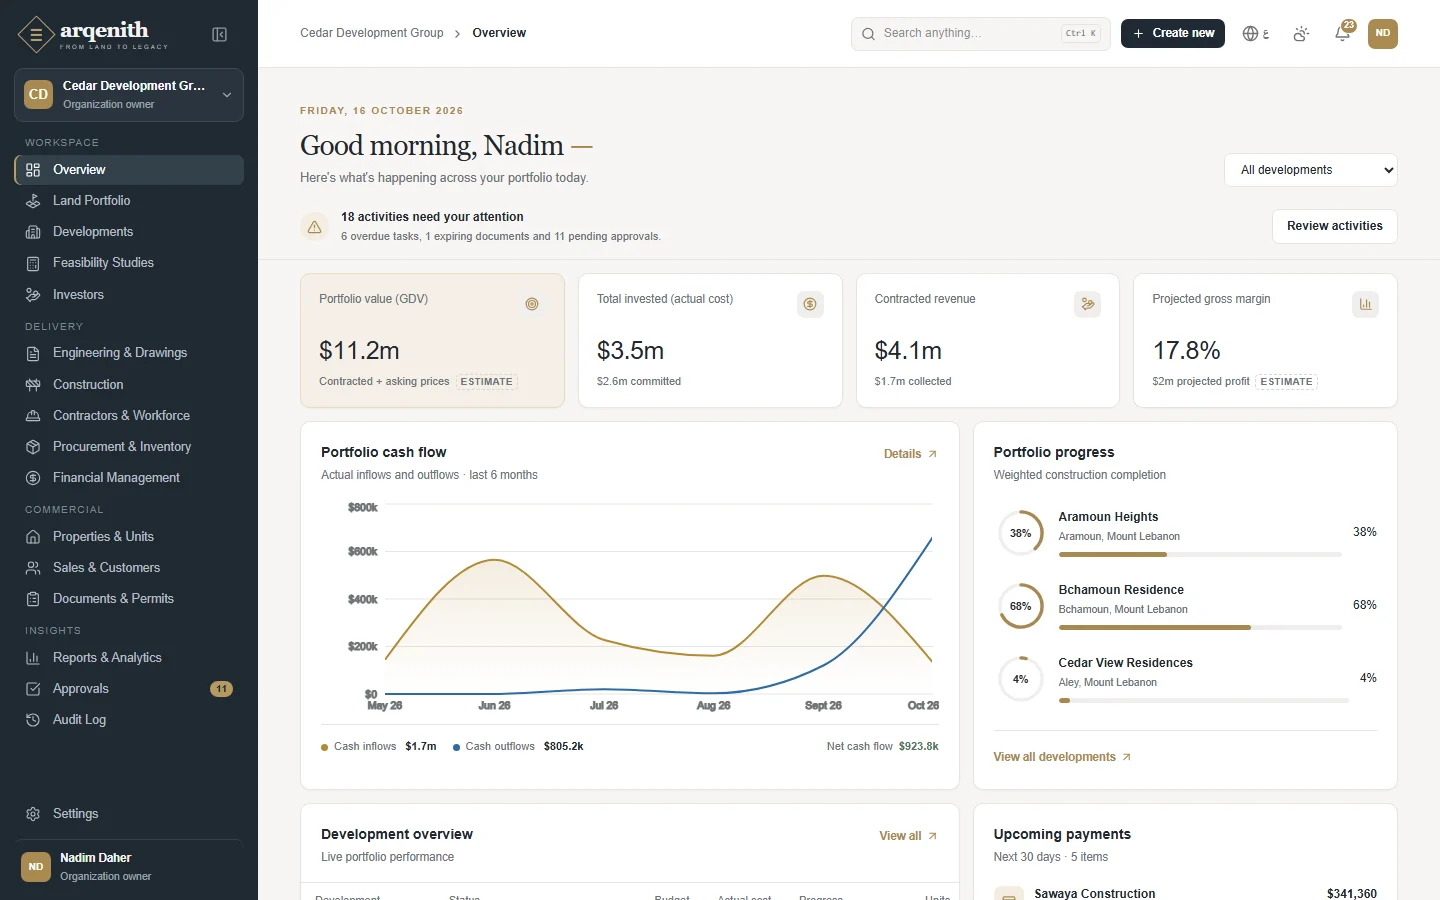
The dashboard: portfolio, construction, sales, collections and what needs attention
Figure 1. The dashboard: portfolio, construction, sales, collections and what needs attention

Chapter 1

Introduction

What Arqenith is, who builds it, and how to read this guide.

Arqenith is an ERP for real estate development and construction. It follows a development through its whole life: the plot of land and its zoning, the feasibility study, the drawings, the construction site, the contractors and suppliers, every cost and payment, the investors who fund it, and the sale of every unit until the last installment is collected.

Arqenith is designed and built by Quantum Logic Systems (QLS), a software company based in Beirut, Lebanon, that builds enterprise systems, integrations and AI services. QLS runs Arqenith in the cloud at arqenith.qlsystems.net and sets it up for each company.

Arqenith works fully in English and in Arabic, including right-to-left layout and Arabic names for every record, handles several currencies, and comes in a light and a dark theme.

How to read this guide

  • • Chapters 1 to 6 explain the ideas: why Arqenith exists, how its modules fit together, who does what, every workflow drawn step by step, and worked cases for developers, construction companies and investors.
  • • Chapters 7 to 19 walk through the product screen by screen, in the order of Arqenith's menu. Each screen has its purpose, who uses it, how to use it, the rules that apply, and common questions.
  • • Chapters 20 to 23 cover languages and currencies, phones and tablets, security and deployment, and how to get started.
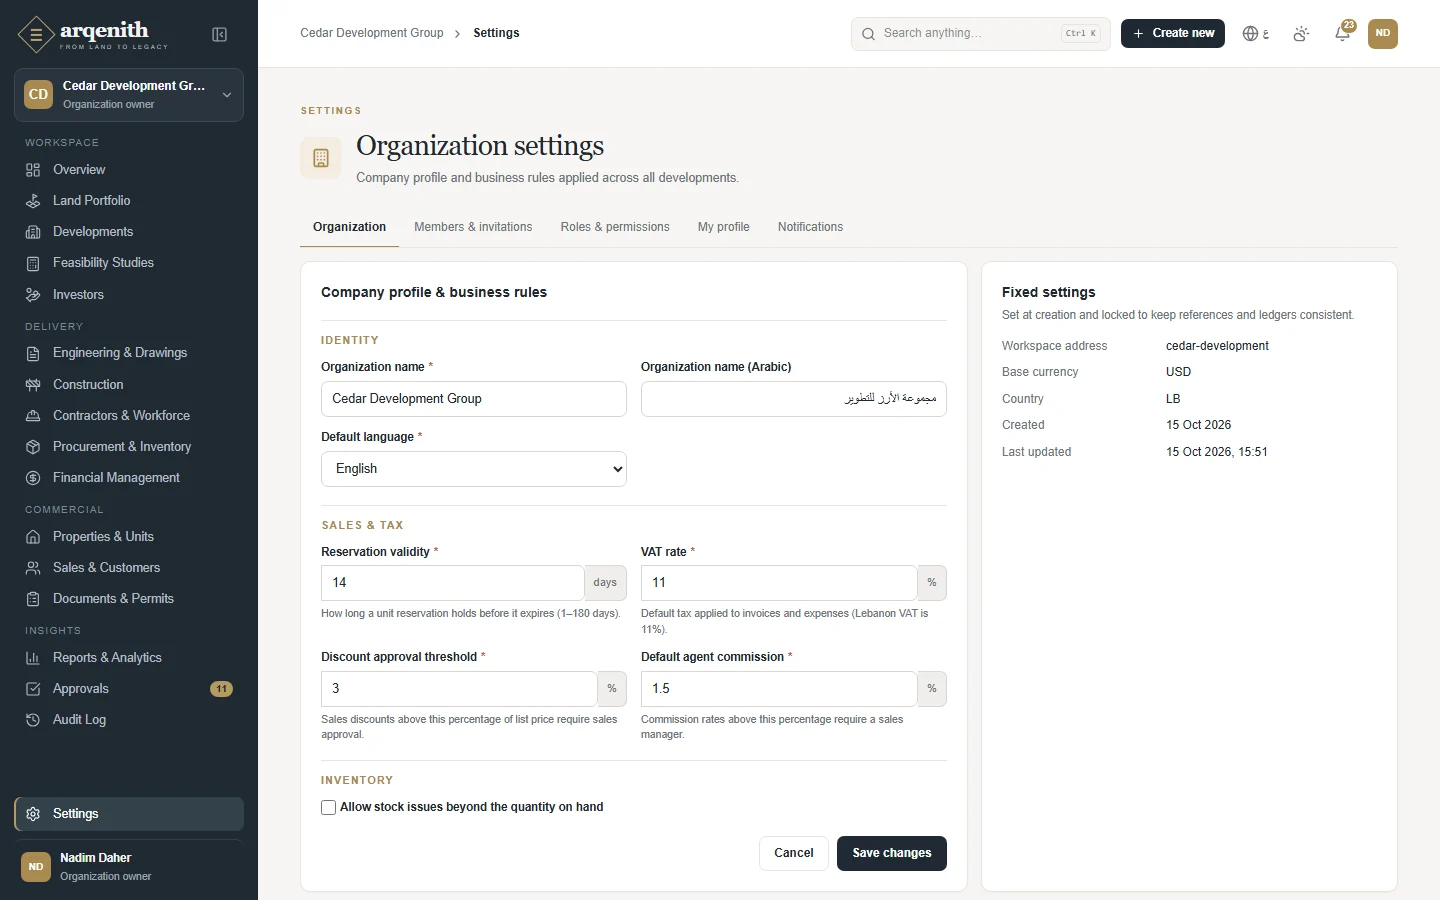
  • • Every screenshot is a real Arqenith screen, shown with the projects of Cedar Development Group, a fictional Lebanese developer made for demonstrations.
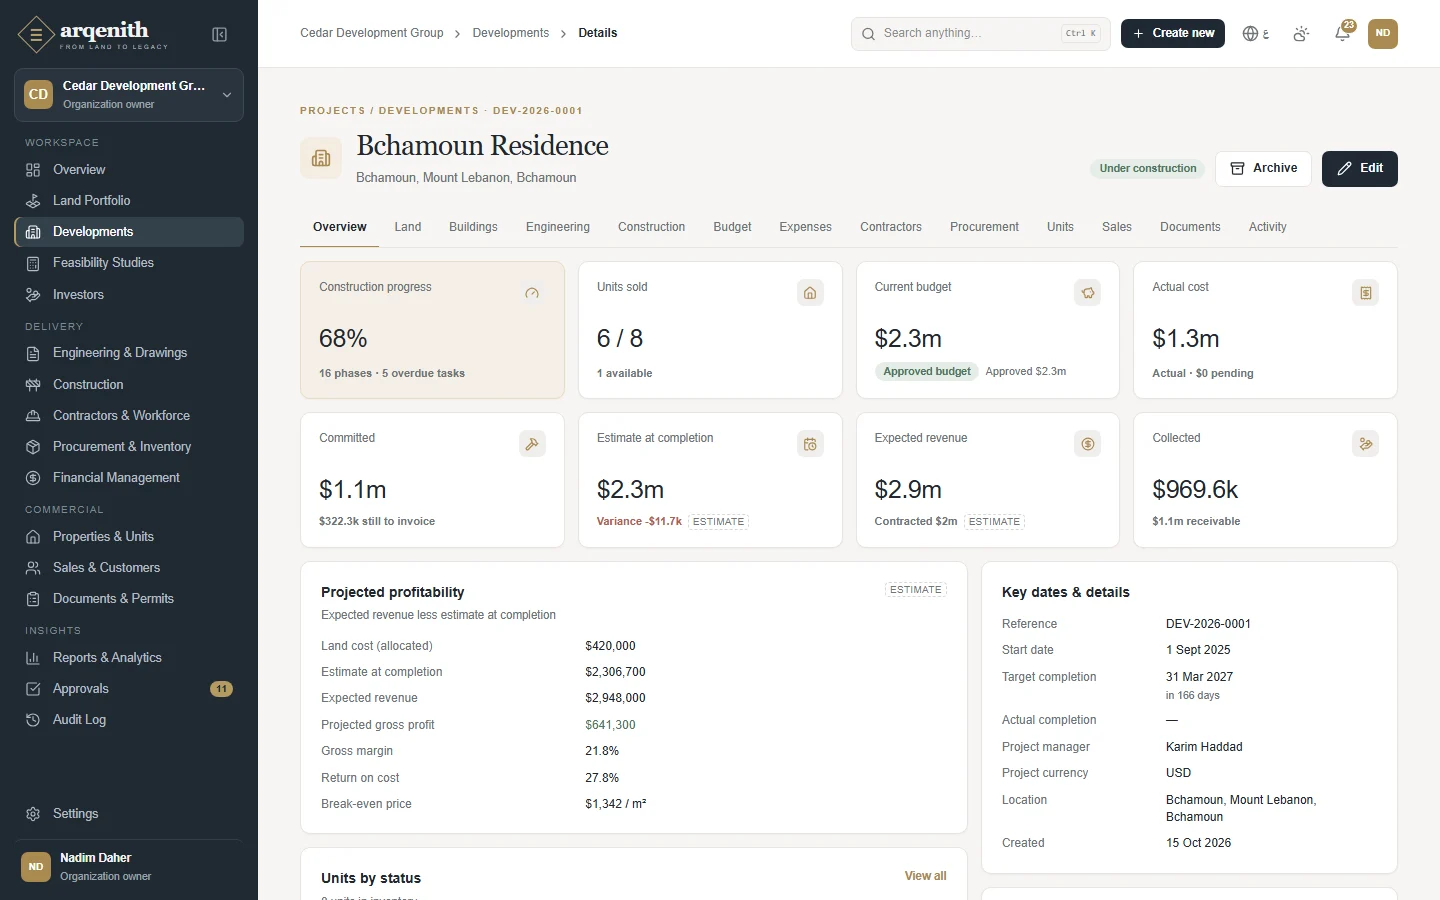
A development's overview
Figure 2. A development's overview
↑ Back to contents

Chapter 2

Why Arqenith

The problems it solves for developers, contractors and investors.

Most developers and contractors run their projects on spreadsheets, site notebooks, WhatsApp groups and an accounting package that only sees invoices after the fact. Nobody can say, on a given day, what a project has cost so far, what is already committed, how much cash the next three months need, or which buyers are late. Investors wait weeks for a statement, and every decision is made on figures that are already old.

One project, one truth

Land, drawings, site progress, purchases, costs and sales of a development live in one workspace, linked to each other.

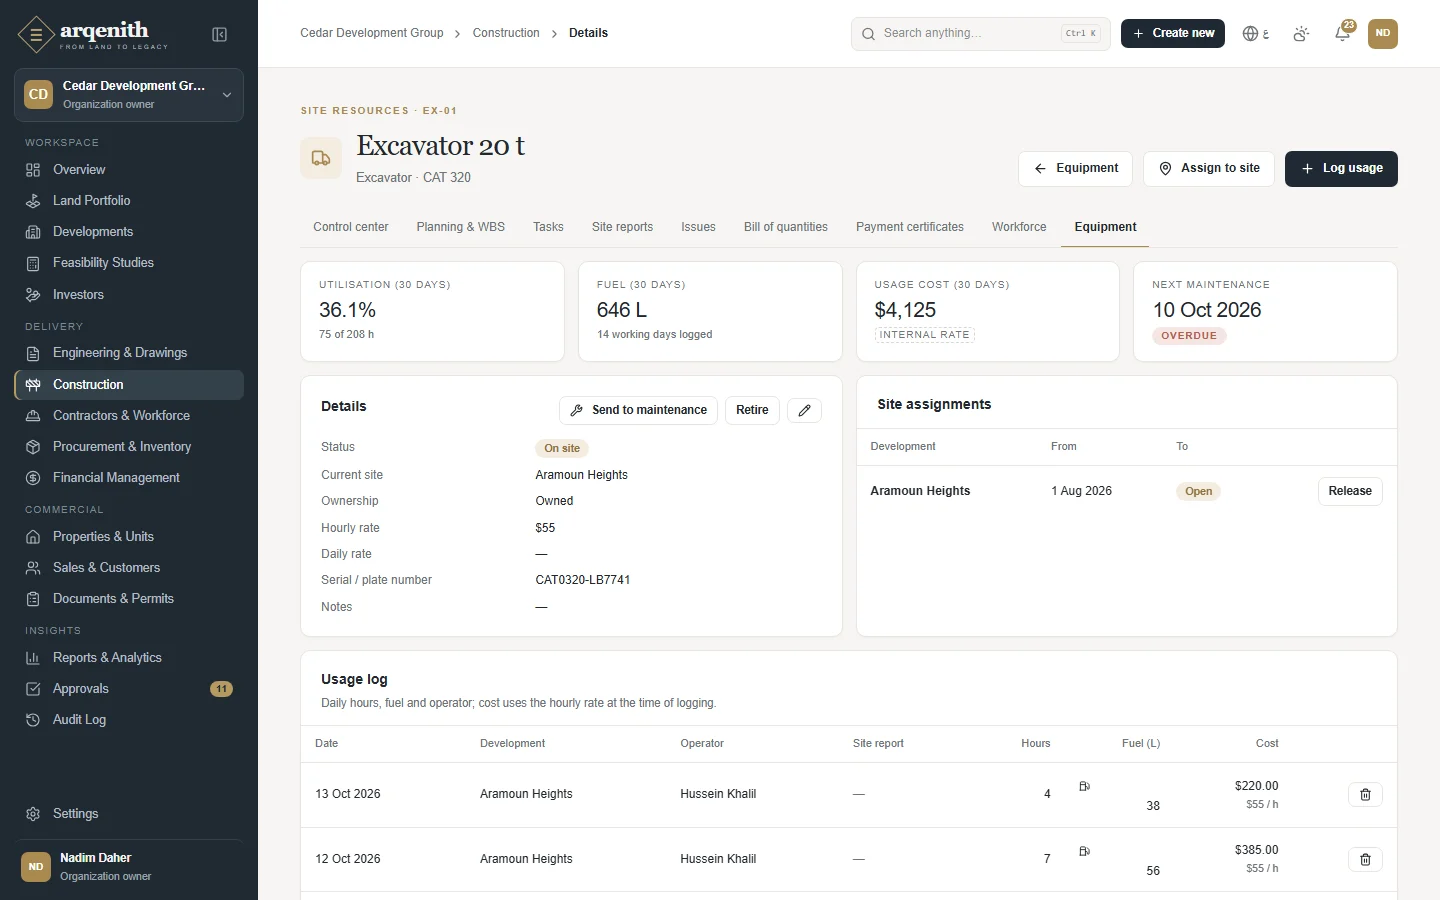
Costs you can trust

Expenses, purchase orders, payment certificates and labour hours post to the budget and to an immutable ledger as they happen.

Cash before it is late

Installments due, payables, loan drawdowns and the cash-flow forecast show a gap months before it becomes a crisis.

Control without paper

Purchase orders, expenses, discounts, certificates and change orders go through approvals, and every decision is recorded.

Sales that collect

Reservations expire on time, contracts carry their payment plans, payments are allocated to the oldest installment, and overdue buyers are flagged.

Investors kept informed

Commitments, capital contributions, distributions and statements per investor, from the same figures the team works with.

For developers

  • Land bank with zoning, documents and a map
  • Feasibility scenarios with margin, return on cost and break-even price
  • Units generated in bulk, priced and repriced
  • Reservations, contracts, installments and commissions
  • Profitability per development

For construction companies

  • Phases, tasks, Gantt and daily site reports
  • Issues, inspections, RFIs and change orders
  • BOQ and interim payment certificates with retention
  • Crews, timesheets and labour cost
  • Equipment register, usage and maintenance
  • Purchase requests to goods receipt and stock

For investors and funds

  • Investor register with KYC
  • Commitments with ownership and profit share per development
  • Capital contributions and distributions posted to the ledger
  • Investor statements
  • Budget, progress, sales and cash of each development

What changes for your company

  • Management sees the budget, committed and actual cost, progress, sales and cash of every development on one dashboard.
  • Site, office and finance work on the same records, so nothing is typed twice and nothing gets lost between them.
  • Buyers, suppliers, contractors and investors get accurate statements and documents in English or Arabic.
  • Every change, approval and payment is recorded, which makes audits, bank reviews and handovers simple.
↑ Back to contents

Chapter 3

How Arqenith Fits Together

From the plot of land to the last installment, and how every cost and payment reaches the ledger.

  1. Land

    Plots in the land bank, from prospect to acquired, with zoning figures, documents and a map.

  2. Feasibility

    Base, optimistic and pessimistic scenarios of areas, costs and prices; the chosen study becomes a development.

  3. Development

    The workspace: budget, team, contractors, purchases, documents and activity.

  4. Buildings, floors and units

    What is built and what is sold: areas, prices and statuses.

  5. Engineering and construction

    Approved drawings, the schedule, the site, the BOQ and contractors' certificates.

  6. Sales and handover

    Reservations, contracts, installments, collections and handover of each unit.

Finance and the ledger

Every cost, payment, receipt, loan movement and investor transaction posts once to an immutable ledger, in its currency and in the company's base currency.

Figures flow upwards: costs and progress of each development add up on the dashboard, in the reports and in each investor's statement, so nothing is re-typed or reconciled by hand.

Budget

What the development may spend, by cost code.

Committed

Approved purchase orders and contracts not yet invoiced.

Actual

Approved expenses, certificates and labour posted to the ledger.

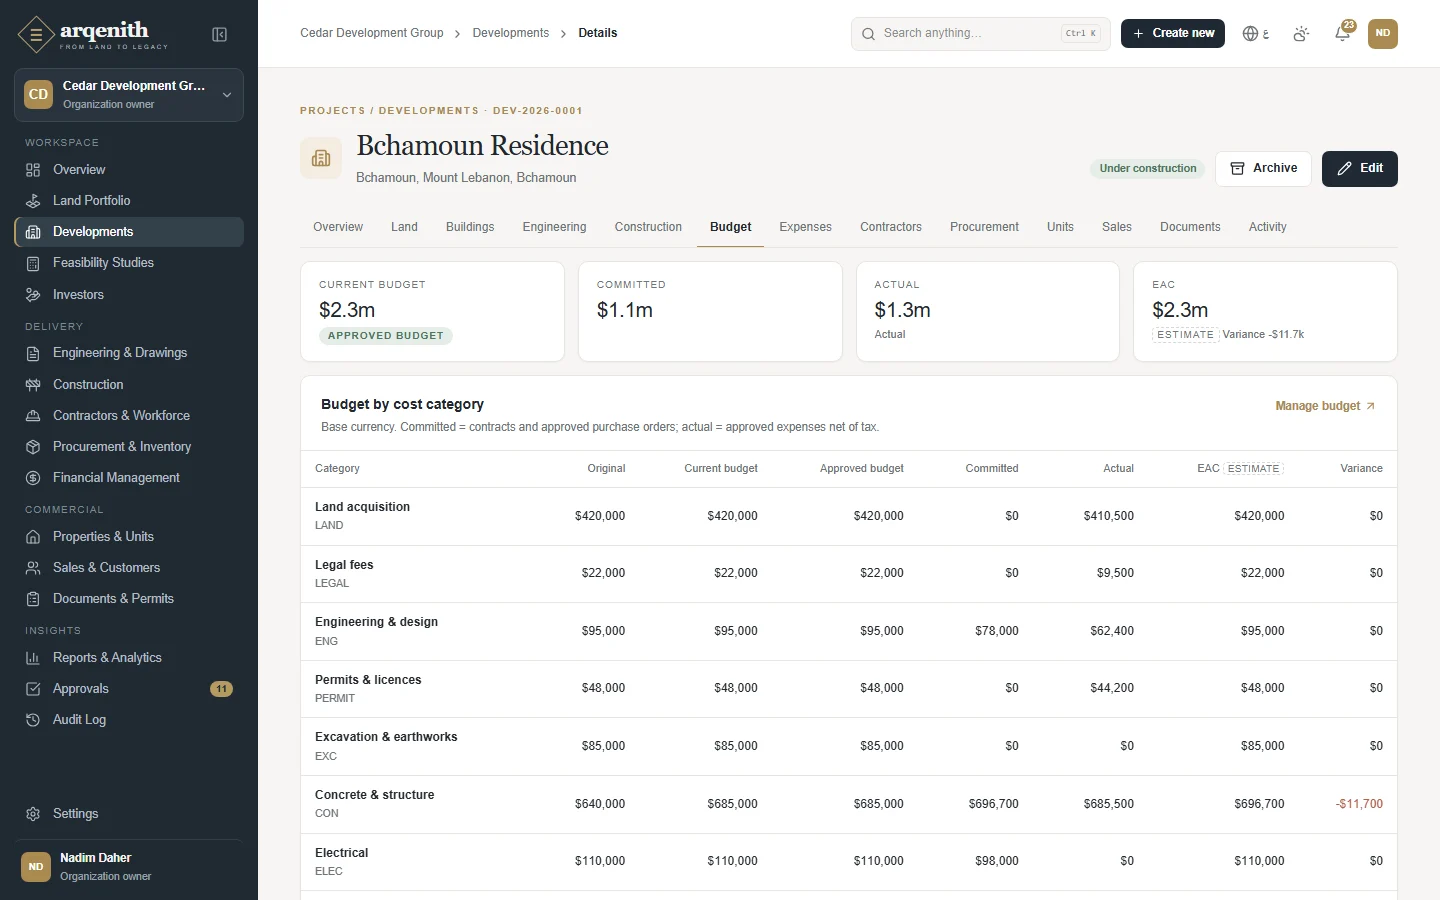
A development's budget
Figure 3. A development's budget

How Arqenith fits together

Arqenith follows a development from land to legacy: you register land, test it in a feasibility study, turn it into a development with buildings, floors and units, design and build it, and then sell the units, with finance, procurement and documents connected along the way.

Who uses it: Everyone. What you see depends on your role and on the developments you are given access to: the sidebar, the Create new menu and search results only show what you are allowed to open.

How to use it

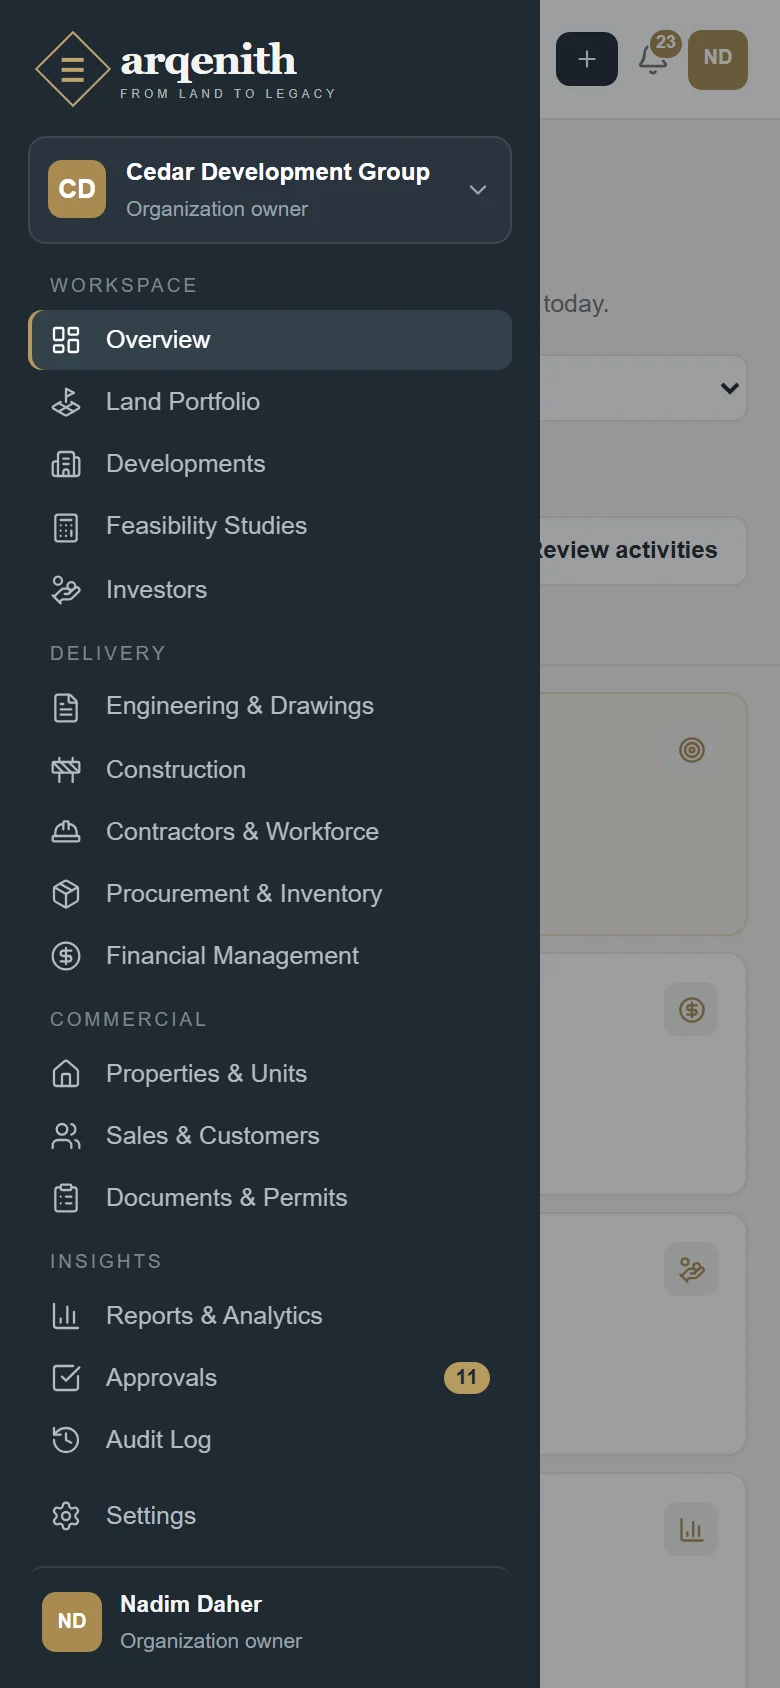
  1. 1Use the sidebar (on the left in English, on the right in Arabic) to move between modules. They are grouped under Workspace, Delivery, Commercial and Insights, with Settings at the bottom. On a phone, open it with the menu button at the top; on a computer, the toggle next to the logo collapses it.
  2. 2To change company, click the organization switcher at the top of the sidebar and pick one from Organizations. Switching always takes you back to Overview. Create organization starts a new company.
  3. 3Click Create new in the top bar to add a Land parcel, Development, Property unit, Expense or invoice, Purchase order or Customer straight from any page. Only the options your role can create are listed.
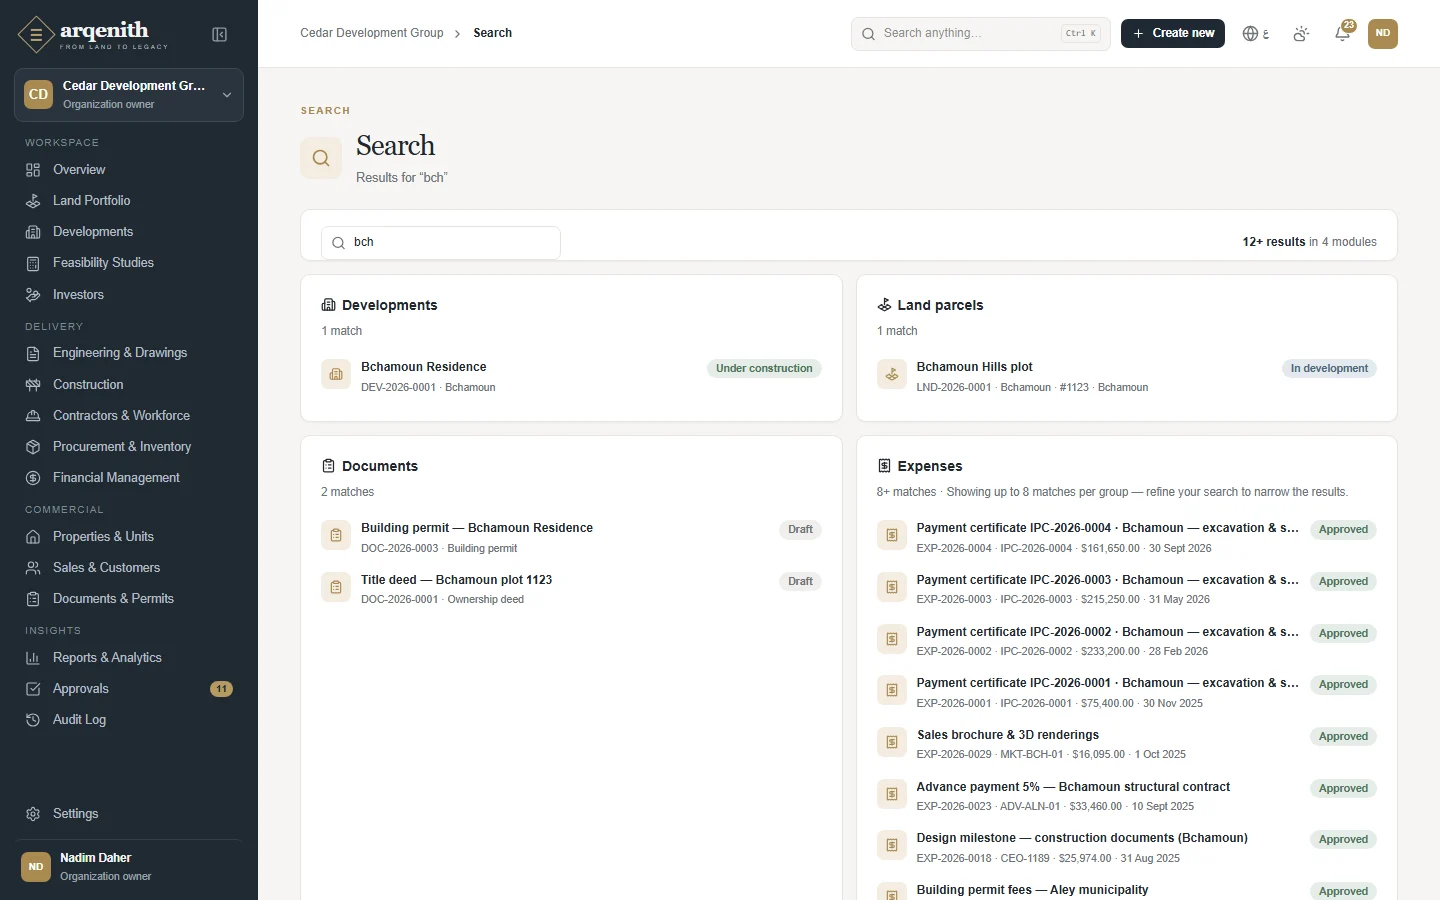
  4. 4Type in the Search anything… box at the top and press Enter to search across modules. Ctrl K puts the cursor in the box.
  5. 5Click the bell to see your latest notifications. Click one to open the record it is about, use Mark all as read, or open View all notifications.
  6. 6Switch language with the ع / EN button and the theme (light, dark or system) with the theme button next to it. On a phone, both are in the menu under your avatar, which also holds Profile, Settings, Notifications and Sign out.

Rules and details

  • The chain is: land parcel → feasibility study → development → buildings → floors → units → reservations and sales contracts. Engineering drawings, construction planning, budgets, contracts and purchase orders all belong to a development.
  • Sidebar modules: Overview, Land Portfolio, Developments, Feasibility Studies and Investors (Workspace); Engineering & Drawings, Construction, Contractors & Workforce, Procurement & Inventory and Financial Management (Delivery); Properties & Units, Sales & Customers and Documents & Permits (Commercial); Reports & Analytics, Approvals and Audit Log (Insights).
  • Each role opens a default set of modules. For example, an Engineer sees land, developments, engineering, construction, contractors, procurement, units, documents and reports, but not finance or sales; a Sales agent sees developments, units, sales and documents. An Administrator can grant or remove individual permissions for a member.
  • Access can also be limited to specific developments. A member who is not given all developments only sees the records of the developments assigned to them, everywhere in the product.
  • The Approvals item shows a count of pending requests you can see. Notifications arrive live while you work; reminders such as overdue tasks and expiring documents are also generated automatically each day.
  • Arabic switches the whole interface to right-to-left. Names you type, such as development or unit names, stay as you typed them; most records also have an optional Arabic name field.
  • Records get reference numbers in the form PREFIX-YEAR-NUMBER, counted per company and per year, for example LND-2026-0001 for a land parcel or DEV-2026-0001 for a development.
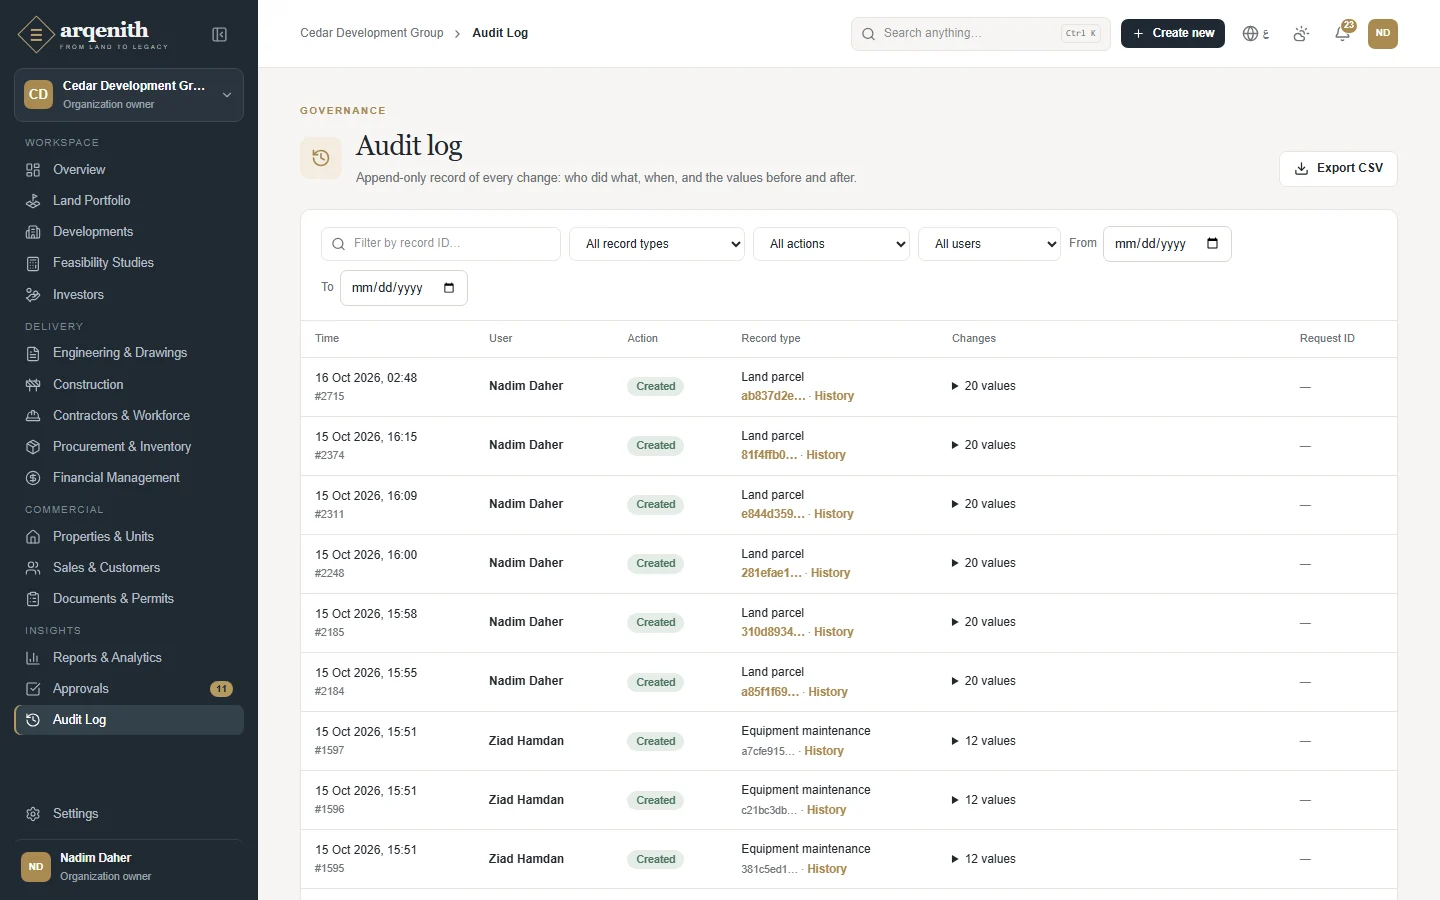
  • Every change is recorded with who made it and when; you see it in the Activity panel of each record and, for those allowed, in the Audit Log.

Questions

Why can't I see a module a colleague can see?
Modules follow your role's permissions. If a module needs a permission you do not have, it is hidden from the sidebar, from Create new and from search. If you see a module but not a particular development, you have not been given access to that development. Ask your Administrator.
I work for two companies. How do I switch?
Open the organization switcher at the top of the sidebar and choose the company under Organizations. You always work in one company at a time, and you land on its Overview after switching.
Where is the search box on a narrow screen?
On narrow screens only the search icon is shown in the top bar. You can open the Search page directly from the address bar (/search) and type your query there.
↑ Back to contents

Chapter 4

Roles and Access

Who can see and do what, per company and per development.

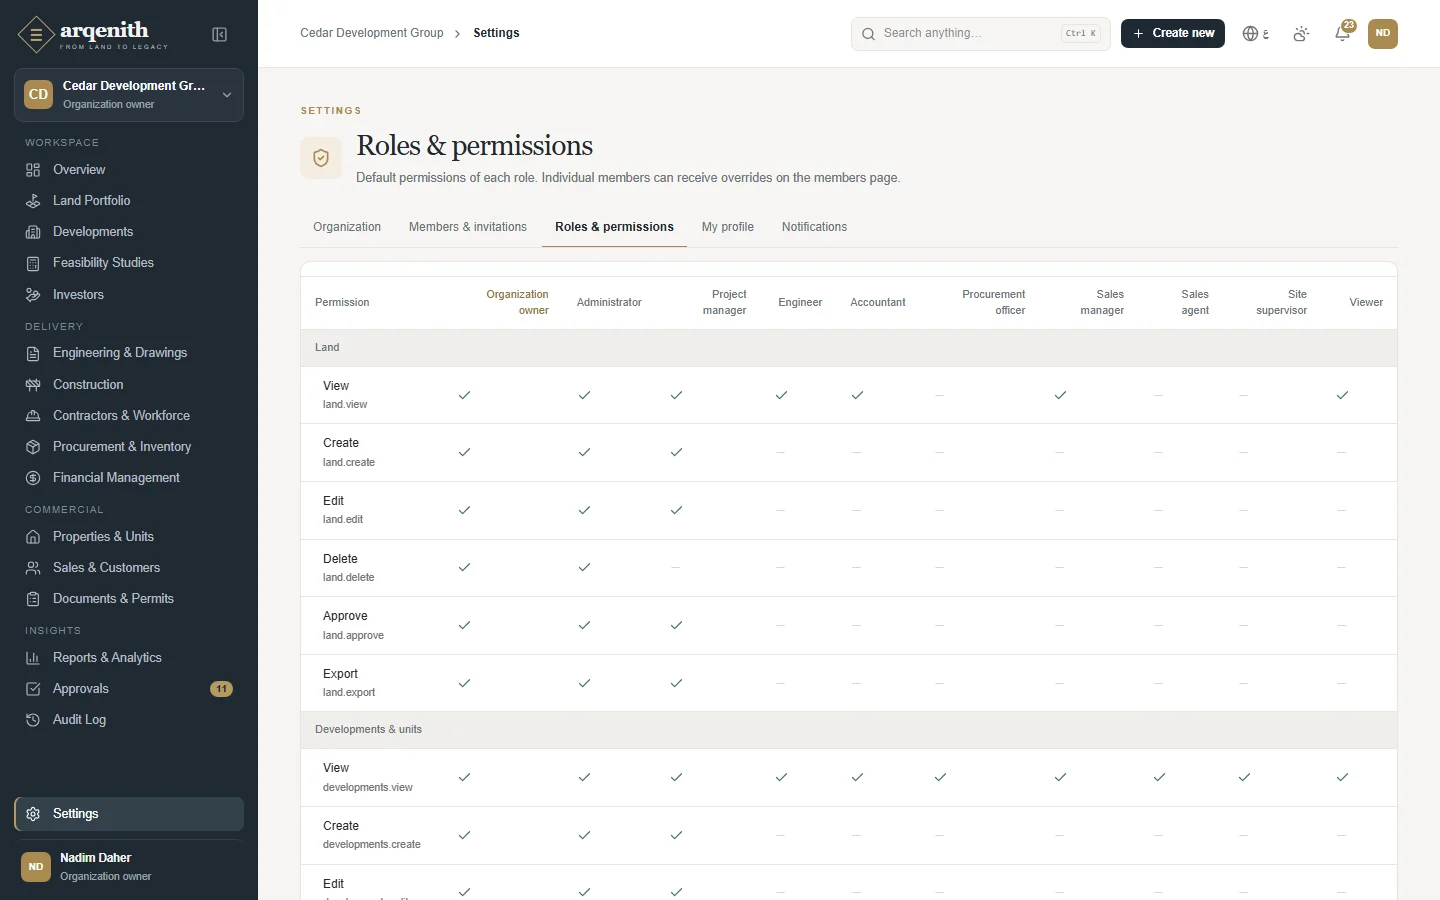
Arqenith comes with ten roles. Each member has one role per company; owners and administrators can also grant or revoke single permissions for a member, and limit a member to the developments they work on. Several companies can live in one Arqenith, each with its own people and data.

RoleWhat it covers
Organization ownerEverything, including inviting administrators and changing owners. A company always keeps at least one owner.
AdministratorEverything in the company's data and settings; invites members and sets their permissions.
Project managerLand, developments, engineering, construction, contractors, procurement, inventory and documents, with approvals; reads finance and sales.
EngineerDrawings, construction records and documents; reads the related modules.
AccountantAll of finance; reads procurement, contractors and sales, and records customer payments.
Procurement officerPurchase requests, RFQs, purchase orders and inventory; manages suppliers.
Sales managerAll of sales, including discount approvals and commissions.
Sales agentCustomers, reservations and contracts they work on.
Site supervisorDaily reports, tasks, issues and site records; records stock received on site.
ViewerReads everything except finance, the audit log, members and settings.

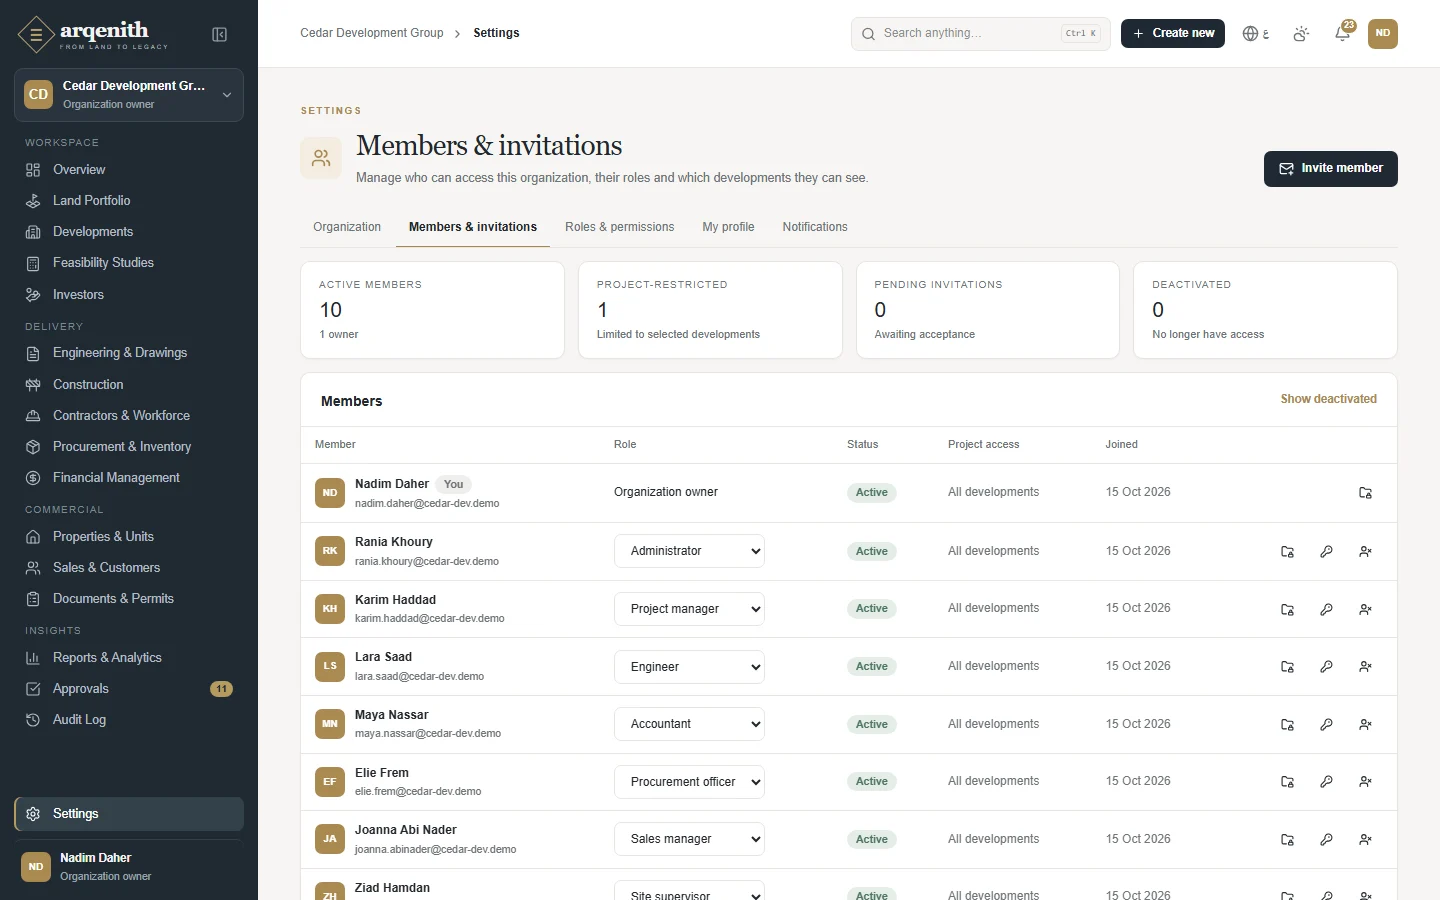
In this guide's screenshots: Nadim Daher owns Cedar Development Group; Rania Khoury is its operations director (Administrator), Karim Haddad its senior project manager, Lara Saad a structural engineer, Maya Nassar the chief accountant, Elie Frem the procurement lead, Joanna Abi Nader the head of sales, Fadi Sleiman a sales consultant and Ziad Hamdan a site supervisor.

Roles and permissions
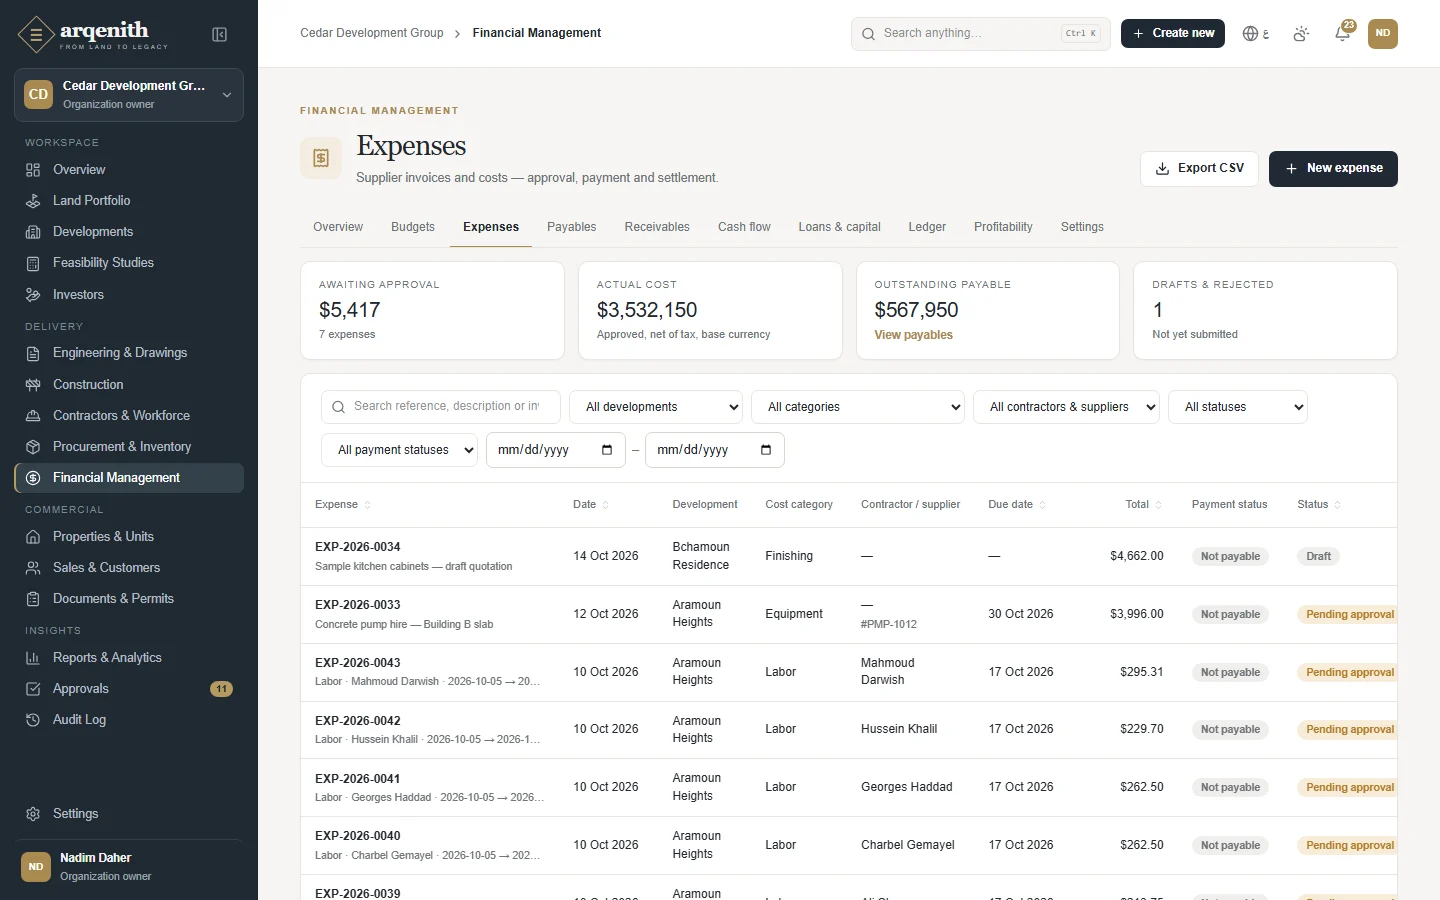
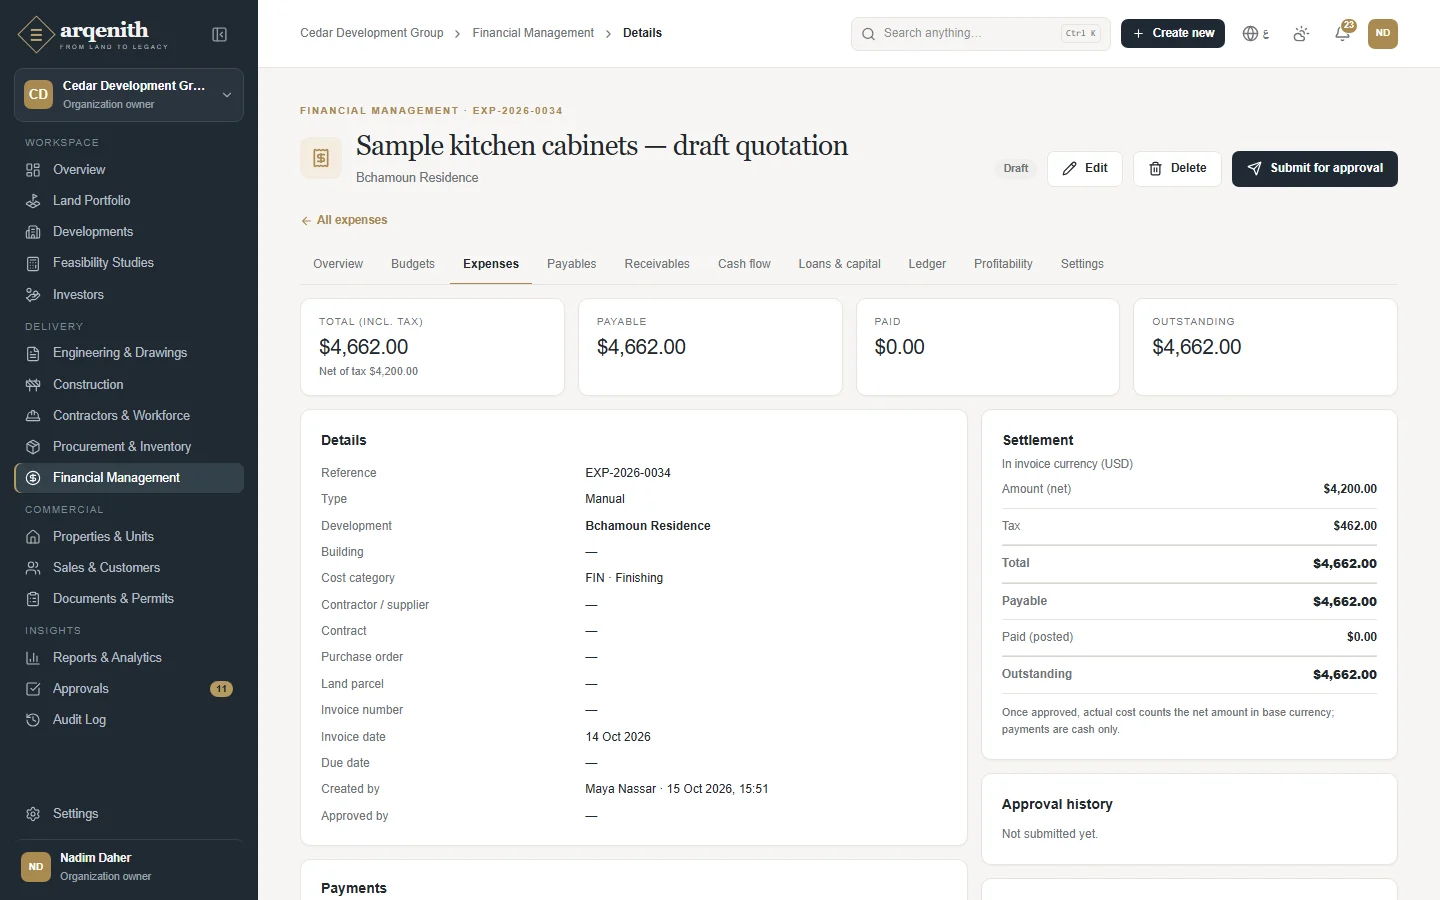
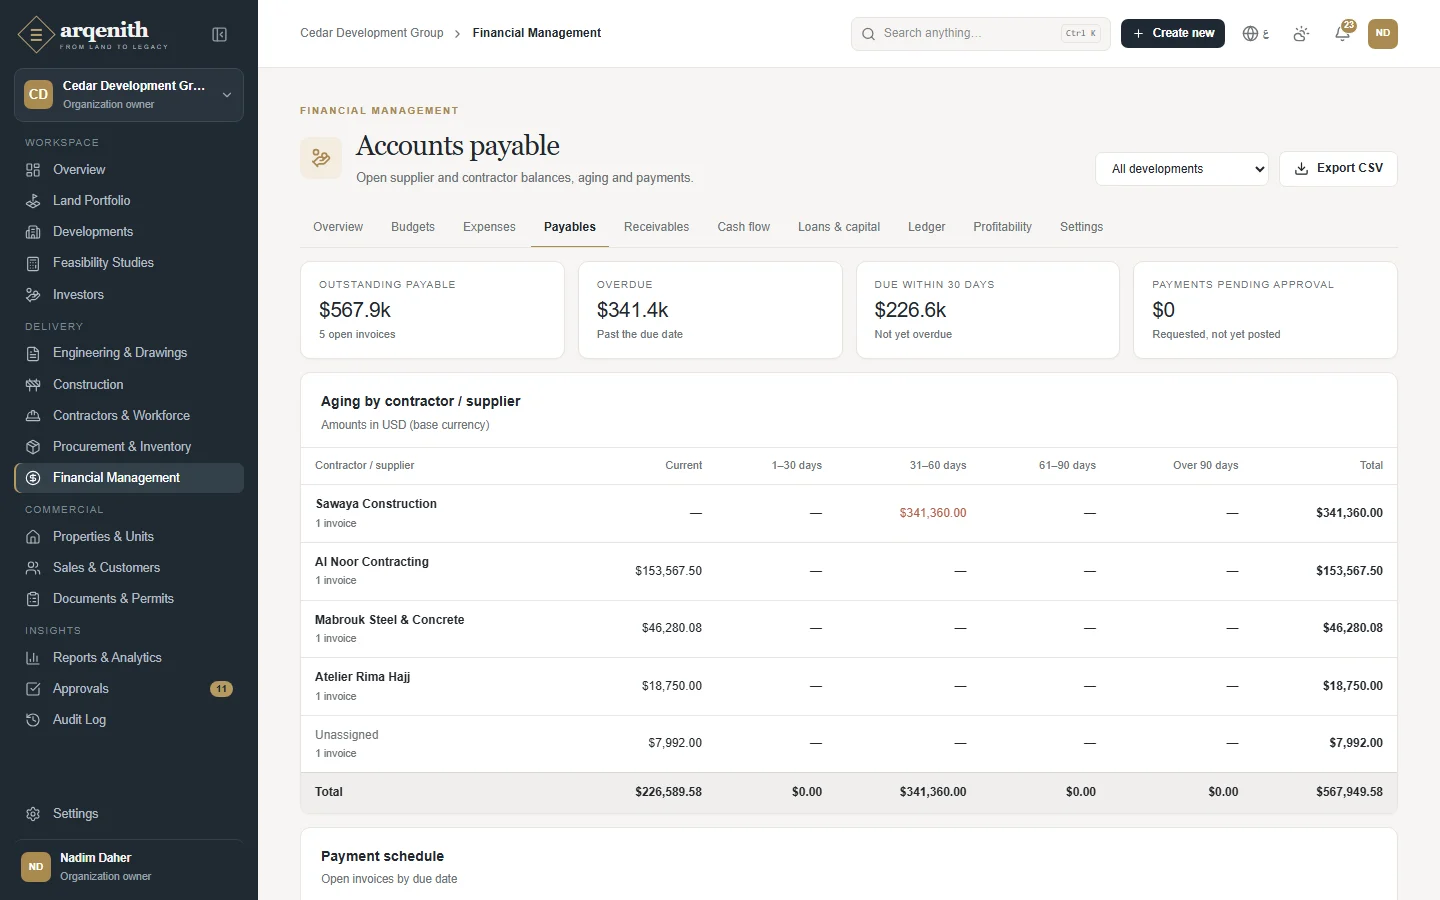
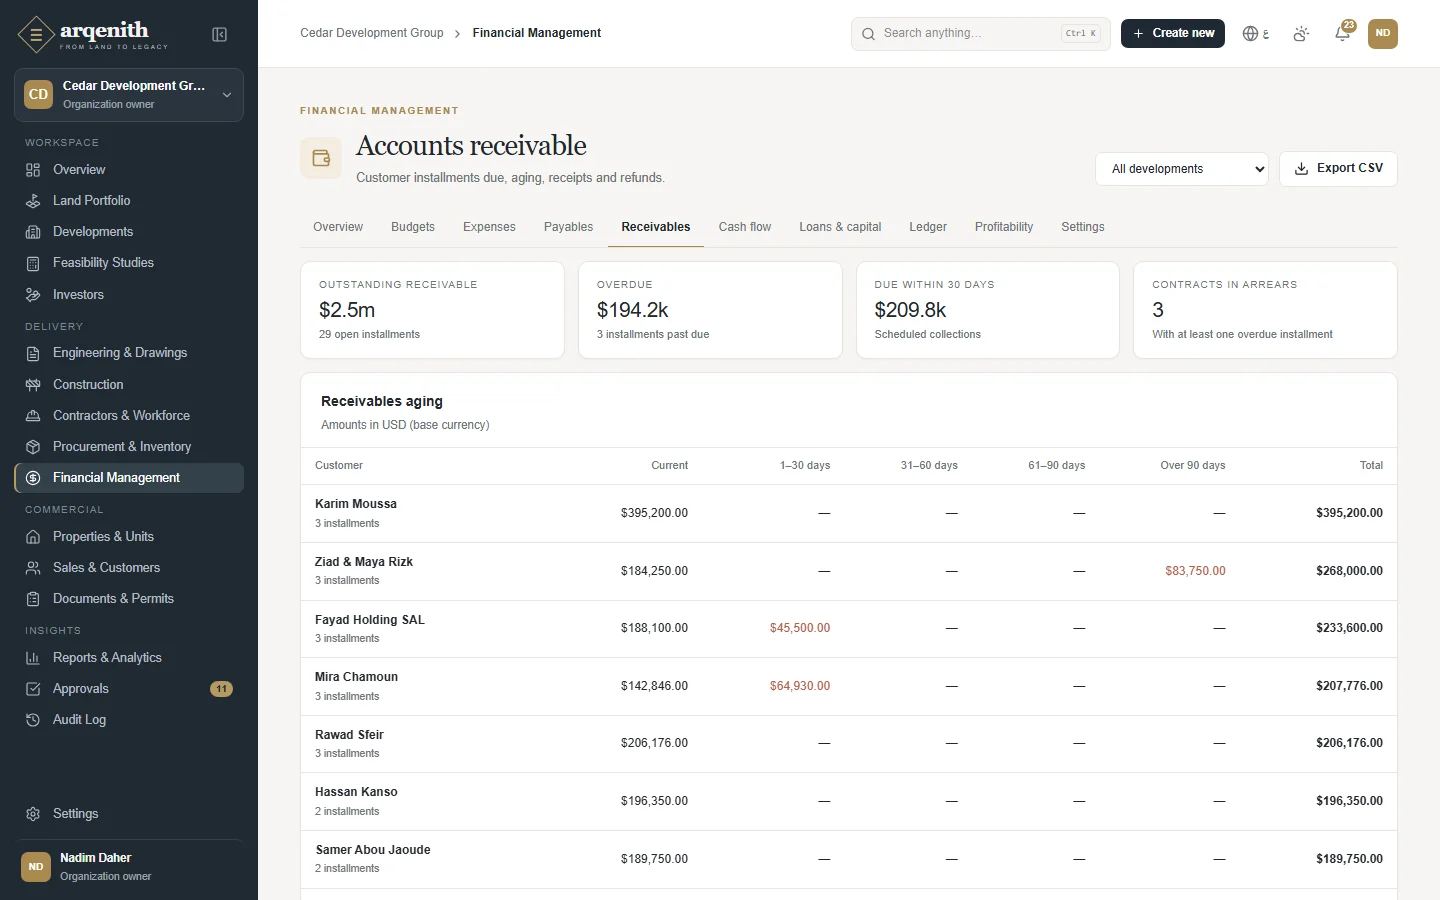
Figure 4. Roles and permissions
Members and invitations
Figure 5. Members and invitations
↑ Back to contents

Chapter 5

The Workflows

Every core process, step by step: land, purchasing, site progress, payments to contractors, sales and investors.

1. From a plot to a development

How land is screened, studied and turned into a development.

  1. 1

    Prospect

    The plot is registered with its location on the map, area, zoning and asking price.

  2. 2

    Negotiation and checks

    Zoning figures are verified and the title deed and survey attached; the status moves to under negotiation and under contract.

  3. 3

    Feasibility study

    Areas, construction and soft costs and sale prices in base, optimistic and pessimistic scenarios; profit, margin, return on cost and break-even price are calculated.

  4. 4

    Decision

    The study is marked final, or archived if the project does not go ahead.

    Not viable: The study is archived and the plot stays in the land bank.

  5. 5

    Acquired and converted

    The plot is acquired and the study becomes a development with its budget.

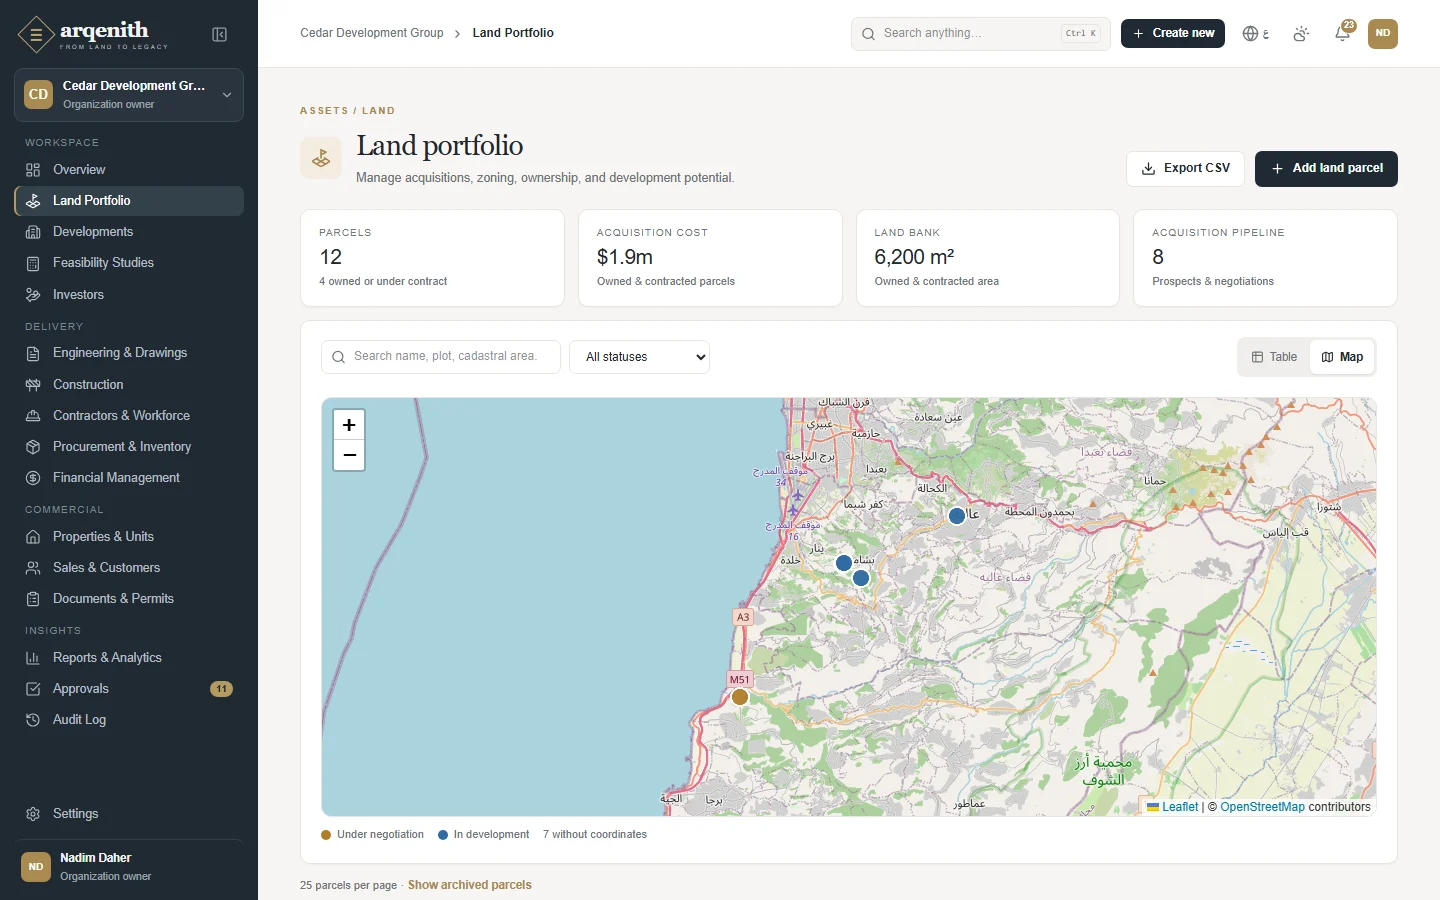
Plots on the map
Figure 6. Plots on the map
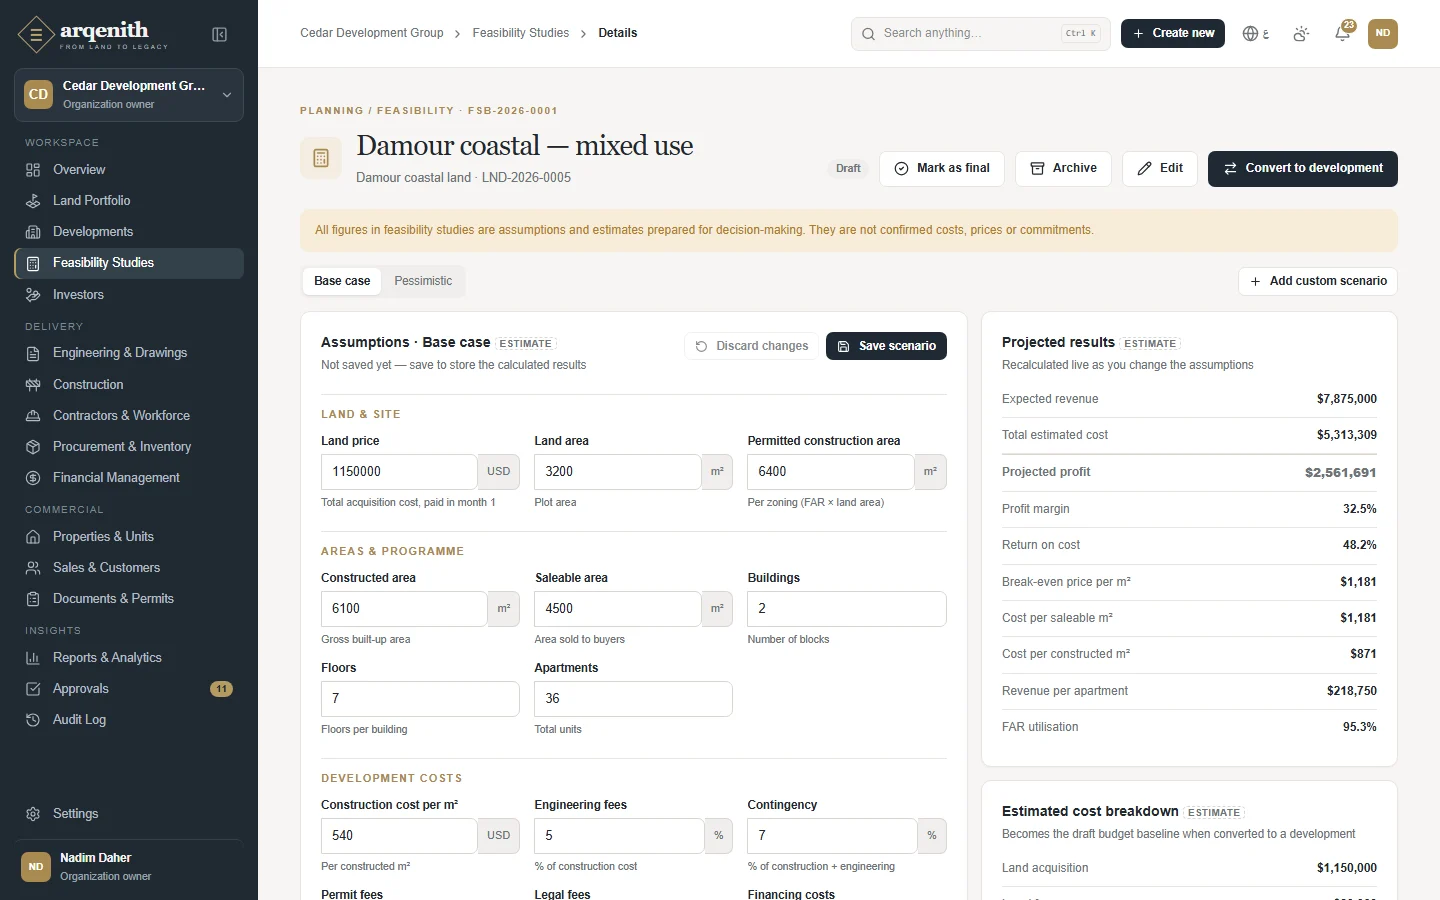
A feasibility study with scenarios and returns
Figure 7. A feasibility study with scenarios and returns

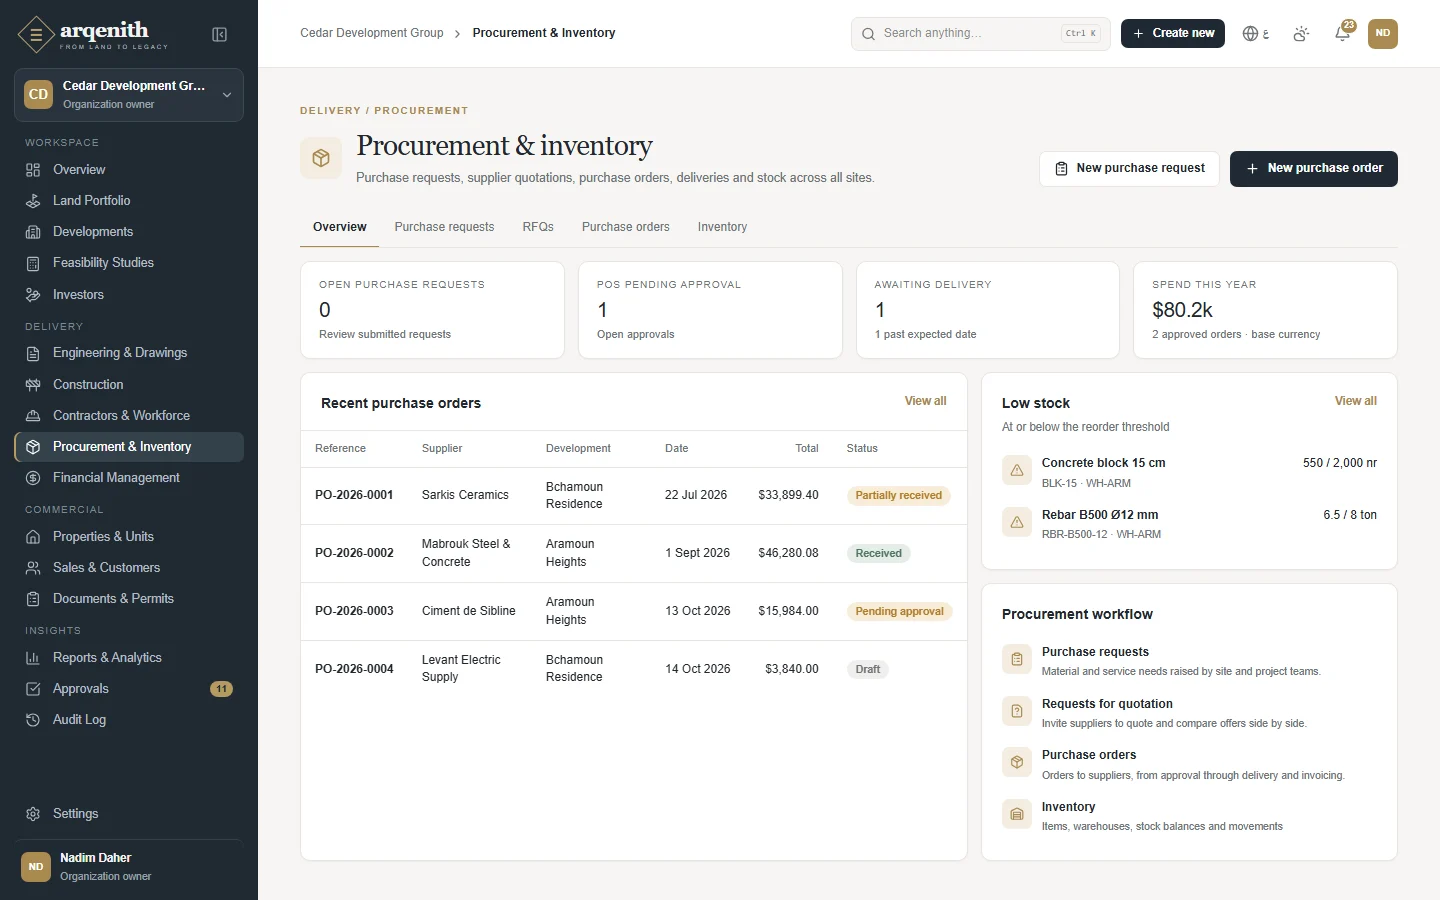
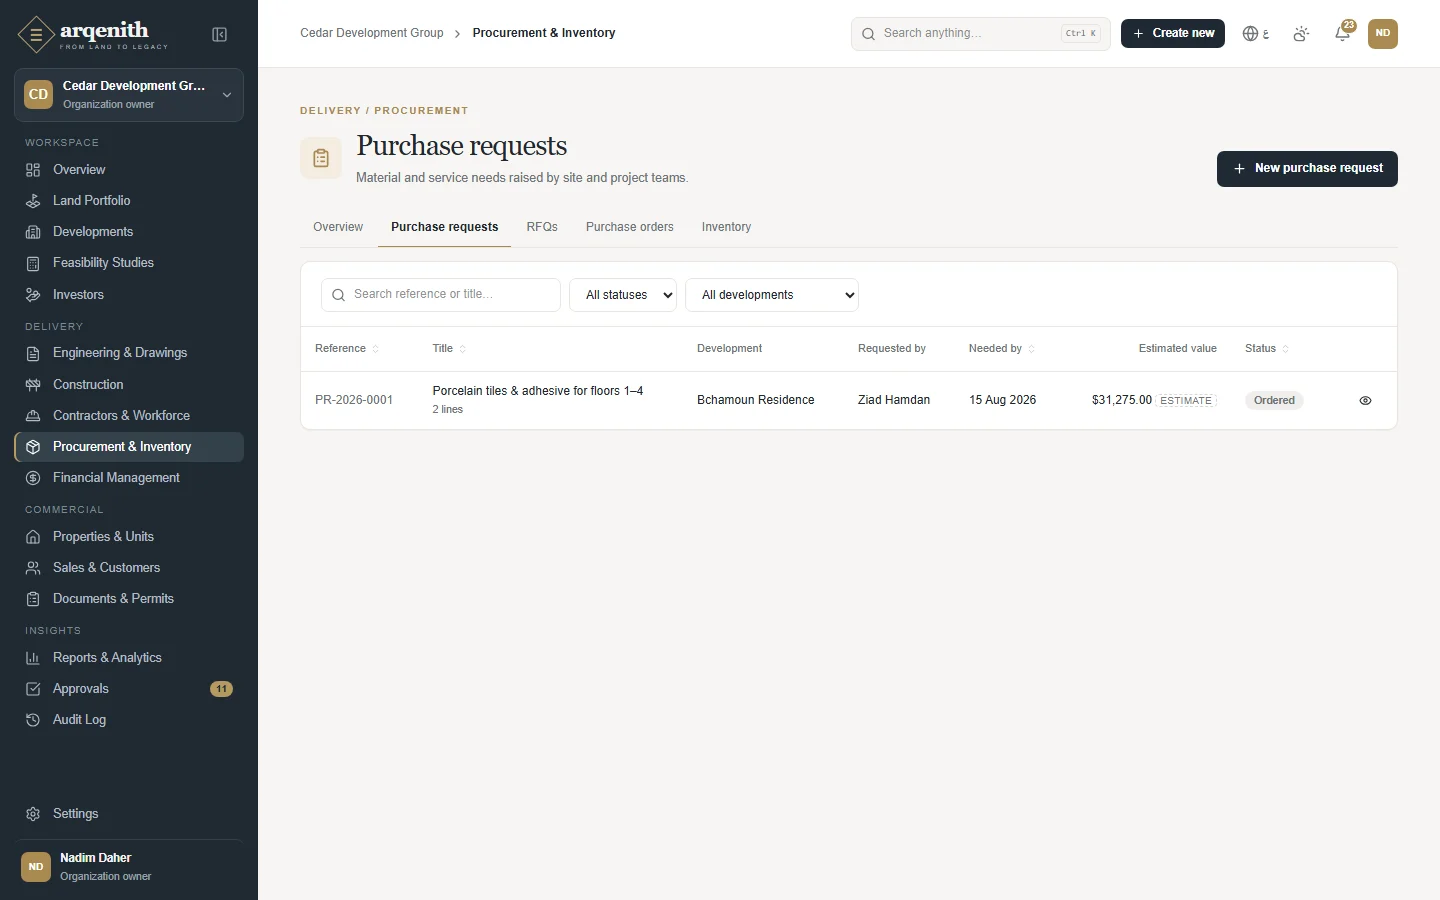
2. Purchasing materials

From the site's request to stock in the warehouse and a payable to the supplier.

  1. 1

    Purchase request

    The site or office asks for items and quantities for a development; it is submitted and approved.

  2. 2

    RFQ

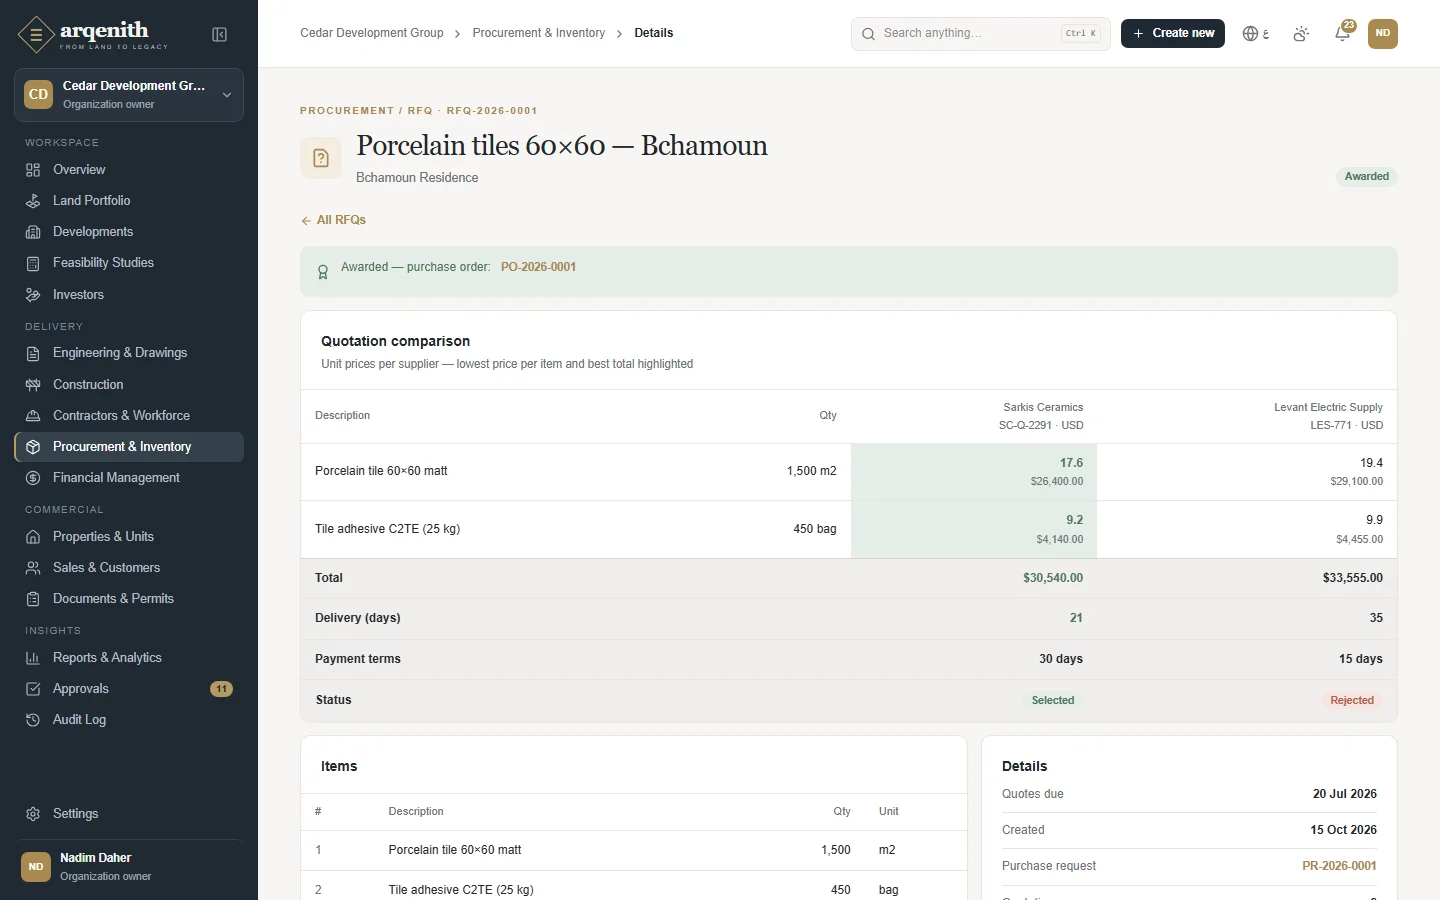
    Suppliers are invited to quote; quotations are recorded and compared line by line.

  3. 3

    Award and approve

    The best quotation is selected and becomes a purchase order, which goes for approval.

    Rejected: The order goes back with the approver's comment.

  4. 4

    Issue

    The approved order is issued to the supplier and counts as committed cost.

  5. 5

    Goods receipt

    Deliveries are received in full or in part, into a warehouse or straight to site.

  6. 6

    Invoice and pay

    The supplier's invoice becomes an expense and a payable; payment posts to the ledger.

  • • References are numbered per company and year, for example PO-2026-0007.
  • • Stock cannot go below zero unless the company allows negative stock.
Comparing quotations
Figure 8. Comparing quotations
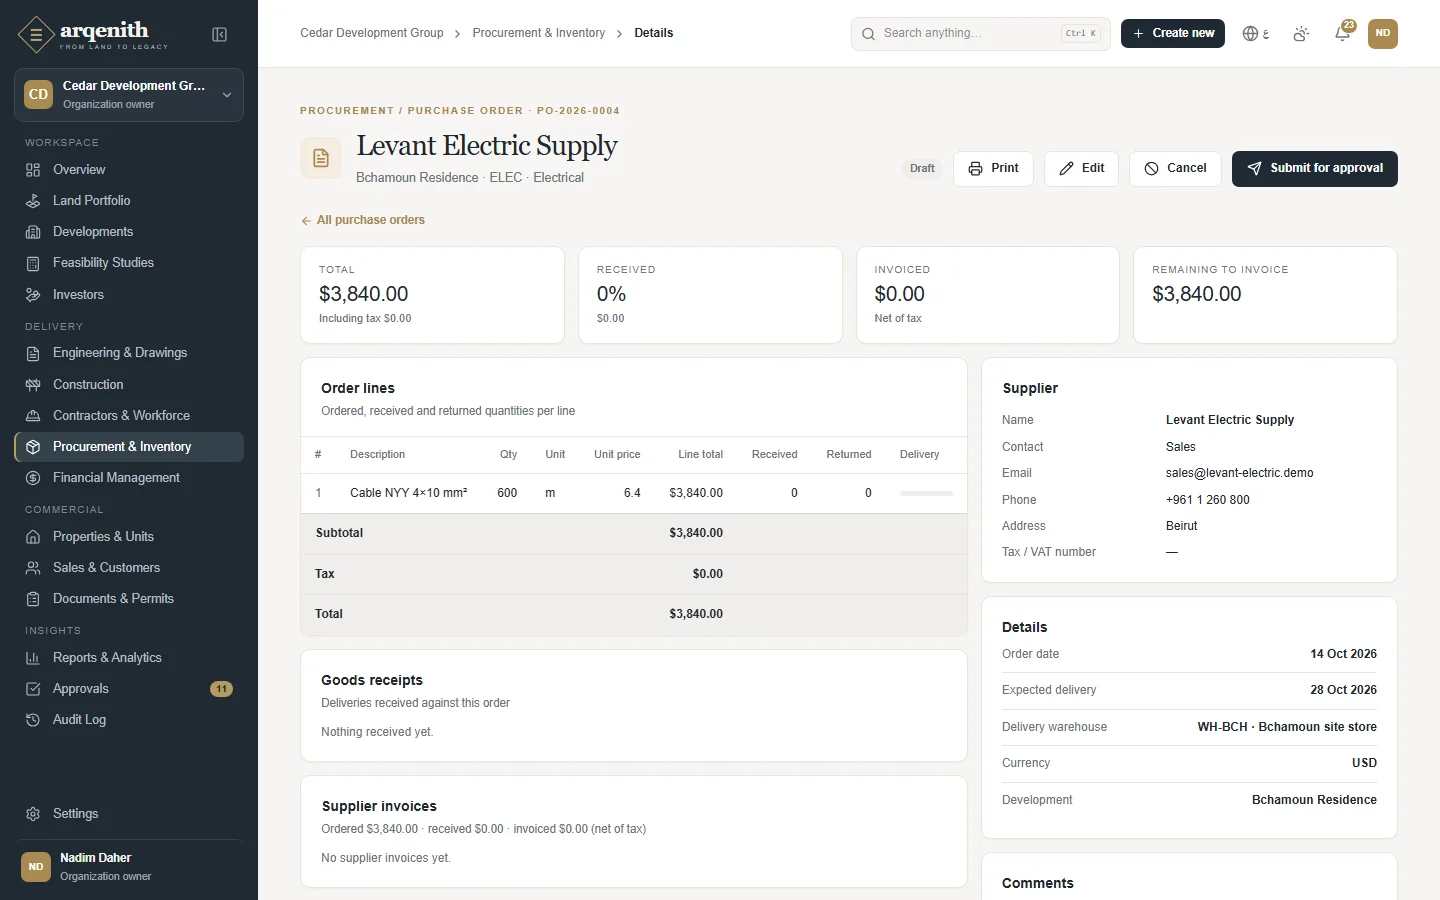
A purchase order and its receipts
Figure 9. A purchase order and its receipts

3. Site progress and change

How the site reports progress, raises issues and changes the scope under control.

  1. 1

    Plan

    Phases, milestones and tasks with dates, owners and dependencies, shown on a Gantt chart.

  2. 2

    Daily report

    Weather, manpower, work done, materials and photos, submitted and approved.

  3. 3

    Issues

    RFIs, inspections, defects, punch items, site instructions and safety incidents, each tracked to closure.

  4. 4

    Change order

    A change with its cost and time impact is reviewed and approved or rejected.

  5. 5

    Measured progress

    Quantities done against the BOQ give measured progress for the contractor's certificates.

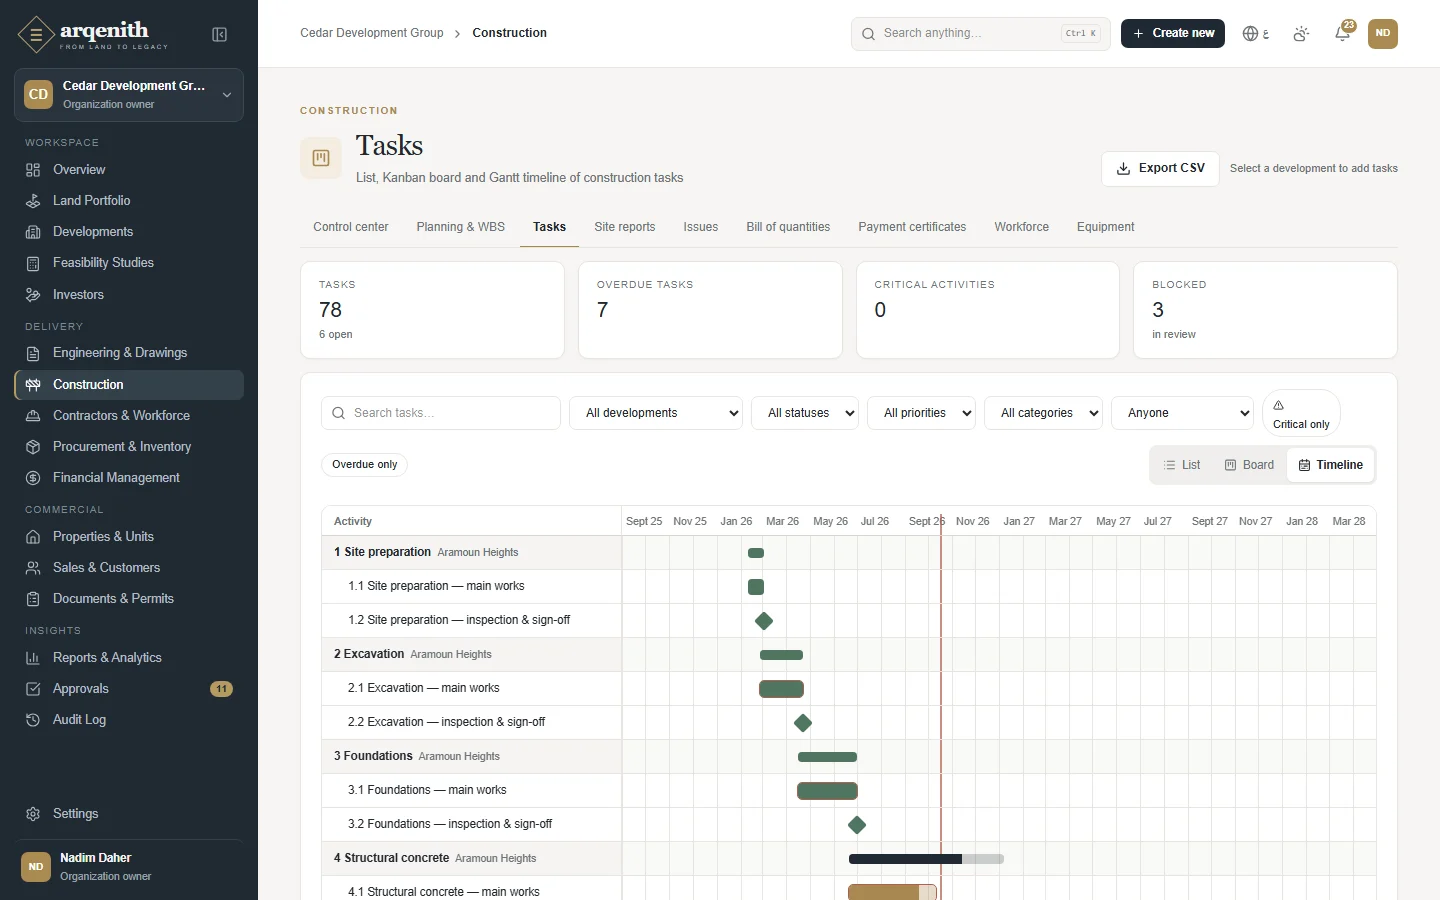
The Gantt chart
Figure 10. The Gantt chart
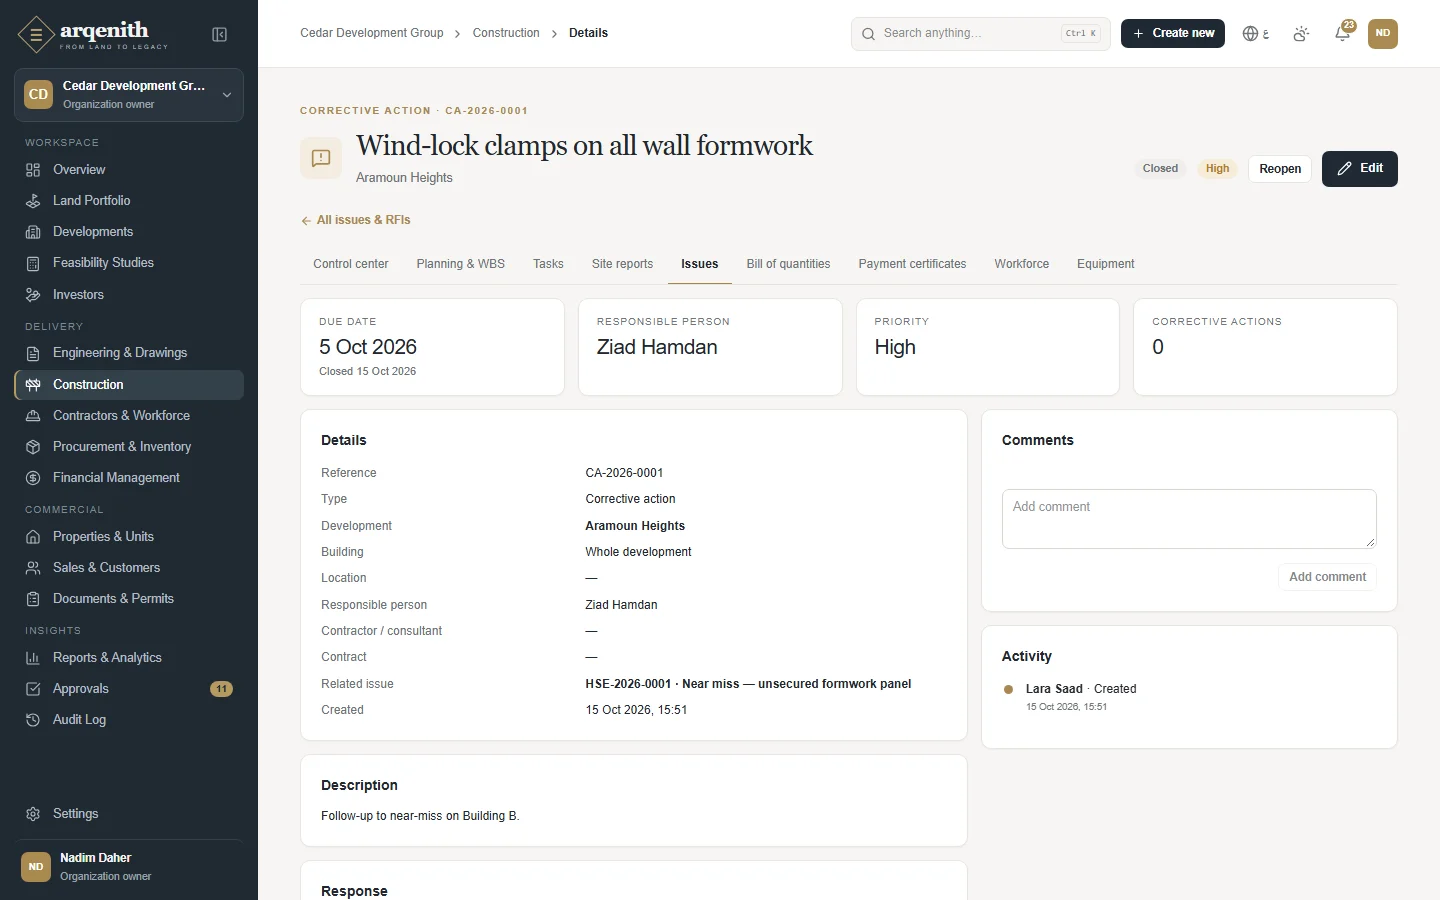
An issue and its history
Figure 11. An issue and its history

4. Paying a contractor

Interim payment certificates from measured work, with retention, to payment.

  1. 1

    Contract

    Fixed price, unit rate, milestone or cost-plus, with its value, retention and advance.

  2. 2

    Certificate

    The period's work is certified line by line; previous certificates and retention are deducted.

  3. 3

    Approval

    The certificate is submitted and approved.

  4. 4

    Payable and payment

    The approved amount becomes cost and a payable; the payment is recorded and posted.

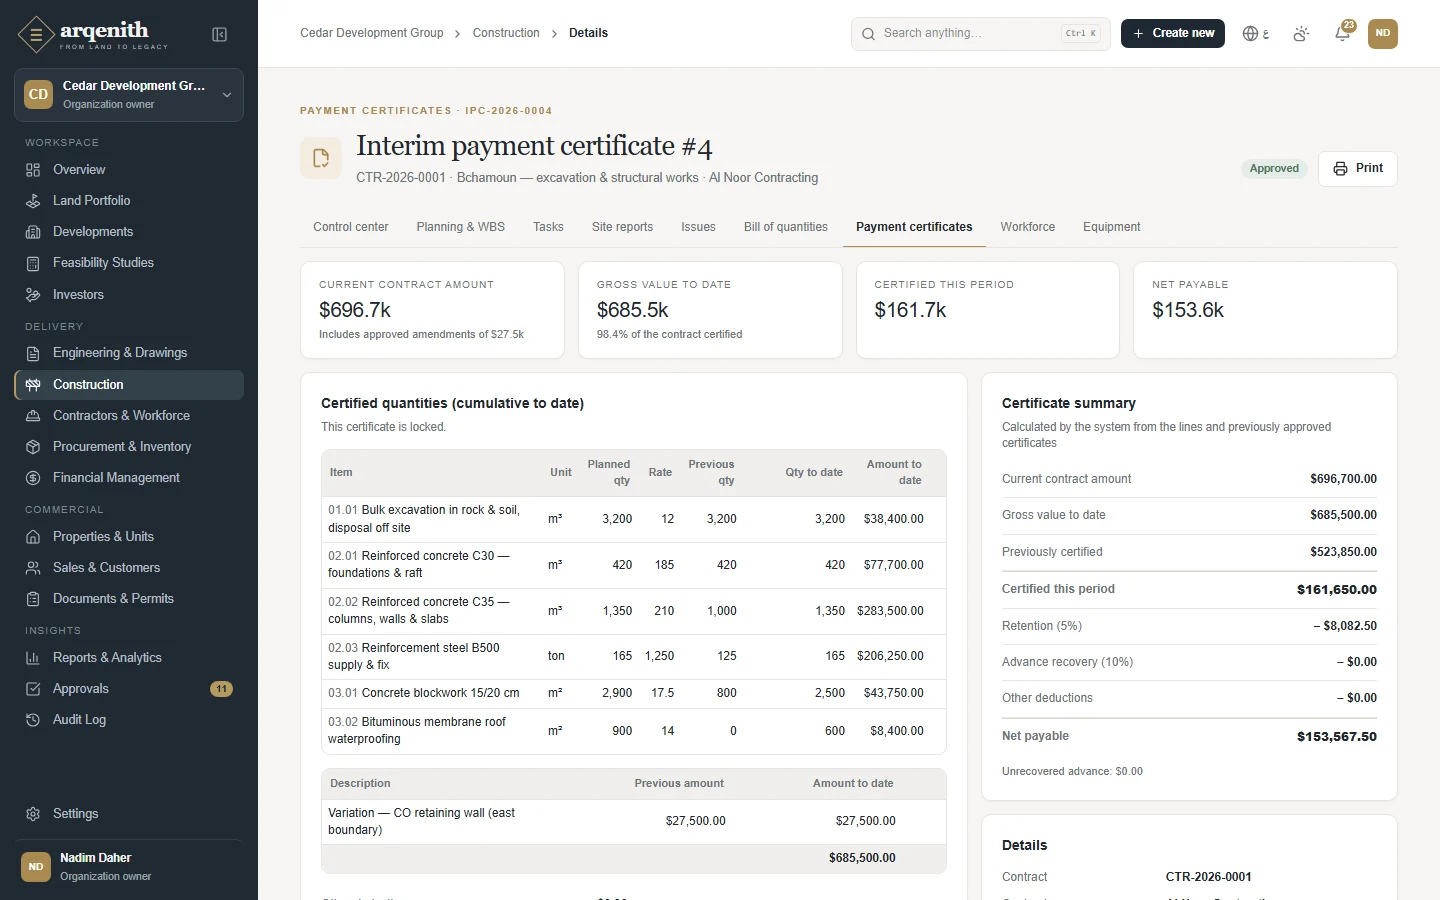
A payment certificate with retention
Figure 12. A payment certificate with retention
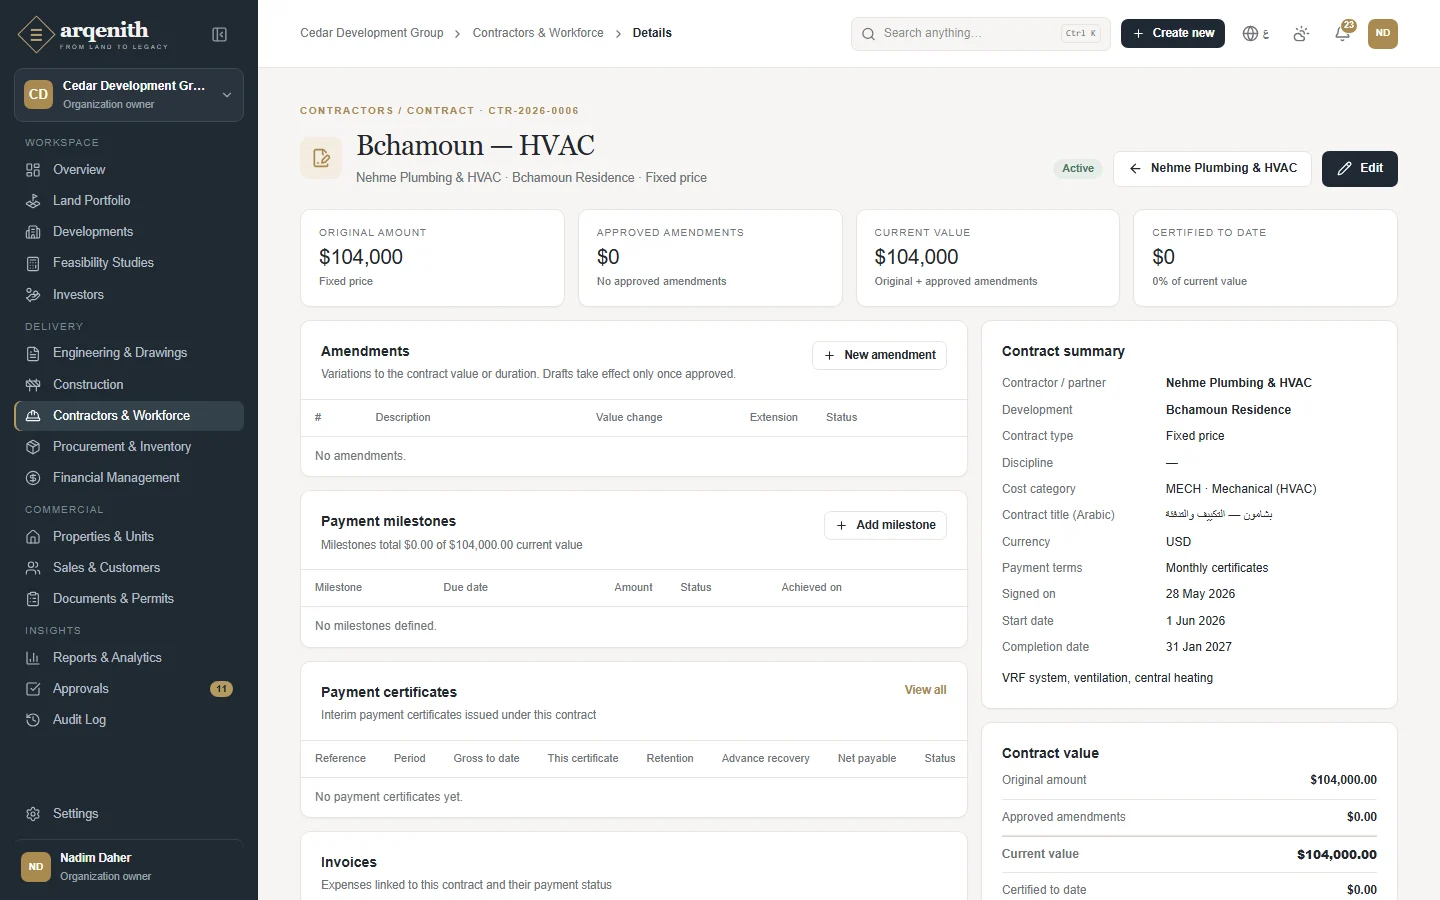
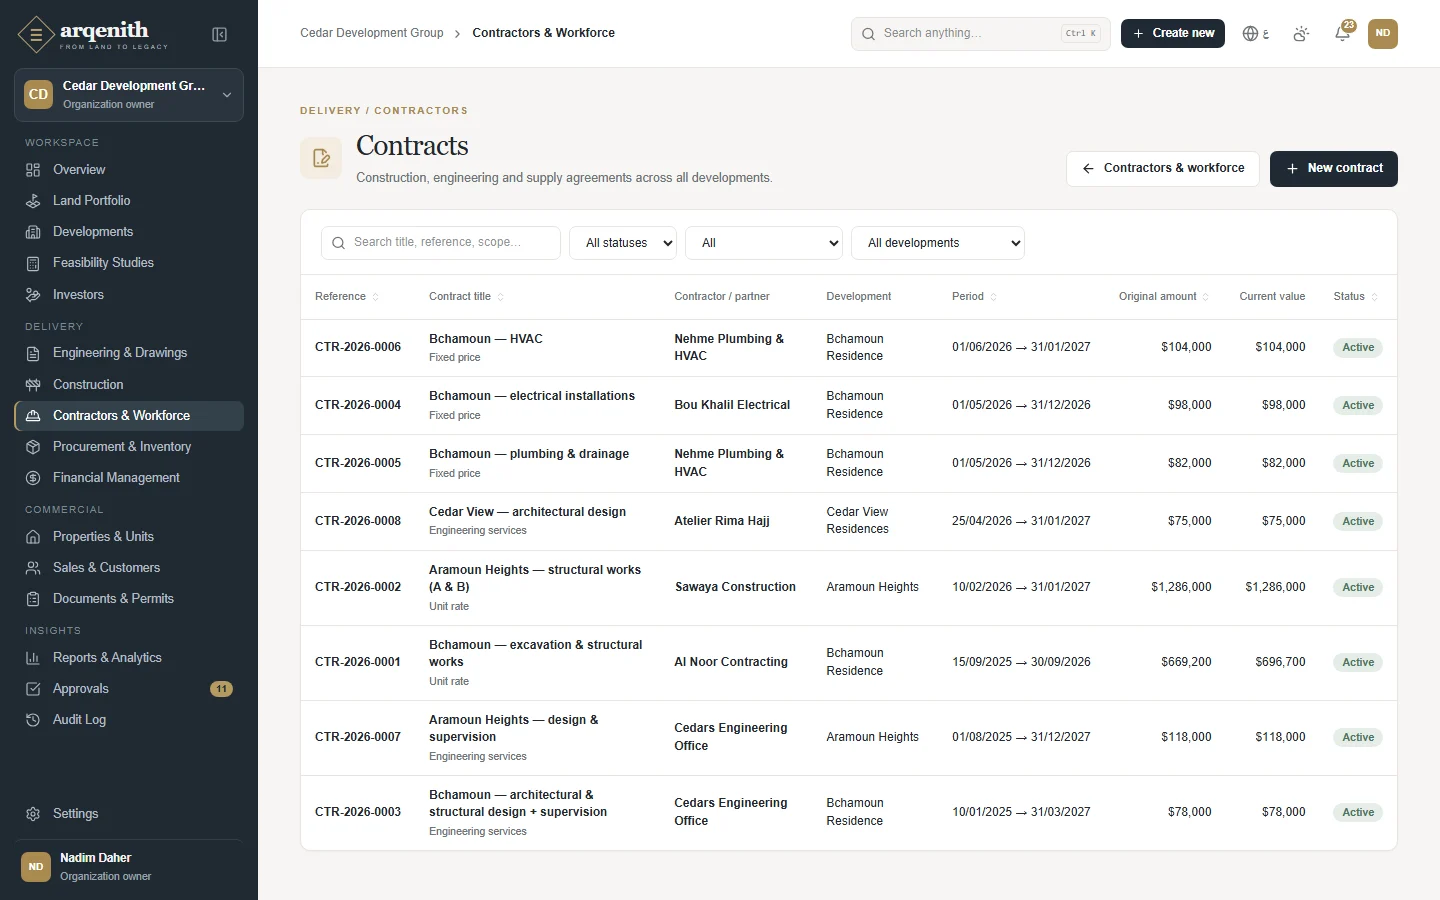
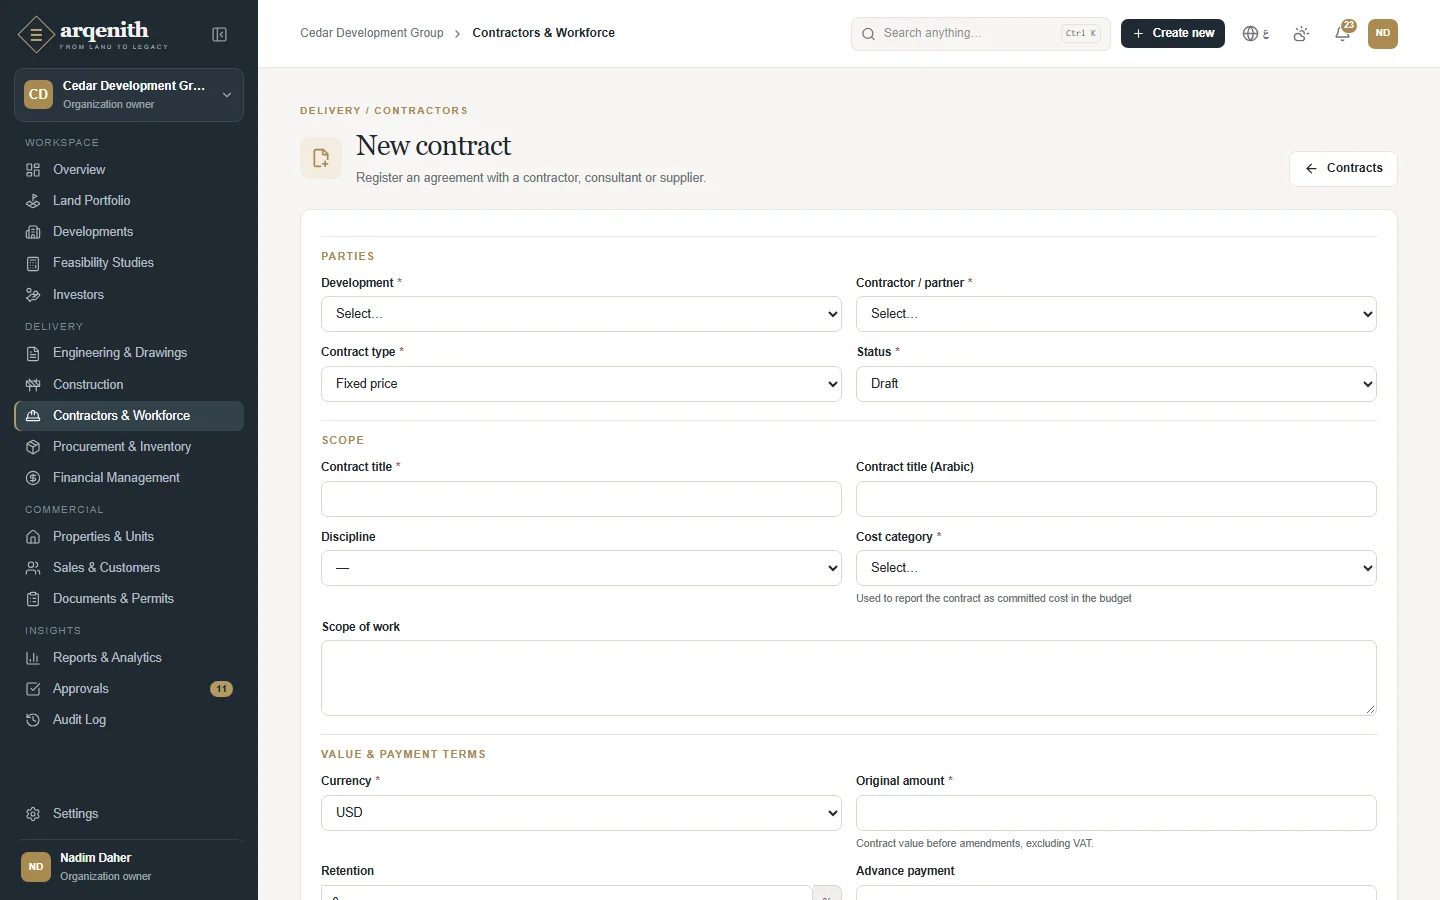
A contract
Figure 13. A contract

5. Selling a unit

From the first visit to the last installment and the handover.

  1. 1

    Customer

    The buyer is registered and followed through the pipeline: lead, viewing, negotiation.

  2. 2

    Reservation

    The unit is held for a set number of days, with a deposit. Only one active reservation per unit.

    Expired: The unit returns to available automatically.

  3. 3

    Contract

    Price, discount and payment plan. A discount above the limit needs the sales manager's approval.

    Cancelled: The unit is released; refunds are recorded against the contract.

  4. 4

    Installments

    The schedule must add up to the contract price. Payments go to the oldest open installment first.

  5. 5

    Handover

    When paid, the unit is handed over; the agent's commission is approved and paid.

  • • A unit can only be under one live contract: the database refuses double sales.
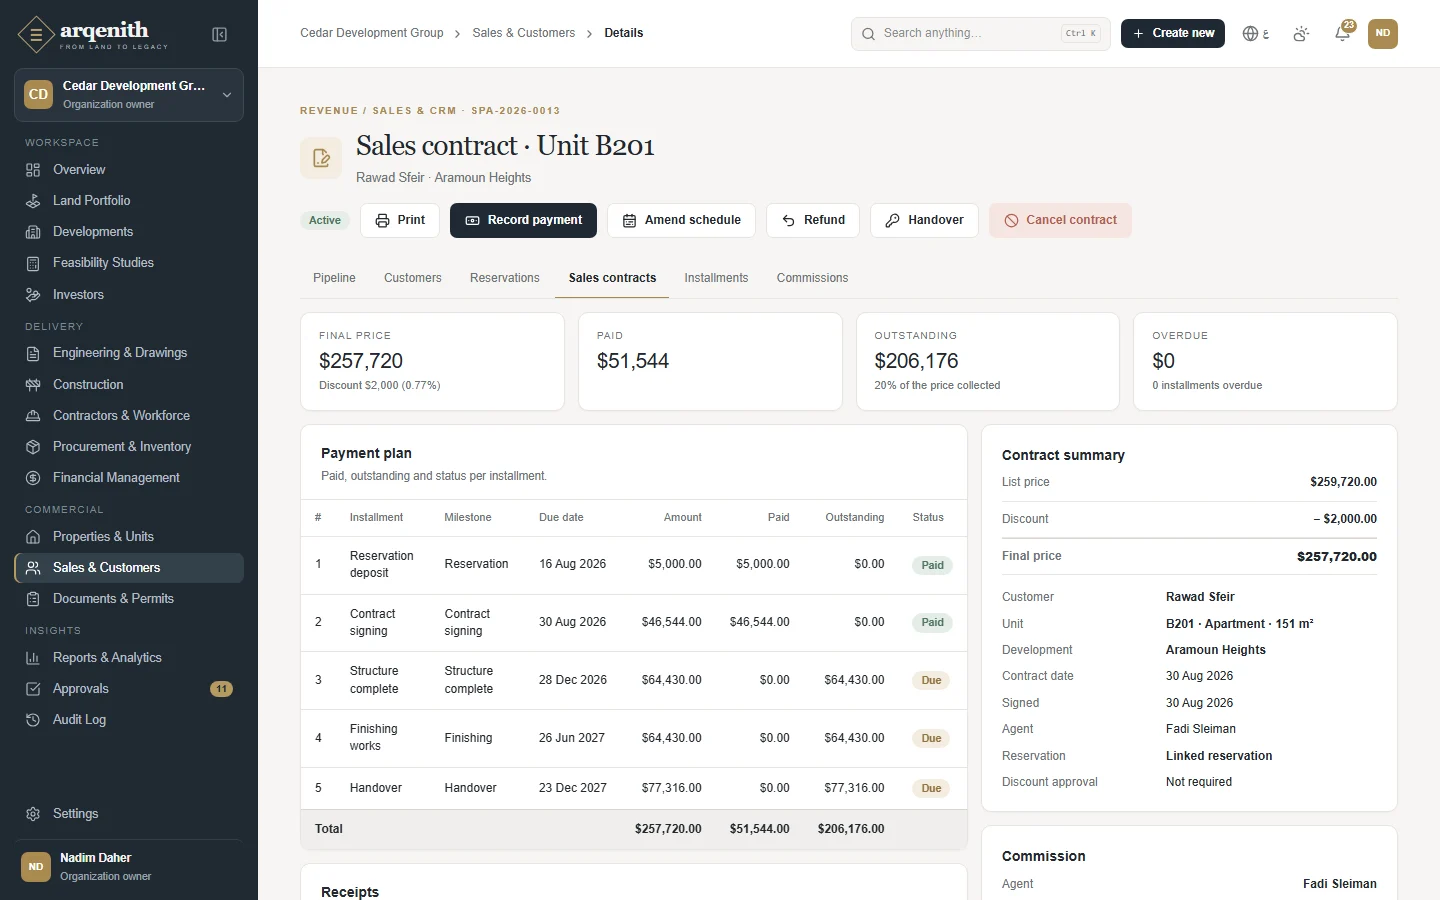
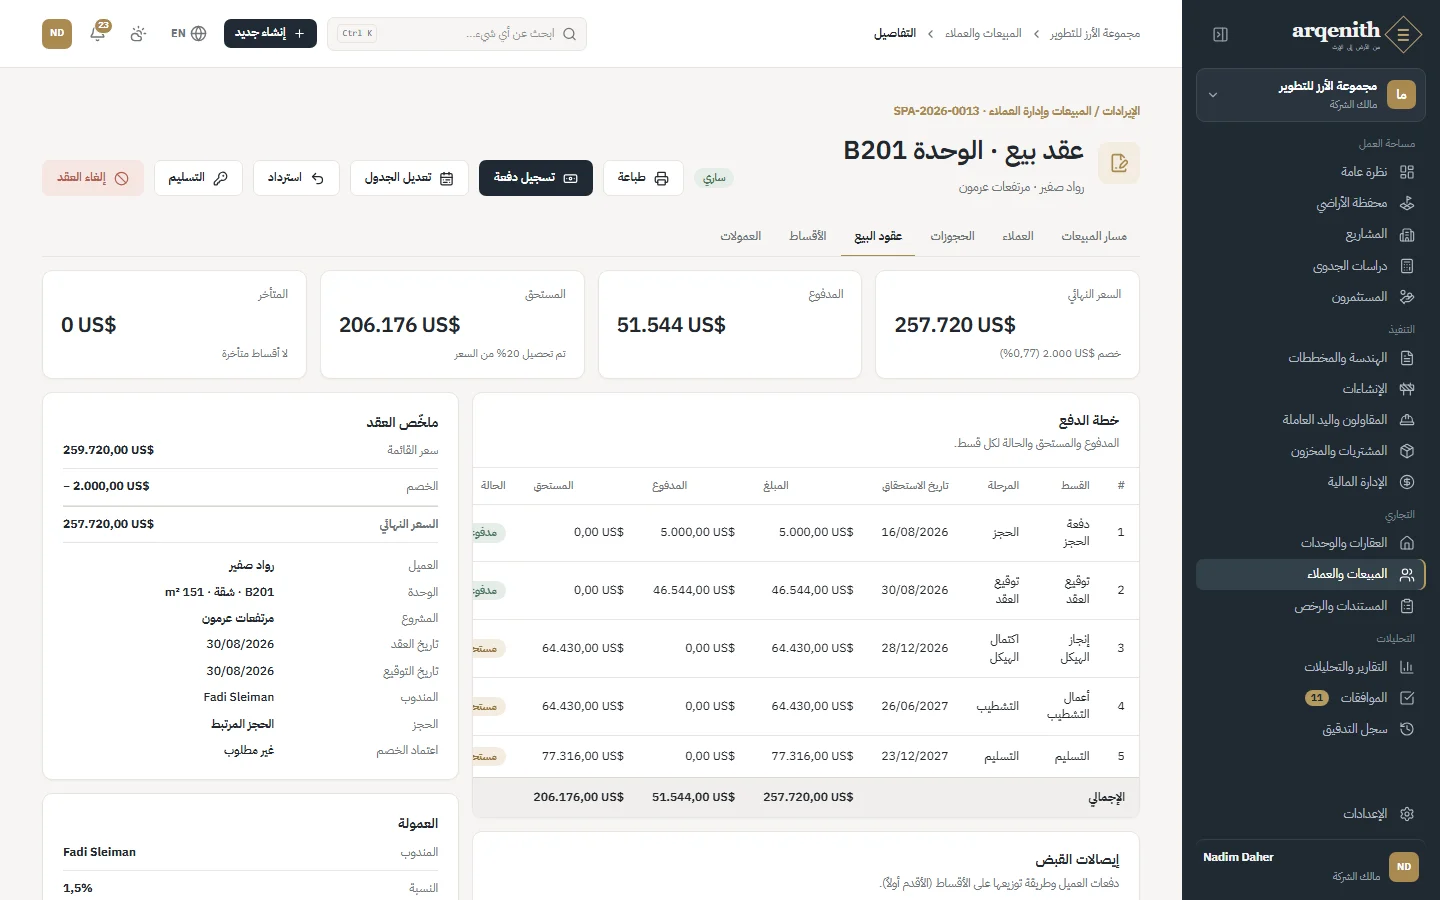
A sales contract and its installments
Figure 14. A sales contract and its installments
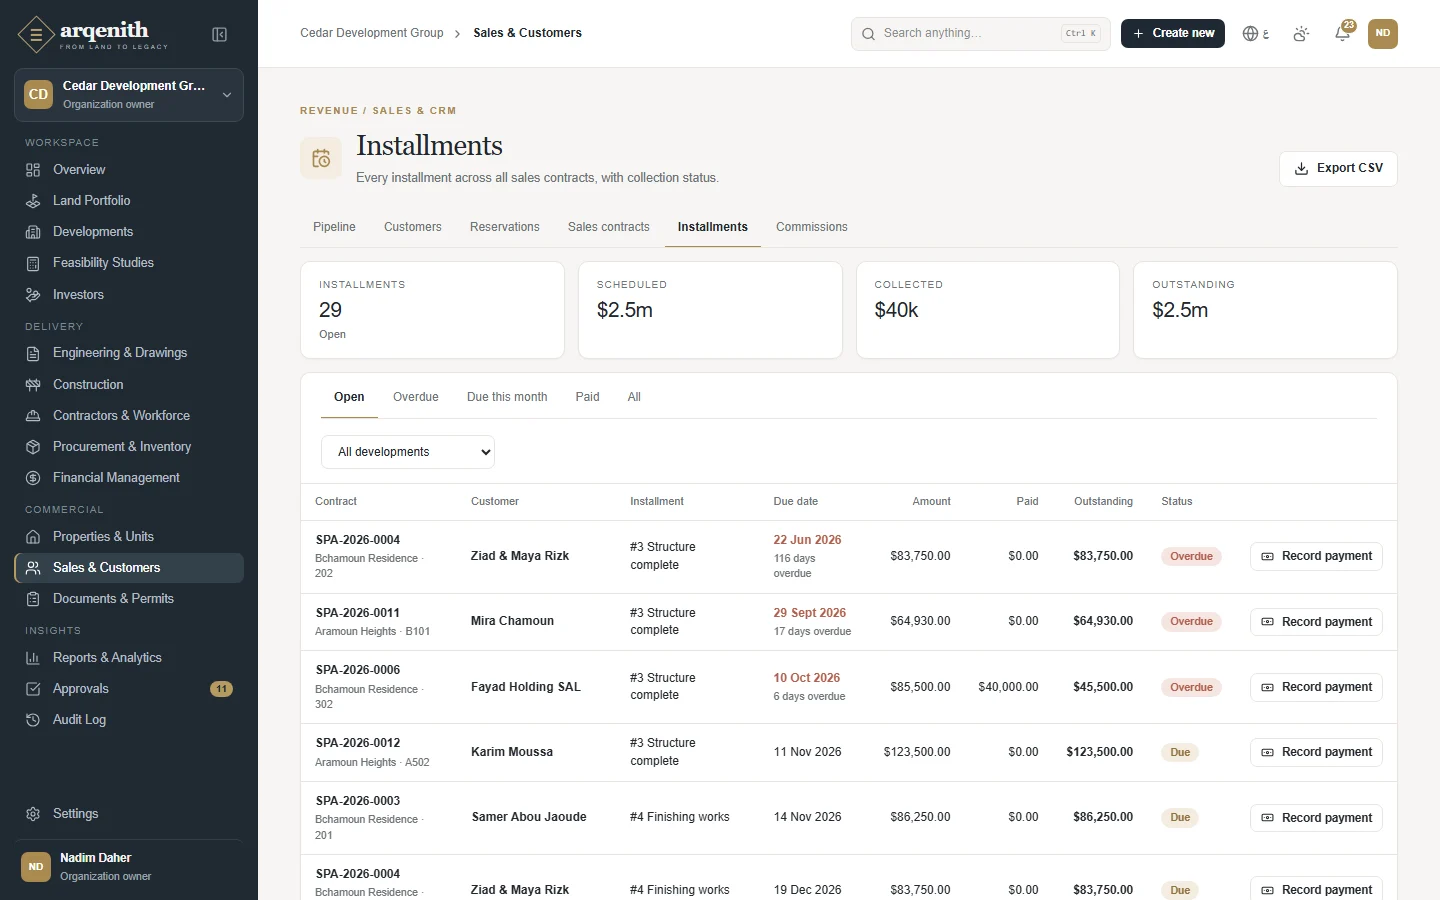
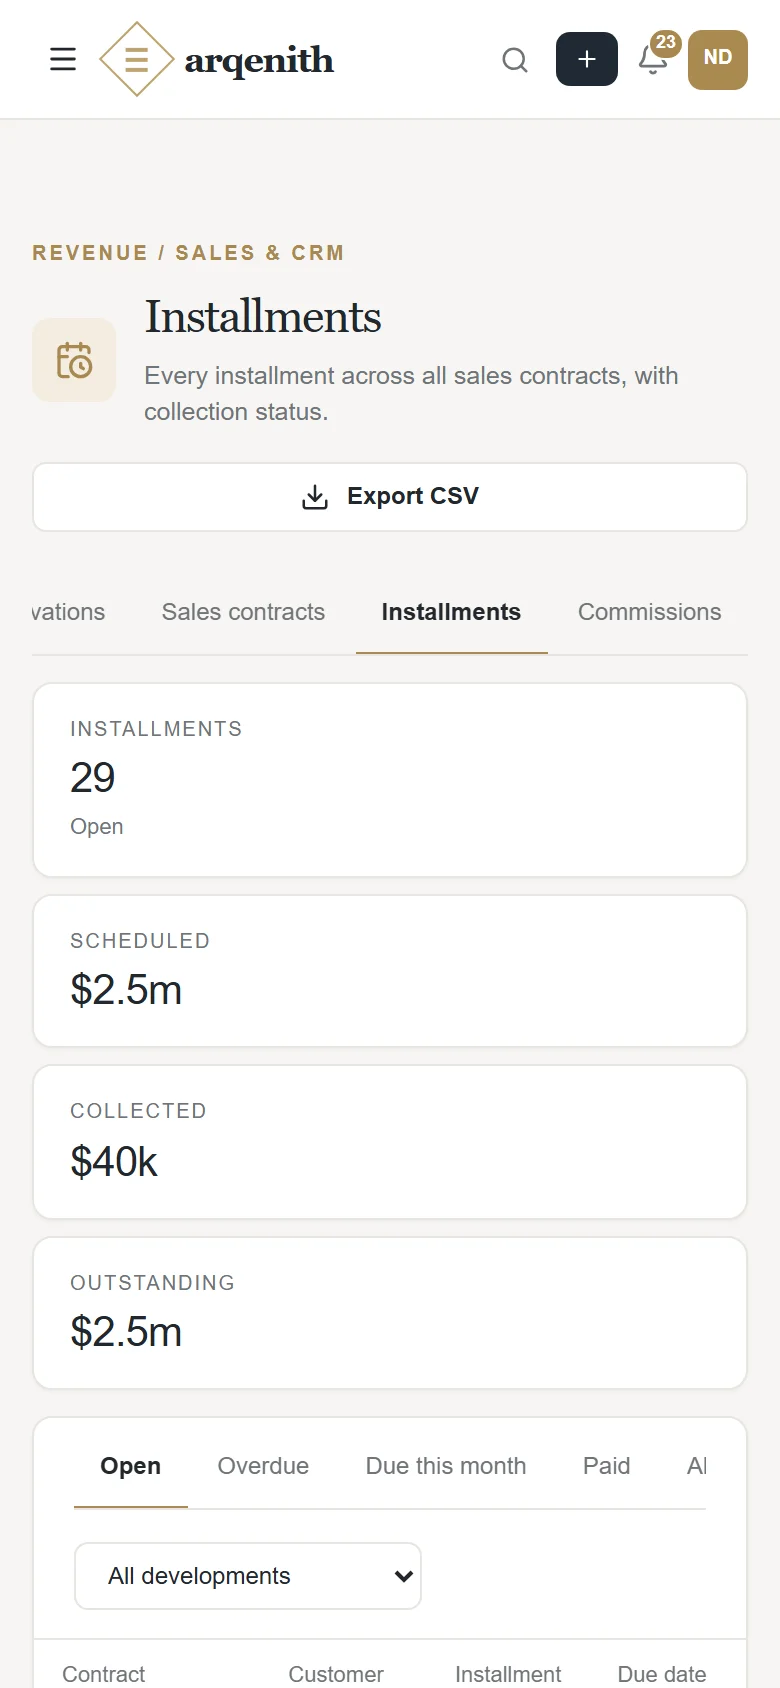
Installments
Figure 15. Installments

6. Funding with investors

Commitments, capital in, distributions out, and the investor's statement.

  1. 1

    Investor

    Individual, company or fund, with contact and KYC details.

  2. 2

    Commitment

    Committed capital and ownership or profit share in a development. Shares on one development never exceed 100%.

  3. 3

    Contributions

    Capital received is recorded against the commitment and posted to the ledger.

  4. 4

    Distributions

    Profit, return of capital or interest paid out, posted as cash out.

  5. 5

    Statement

    Each investor's statement shows commitments, contributions, distributions and balance.

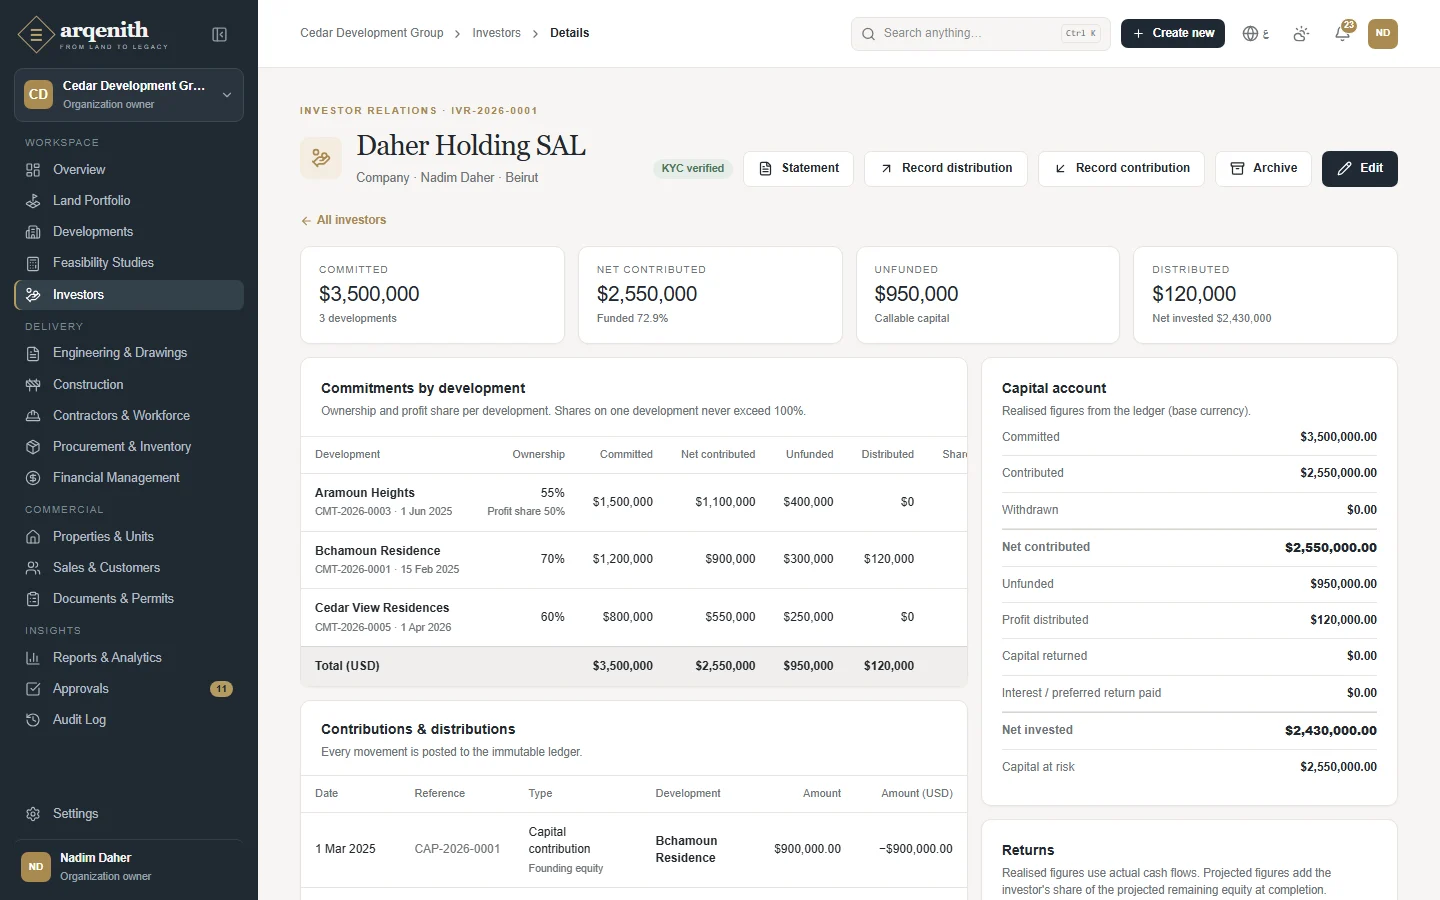
An investor
Figure 16. An investor
An investor statement
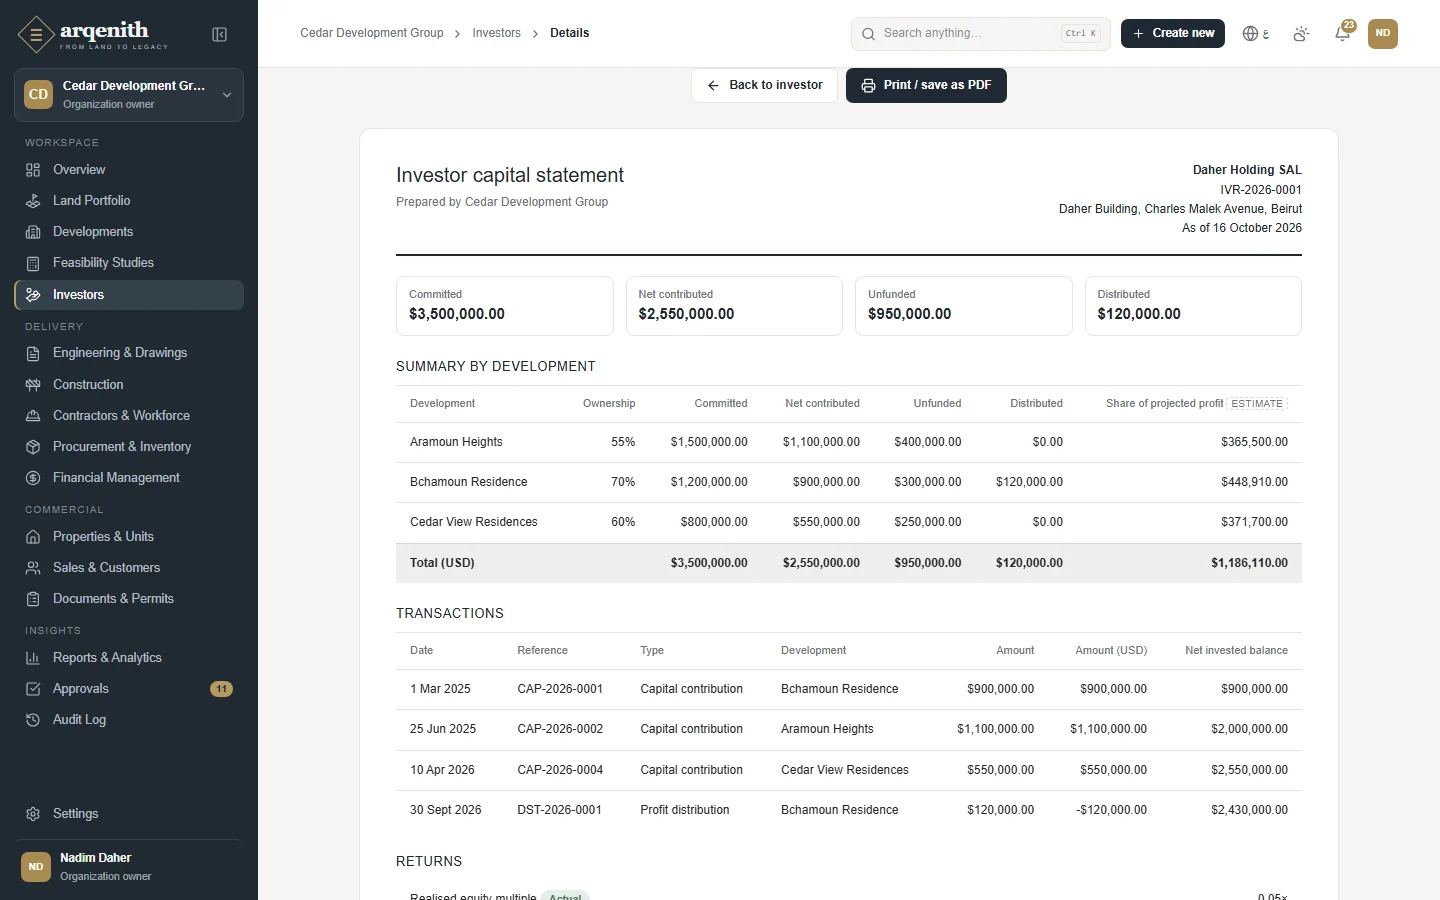
Figure 17. An investor statement
↑ Back to contents

Chapter 6

Worked Cases

Real situations a developer, a construction company and an investor face, and how to handle each in Arqenith.

Developer · land and feasibility

1. Should we buy this plot?

A broker offers a 2,400 m² plot in Bchamoun. The board wants to know within a week whether a residential project there makes money.

  1. 1Add the plot in Land with its area, zoning figures, asking price and location on the map; attach the title deed and survey.
  2. 2Create a feasibility study for the plot: buildable and saleable areas, construction cost per m², soft costs and contingency, and sale price per m².
  3. 3Fill in the optimistic and pessimistic scenarios and compare profit, margin, return on cost and break-even price per m².
  4. 4Review the figures with the board, then mark the study final.
  5. 5When the deal closes, mark the plot acquired and convert the study into a development with its budget.

Result: The decision is taken on documented figures, and the approved assumptions become the project's starting budget.

A plot with its zoning figures and documents
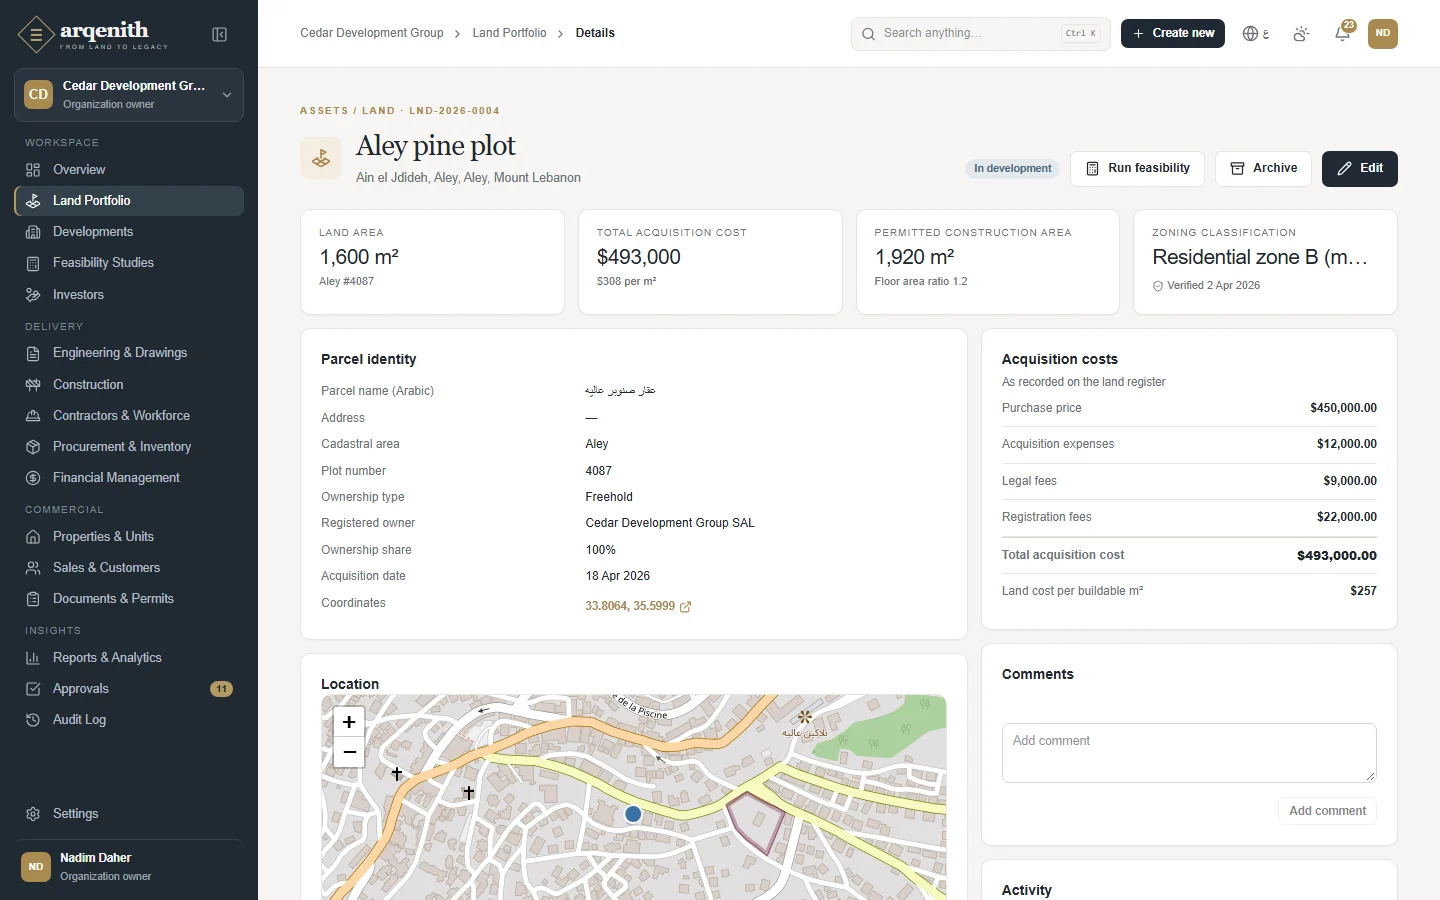
Figure 18. A plot with its zoning figures and documents
A feasibility study with scenarios and returns
Figure 19. A feasibility study with scenarios and returns

Developer · sales

2. Launching sales of a new tower

Tower A has 12 floors of 4 apartments. Sales start next month, with prices by floor and a payment plan over construction.

  1. 1In the development, add the building and its floors.
  2. 2Generate the 48 units in one step from Units, with areas and a price per m².
  3. 3Select the higher floors and set a new price per m² for all of them in one step; attach floor plans to the units.
  4. 4Agents reserve units for customers with a deposit; reservations expire by themselves if not converted.
  5. 5Convert a reservation into a contract with the payment plan; discounts above the limit go to the sales manager.

Result: The availability chart is always right, no unit can be sold twice, and every contract carries a schedule that adds up to its price.

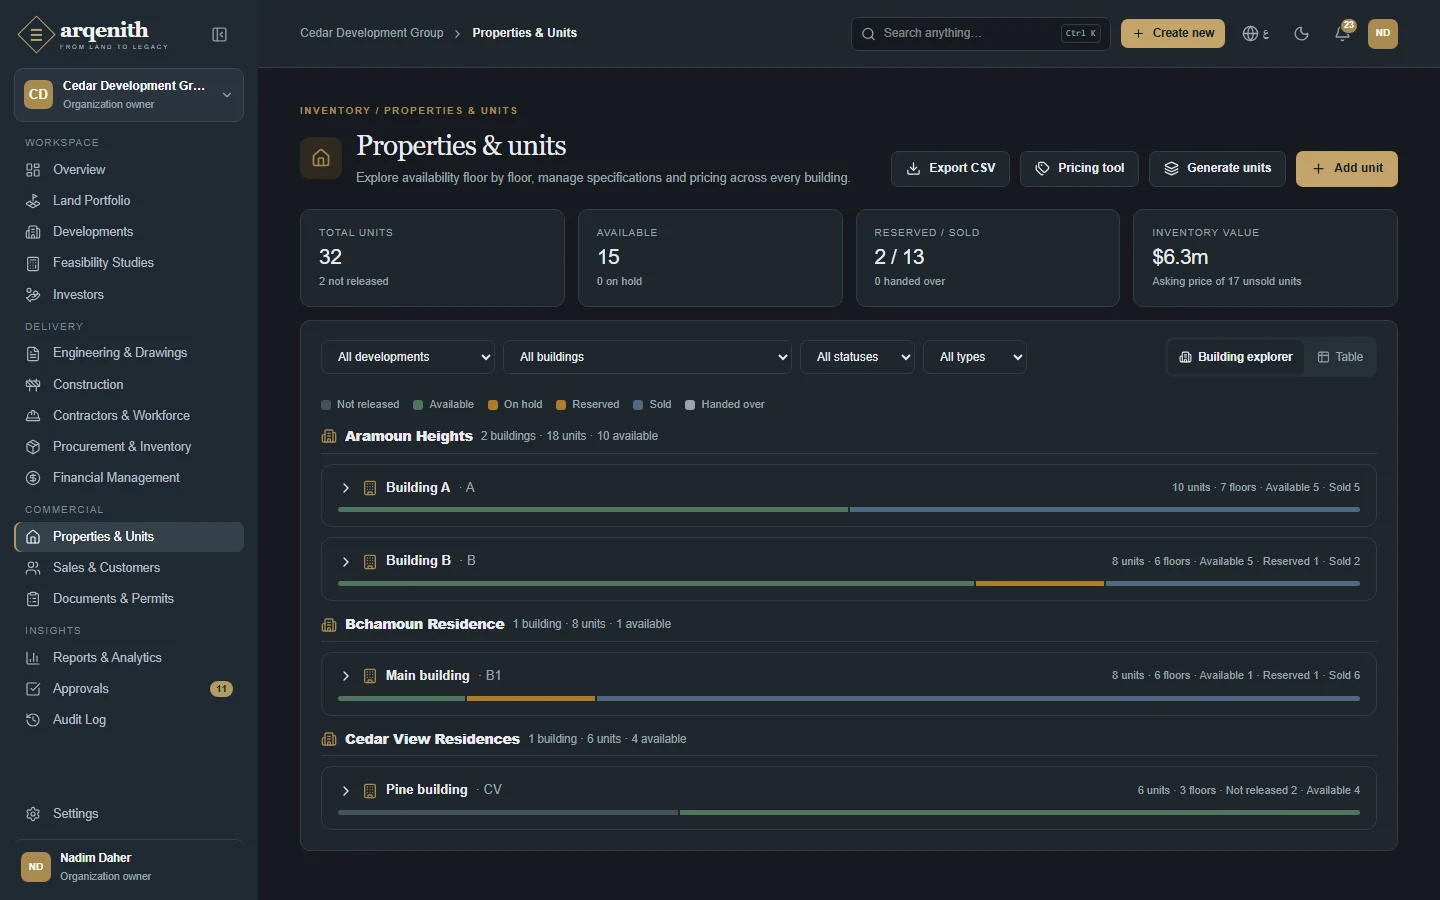
The units explorer
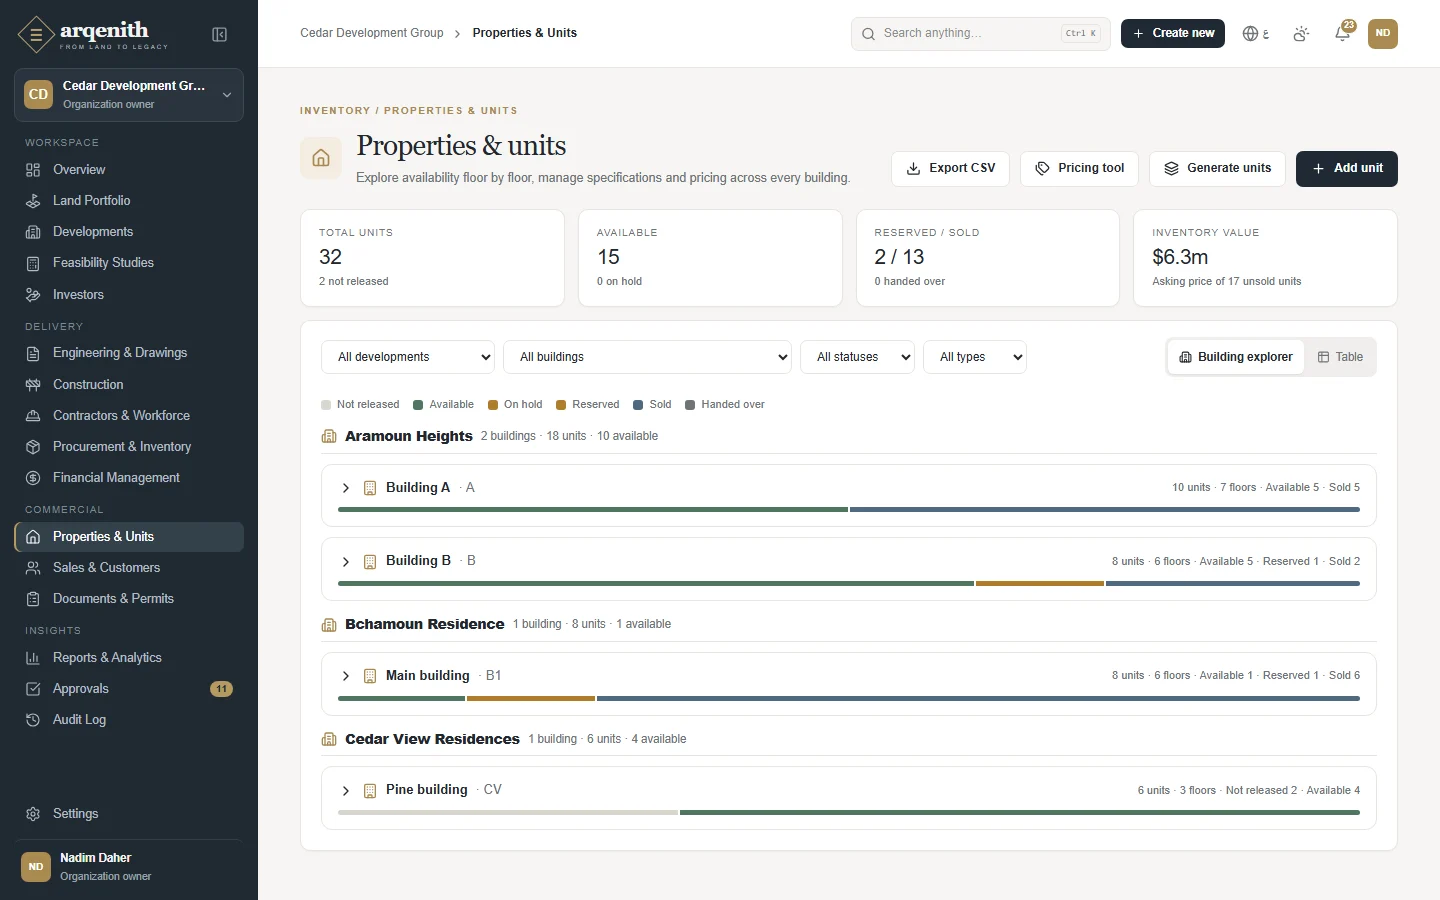
Figure 20. The units explorer
A sales contract and its installments
Figure 21. A sales contract and its installments

Construction company · site

3. A week on site

The site supervisor runs the structure works of Tower A with two subcontractors, and the consultant has asked for a change to the balconies.

  1. 1Each evening, submit the daily report from the phone: weather, manpower per trade, work done and photos.
  2. 2Move tasks across the board as they start and finish; the Gantt shows what is late.
  3. 3Raise an RFI for the balcony detail and a change order with its cost and days of delay.
  4. 4The project manager approves the change order, with its cost and time impact on record.
  5. 5Record a defect found at inspection and close it once fixed, with a photo.

Result: The office sees the site every day without phone calls, and every change to scope and cost has an approval behind it.

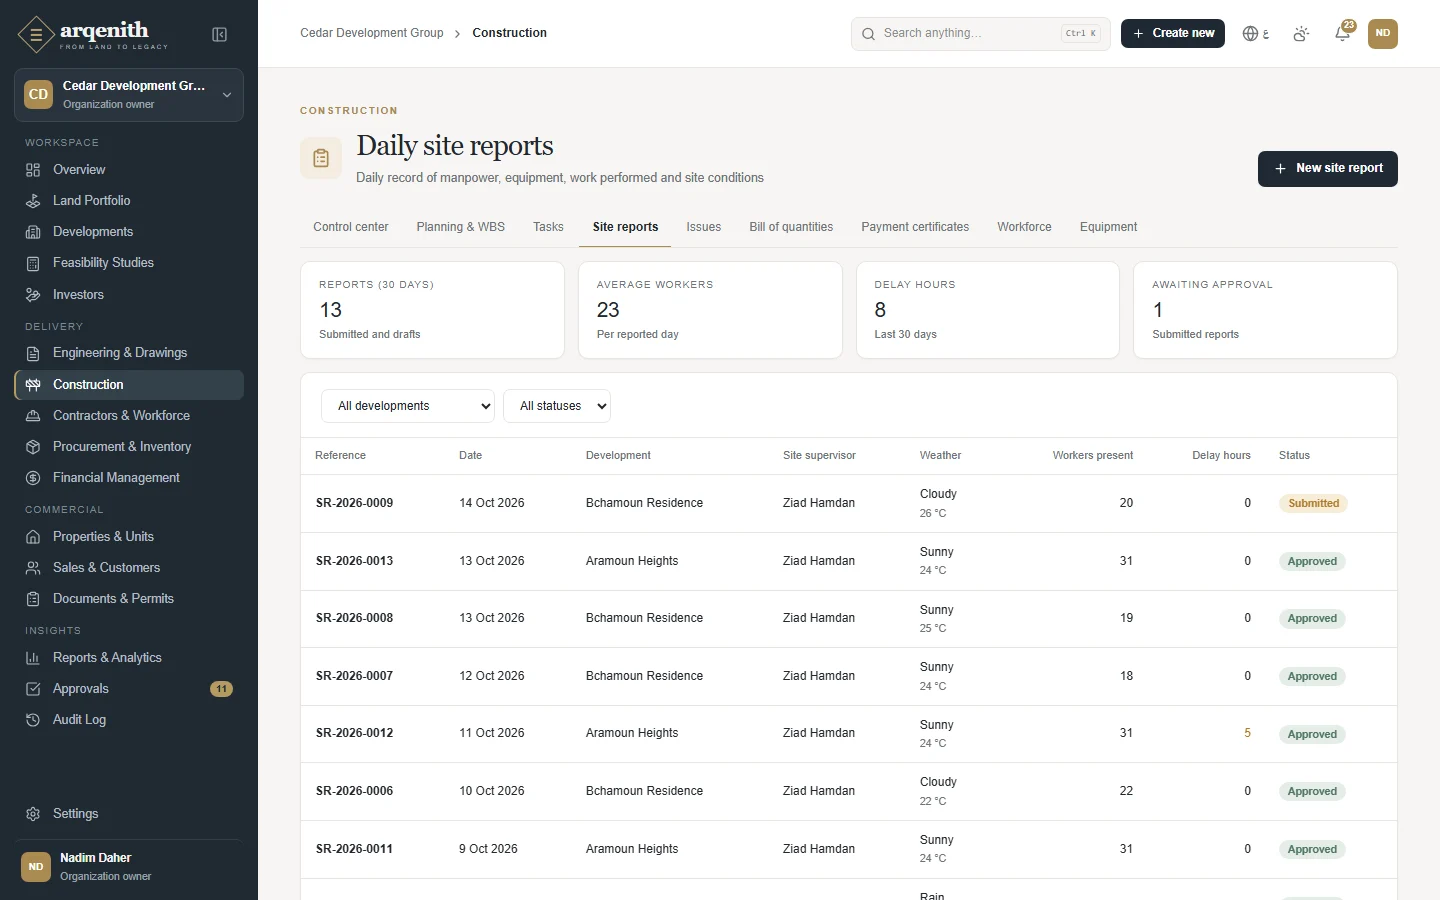
Daily site reports
Figure 22. Daily site reports
Change orders
Figure 23. Change orders

Construction company · procurement

4. Buying 400 tonnes of rebar

The structure needs rebar in three deliveries. Three suppliers can quote, and prices change every week.

  1. 1The site raises a purchase request for the development; the project manager approves it.
  2. 2Procurement sends an RFQ to the three suppliers, records their quotations and compares them.
  3. 3The best quotation is awarded and becomes a purchase order, approved and issued.
  4. 4Each delivery is received against the order; the order shows partially received until the last one.
  5. 5The supplier's invoice becomes an expense against the budget line and a payable.

Result: Committed cost is visible the day the order is approved, not when the invoice arrives, and stock on site is known.

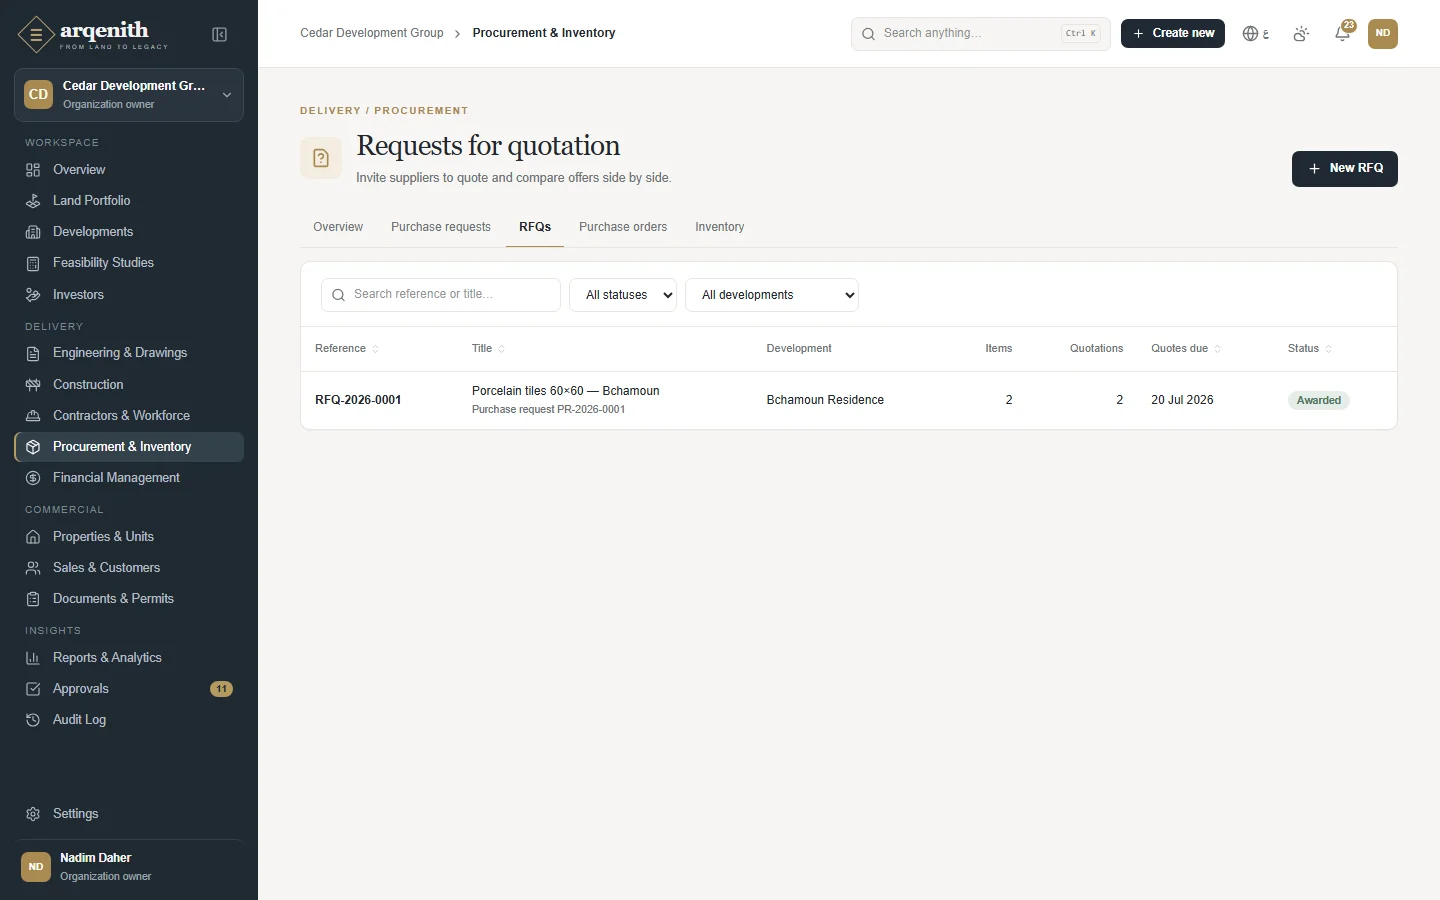
Requests for quotation
Figure 24. Requests for quotation
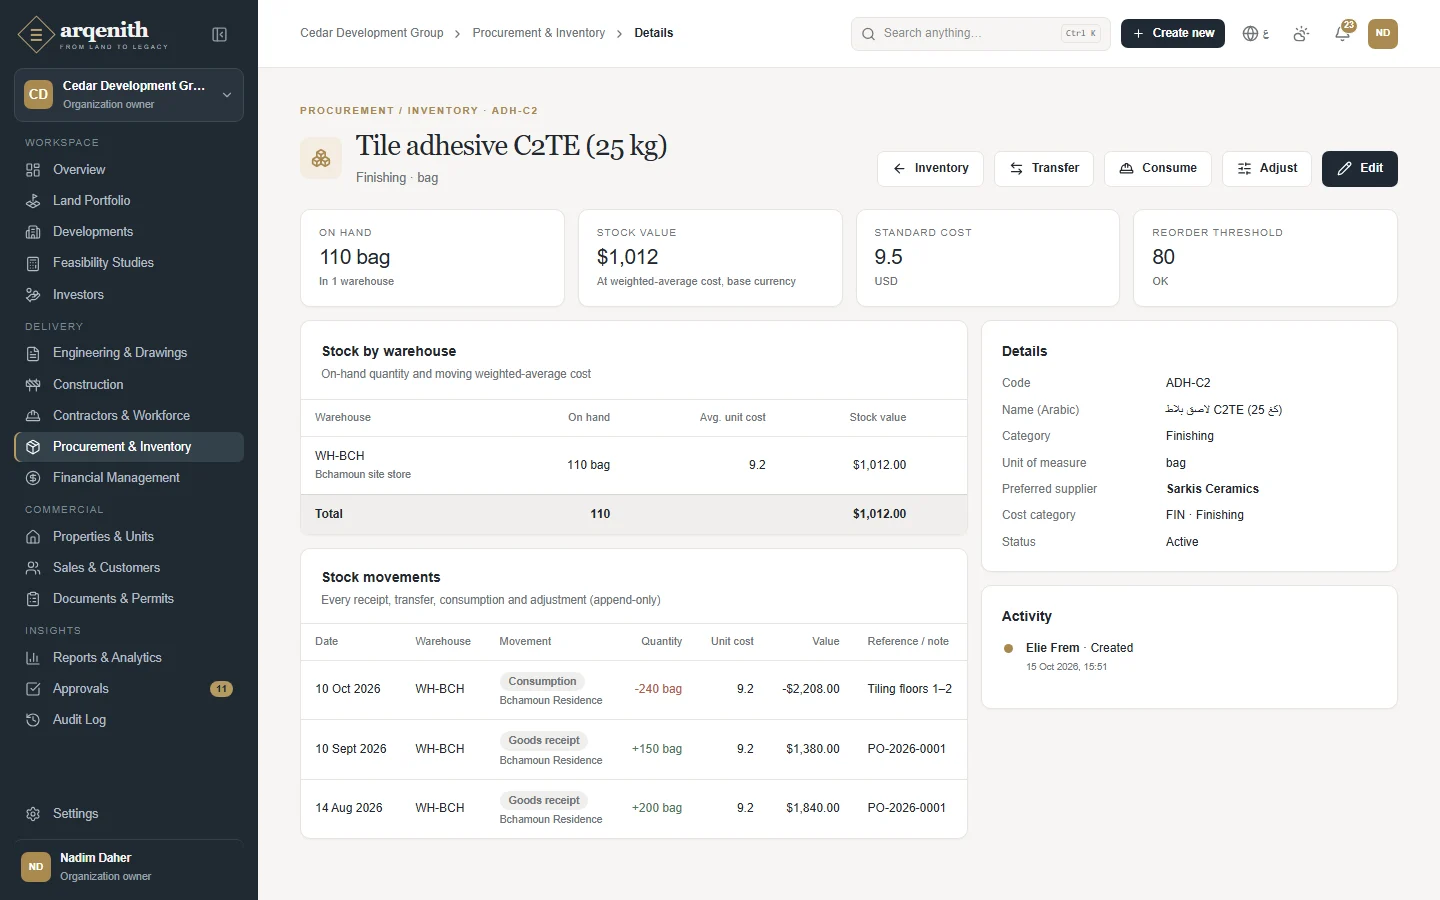
An item and its movements
Figure 25. An item and its movements

Construction company · workforce and equipment

5. What do our crews and machines really cost?

Labour and equipment are a third of the cost of the works, but nobody knows how much went to each development.

  1. 1Set up crews with their workers and hourly rates.
  2. 2Supervisors submit timesheets per crew and development; they are approved and posted as labour cost.
  3. 3Assign each machine to a development for a period, and log its usage hours at the rate in force.
  4. 4Put a machine in maintenance while it is serviced, record each service, and get an alert when the next one is due.

Result: Labour and equipment cost lands on each development's budget, so margins are real.

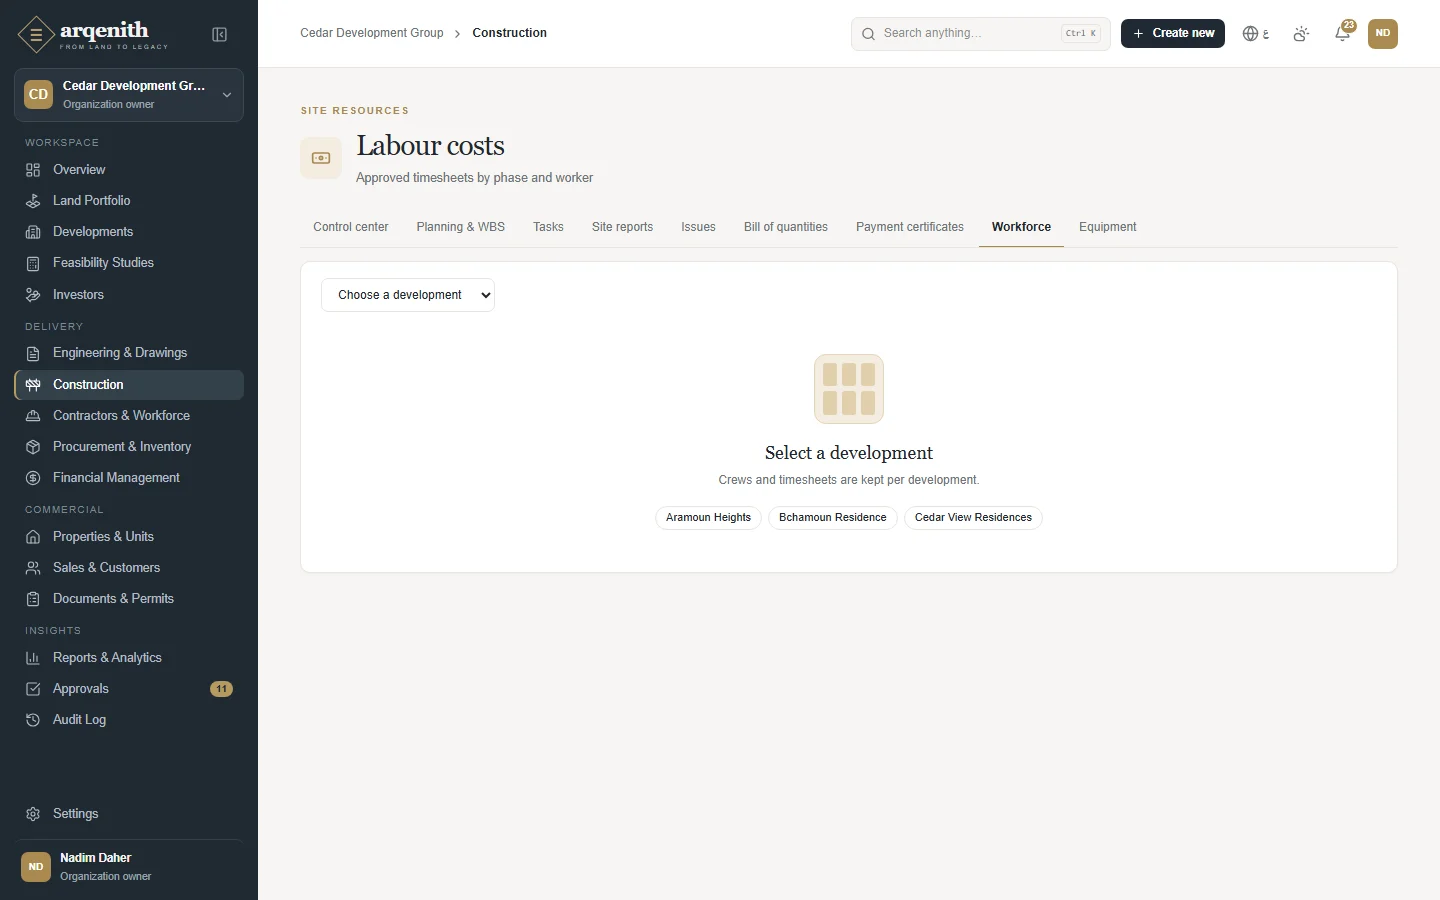
Labour cost by development
Figure 26. Labour cost by development
A machine: assignments, usage and maintenance
Figure 27. A machine: assignments, usage and maintenance

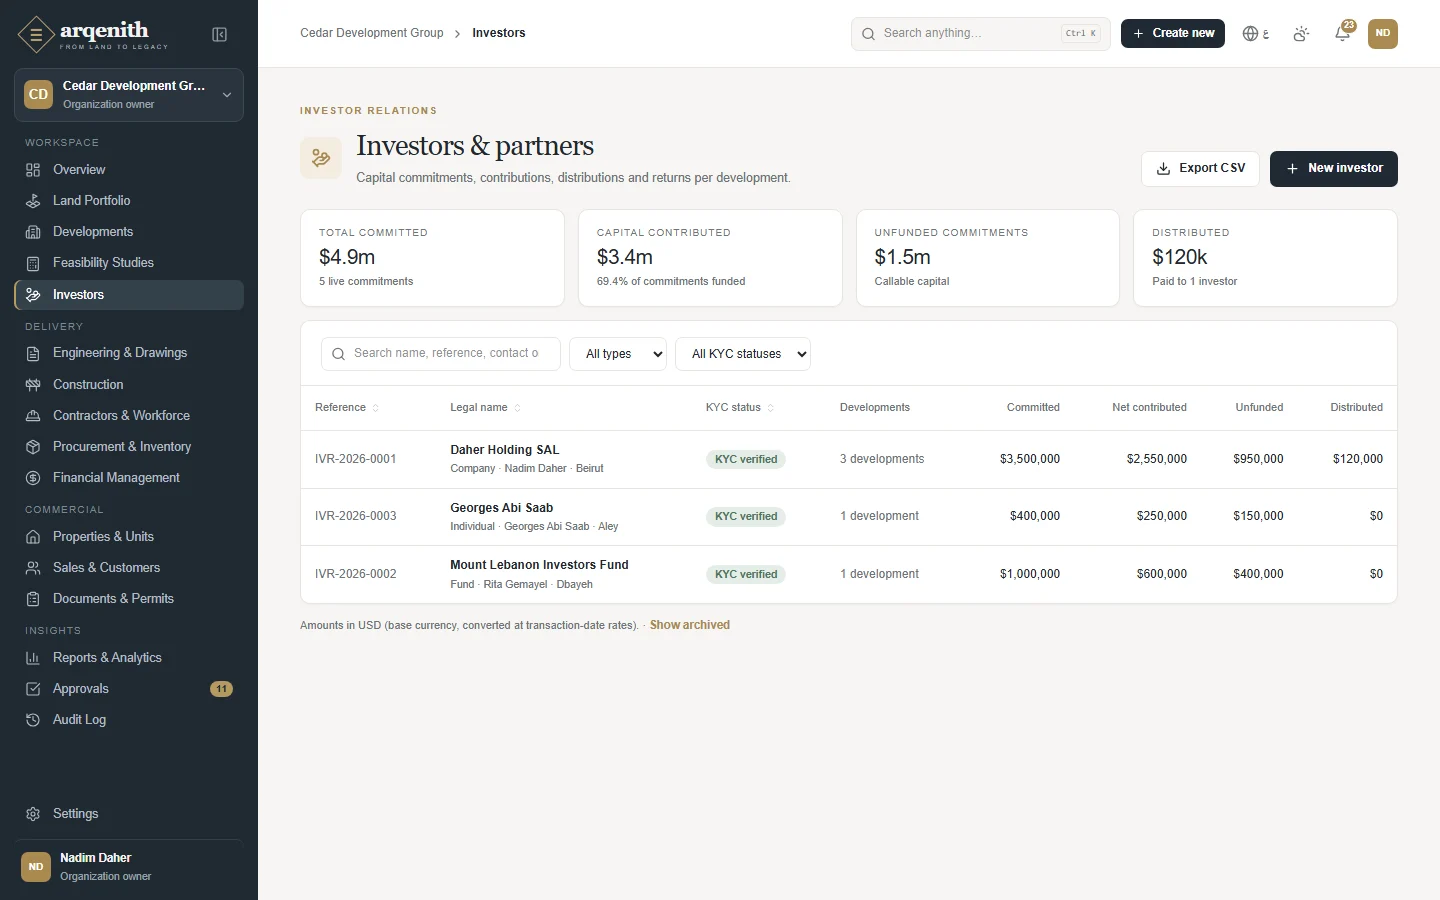
Investor or fund

6. Bringing in an investor for 30%

A family office will fund 30% of a development's equity and wants a quarterly statement.

  1. 1Register the investor with its KYC documents.
  2. 2Create a commitment on the development: committed capital and 30% share.
  3. 3Record each capital contribution as it arrives, in its currency.
  4. 4When units are sold, record distributions of profit or return of capital.
  5. 5Print the investor statement each quarter.

Result: The investor's figures come from the same ledger as the company's accounts, and shares can never add up to more than 100%.

The investor register
Figure 28. The investor register
An investor statement
Figure 29. An investor statement

Finance

7. Will we have enough cash in March?

Two developments are under construction, a loan is being drawn, and several buyers are late.

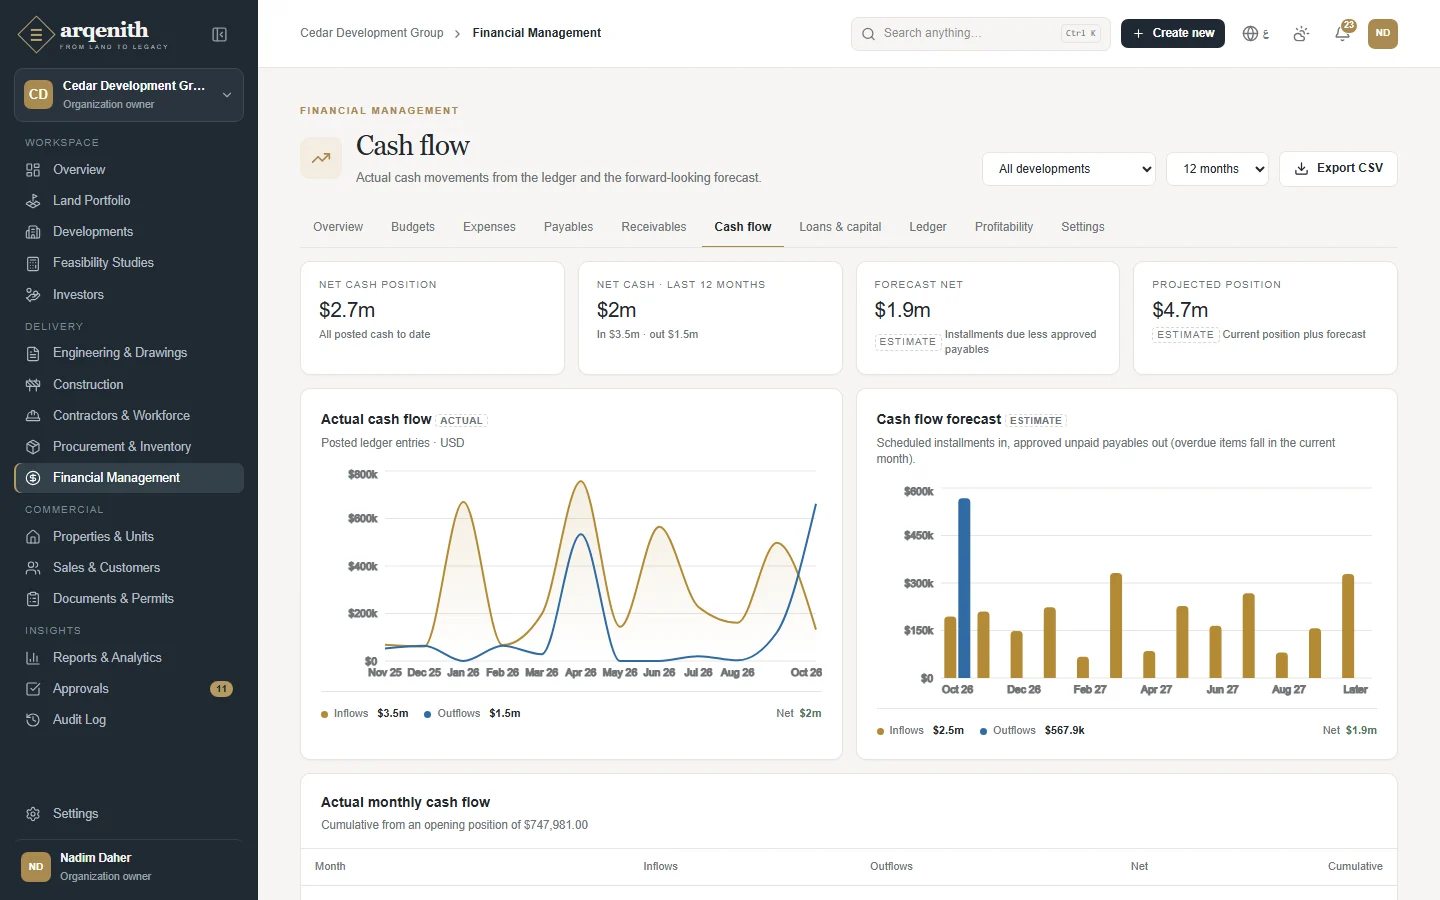
  1. 1Open Cash flow: actual cash in and out by month, and the forecast of what is expected in and out in the months ahead.
  2. 2Check Receivables and Installments for overdue buyers and follow them up.
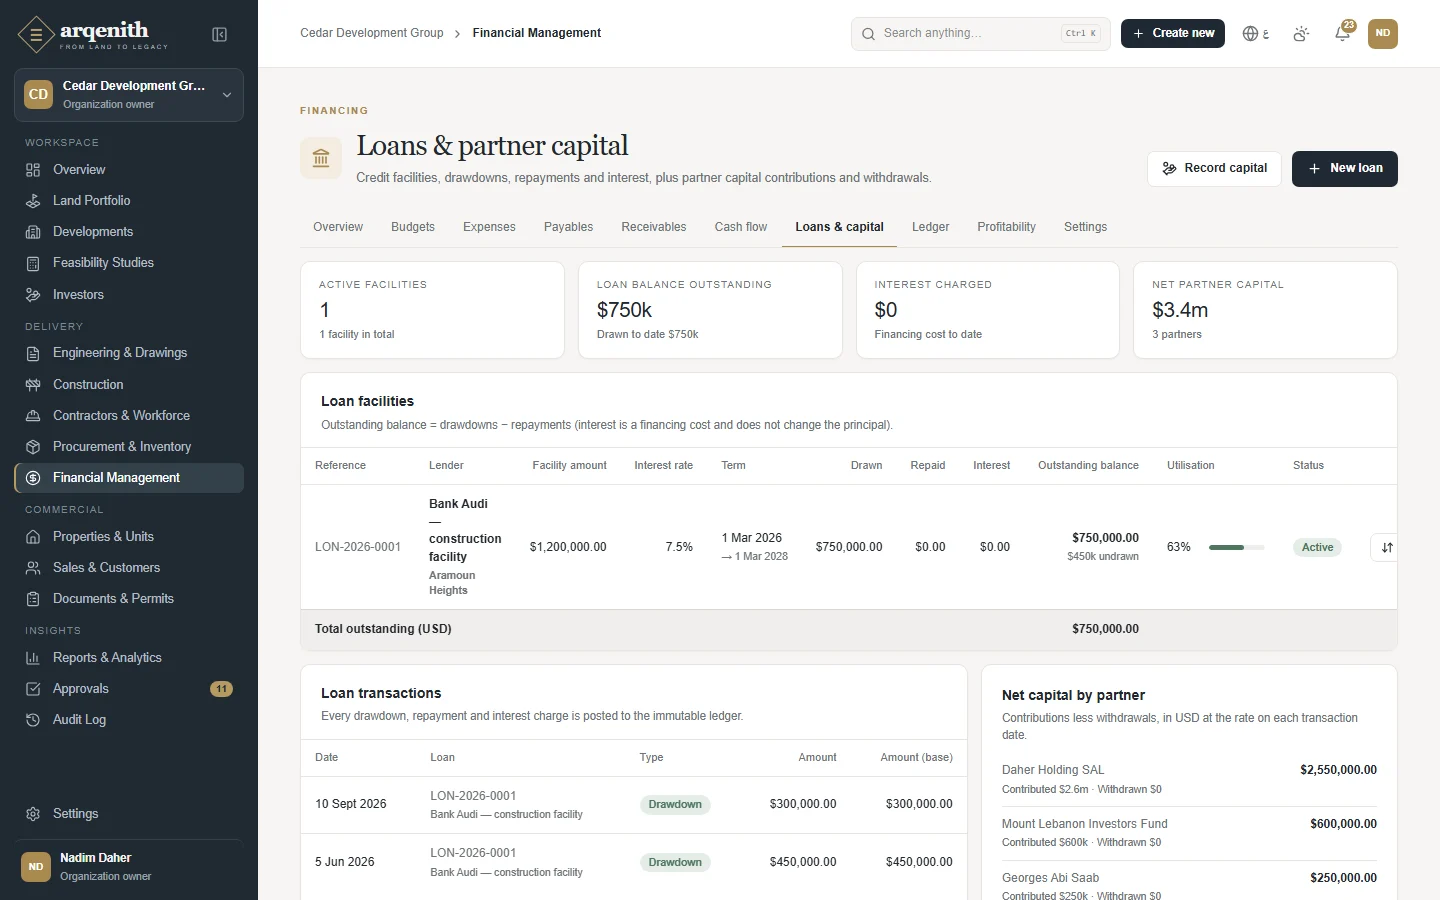
  3. 3Plan the next drawdown in Loans and record repayments and interest.
  4. 4Export the ledger for the period for the auditors or the bank.

Result: The gap is visible months ahead, and every figure can be traced back to its source document.

Cash flow
Figure 30. Cash flow
Loans
Figure 31. Loans

Owner · administration

8. Bringing the team on board

A new company starts on Arqenith with 15 people, and a site engineer must only see the development he works on.

  1. 1In Settings → Members, invite each person by email with their role; copy the link if email is not set up.
  2. 2Each person opens the link, enters their name and chooses a password; they join directly.
  3. 3Limit the engineer to his development, and grant or revoke single permissions where needed.
  4. 4Use the audit log to see who changed what and when.

Result: Everyone works in one system with exactly the access they need, and no one can sign up without an invitation.

Members and invitations
Figure 32. Members and invitations
Roles and permissions
Figure 33. Roles and permissions
↑ Back to contents

Chapter 7

Getting Around

The dashboard, the sidebar, search, quick create and common questions.

Signing in
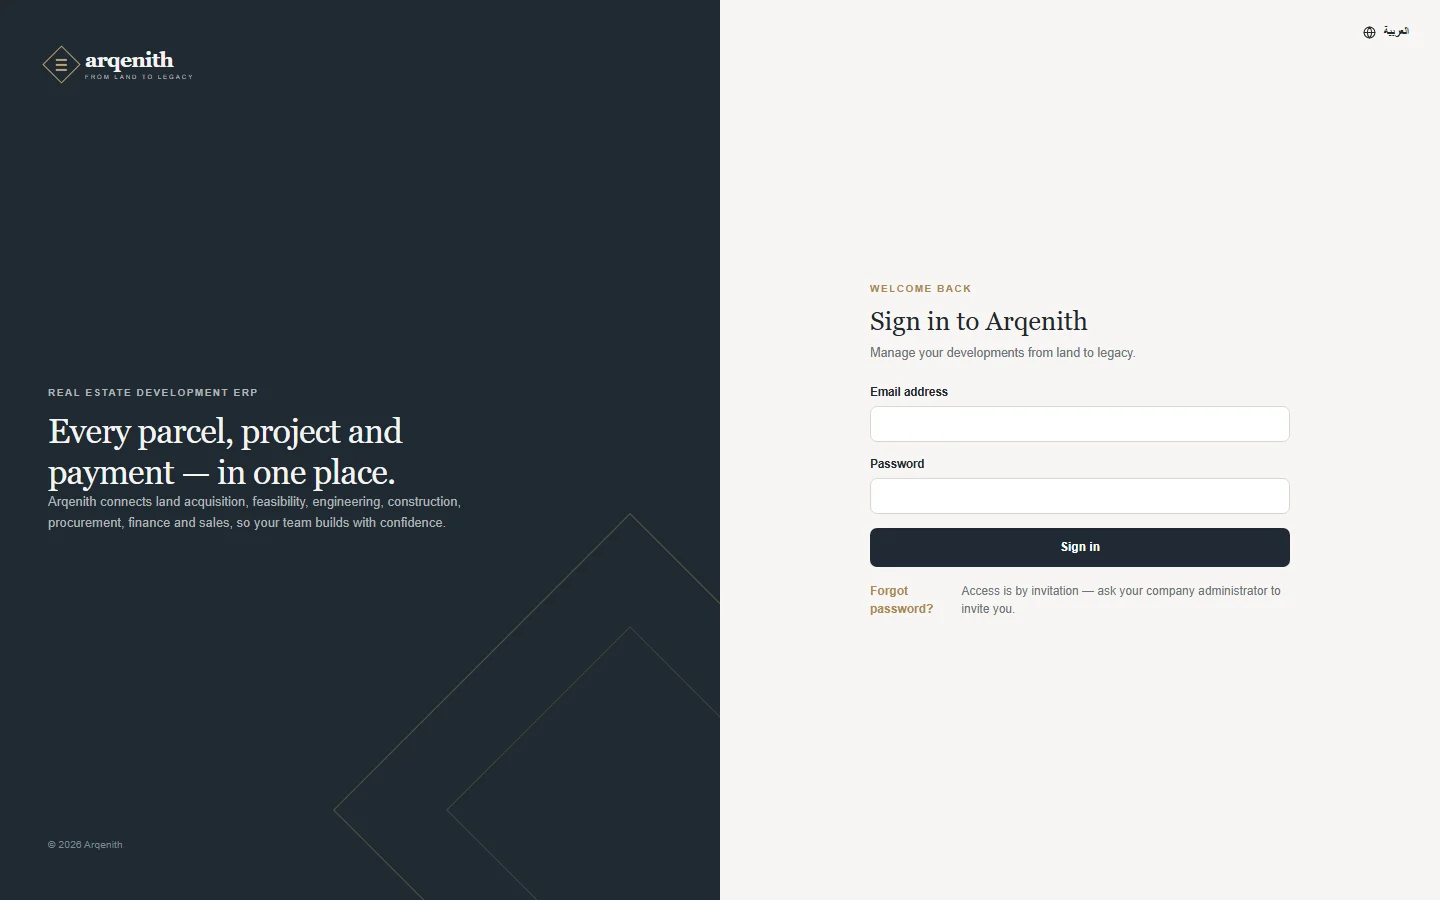
Figure 34. Signing in
Resetting a password
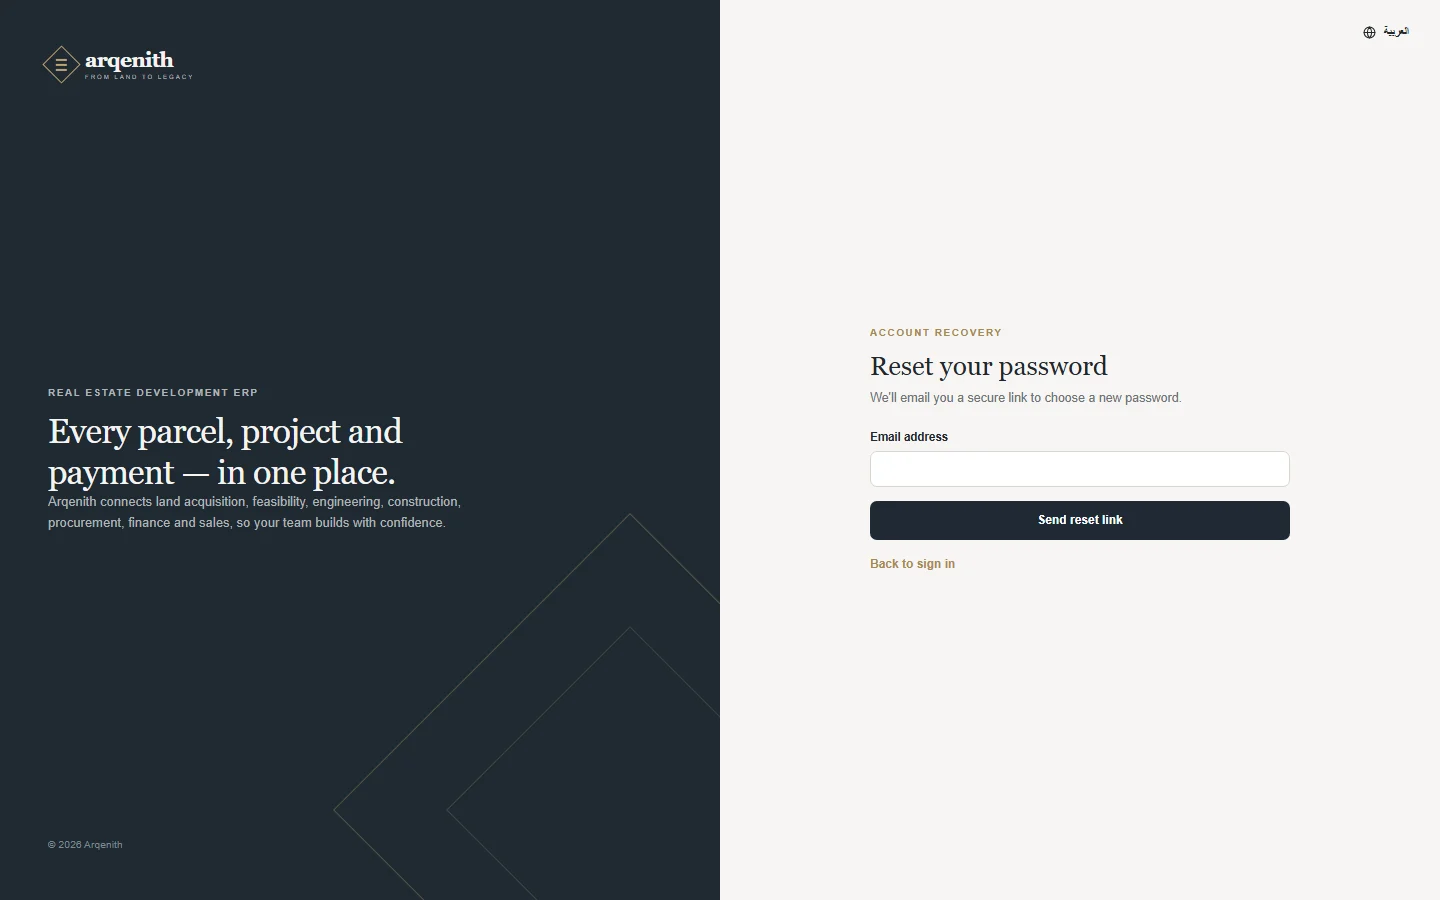
Figure 35. Resetting a password

Common questions

Answers to the questions people ask most often, across the whole of Arqenith.

Who uses it: Everyone.

How to use it

  1. 1Search the question list with the box at the top of this guide; it filters every section at once.
  2. 2Each screen's own section below also ends with the questions specific to that screen.
  3. 3If a page says “Access denied”, your role does not include that area. Ask your Organization owner or an Administrator, who can change your role or grant a single permission from Settings → Members & invitations.

Rules and details

  • Check which organization you are working in first (the switcher at the top of the sidebar shows its name and your role there). People who belong to several organizations work in one at a time, and every screen, report and notification belongs to the active one.
  • What you see depends on two things: your role (what you may view, create, edit, delete, approve and export, module by module) and your project access (all developments, or only selected ones). Records of developments you cannot access are hidden everywhere, including search, reports and exports.
  • Every change to a record is kept in the audit log with who made it and when, and records carry their own Activity history. Nothing you approve, post or upload is silently overwritten.

Questions

How do I get an Arqenith account?
Only by invitation. There is no public sign-up. An Organization owner or Administrator invites you from Settings → Members & invitations and gives you a link (it is also emailed to you when email is set up). Open the link, enter your full name and choose a password, then click Create account and join. Your email address comes from the invitation and cannot be changed there. The link is valid for 14 days; if it has expired, ask for a new invitation.
How do I switch between English and Arabic?
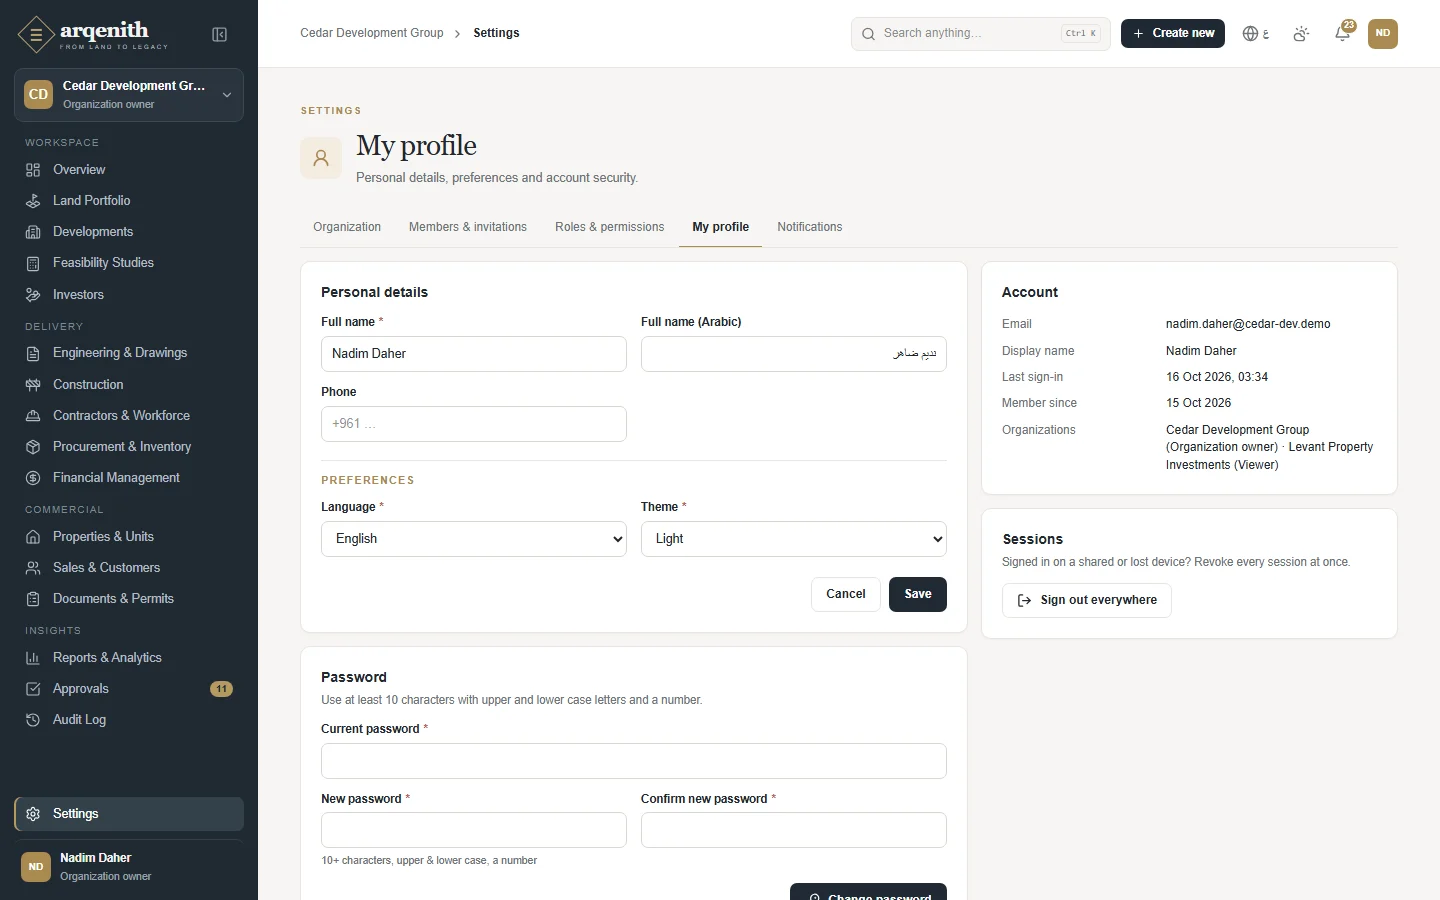
Use the ع / EN button in the top bar (on a phone it is in the menu under your avatar), or Settings → My profile → Language. The whole interface switches, and Arabic is laid out right to left. Names you enter in both languages (for example a document title and its Arabic title) are shown in the language you are using. Notification and password emails follow the language saved in your profile, and printable documents such as contracts and receipts have their own EN / عربي switch.
Which currency are amounts shown in?
Each organization has a base currency chosen when it is created (for example USD). It is used for budgets, reports and consolidated figures, and it is locked afterwards so references and ledgers stay consistent. Each development can still use its own currency, and amounts always appear with their currency code. Reports state the currency they use, and show a currency per row where a report mixes currencies.
I work for several companies. Can one account cover them all?
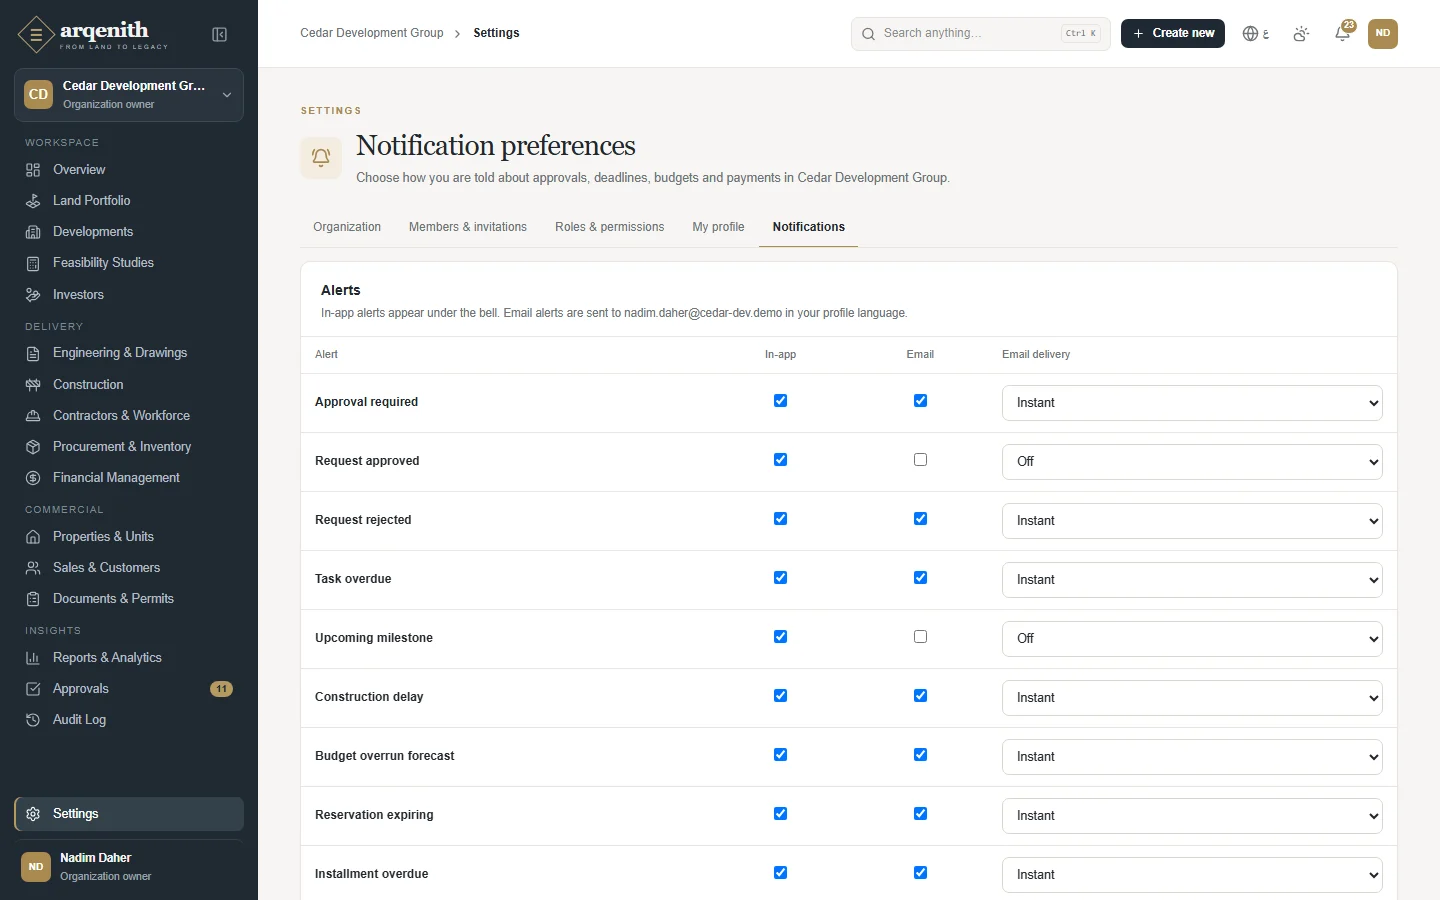
Yes. Open the organization switcher at the top of the sidebar and pick the organization to work in; you can have a different role in each. Each organization's data is completely separate. Create organization in the same menu sets up a new company workspace, in which you become the Organization owner. Notification preferences are kept separately for each organization.
Can I use Arqenith on a phone or tablet?
Yes, in the phone's browser; there is nothing to install. The sidebar folds away behind the menu button in the top bar, forms and dialogs fit the screen, and wide tables scroll sideways. Site teams can, for example, record daily reports or upload site photos from the phone.
How do I get data out of Arqenith?
Lists such as the document library, the audit log and most module registers, as well as every report, have an Export CSV button when your role includes the Export permission for that area. The file follows the filters you applied. Reports can also be printed. Contracts, receipts, statements, purchase orders, payment certificates and similar records open as printable A4 documents with Print and Download PDF buttons.
Why can't I delete a record?
Arqenith keeps a complete history, so records with business or financial effect are cancelled, voided, withdrawn or archived instead of deleted. Ledger entries are never edited; a voided expense or payment is reversed. Documents are archived and keep all their versions. Approval requests are withdrawn, members are deactivated and invitations revoked. Audit log entries can never be changed or removed.

Overview dashboard

The Overview page is the home screen: a summary of your portfolio, what needs attention today, and a checklist that guides a new company through its setup.

Who uses it: Everyone. Users with finance access (Organization owner, Administrator, Project manager, Accountant) see financial figures; other roles see unit and task figures instead.

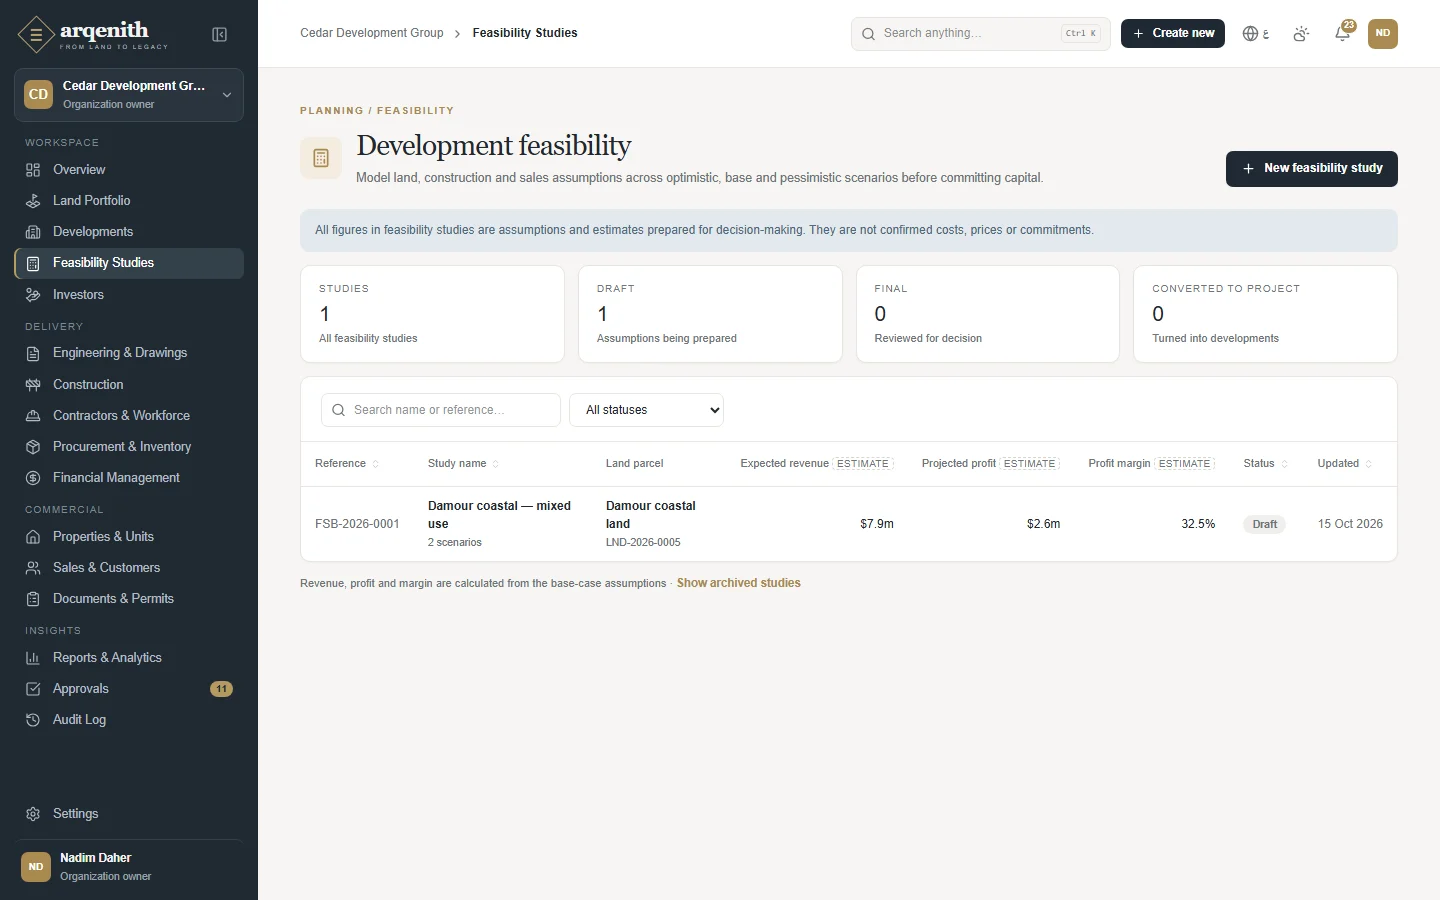
The dashboard: portfolio, construction, sales, collections and what needs attention
Figure 36. The dashboard: portfolio, construction, sales, collections and what needs attention

How to use it

  1. 1Open Overview from the top of the sidebar. The header greets you and shows today's date.
  2. 2To focus on one project, choose it in Filter by development; All developments shows the whole portfolio.
  3. 3If the Get started with Arqenith checklist is shown, follow its steps: Review organization settings, Register your first land parcel, Create a development, Set the development budget, Add buildings and units, and Invite your team. Each step opens the right screen.
  4. 4If a banner says activities need your attention, click Review activities to open your notifications.
  5. 5Use the links on each panel to go deeper: Details on the cash flow chart, Open payment schedule under upcoming payments, View all developments under portfolio progress, and View all under the development overview table.

Rules and details

  • The checklist ticks itself from real data; you cannot tick steps by hand. It only shows the steps your role can do, and disappears once all of them are done.
  • The attention banner adds up overdue tasks (not done and past their planned end), documents expiring within 30 days (including ones already expired) and approval requests waiting that you can see.
  • Financial view: Portfolio value (GDV), marked Estimate, combines contracted prices and asking prices; Total invested (actual cost) shows actual cost with the amount committed beneath; Contracted revenue shows the amount collected beneath; Projected gross margin is GDV minus the estimate at completion, divided by GDV.
  • Portfolio cash flow shows actual money in and out for the last six months including this one, with Net cash flow in red when it is negative. Upcoming payments lists up to five approved expenses with an unpaid balance due within 30 days, overdue ones included, and highlights those due within three days.
  • Without finance access you see Active developments, Units available, Units sold and Overdue tasks, plus a Unit inventory panel with Available, Reserved and Sold.
  • Everyone sees Portfolio progress (construction completion per development) and the Development overview table with status, progress and units sold.
  • A new company with no developments sees Your portfolio starts here, with a Create a development button for those allowed to create one. Archived developments are left out of the dashboard.

Questions

I did the step but the checklist did not tick it. Why?
Each step checks real records: for example, Set the development budget needs at least one budget line, and Invite your team needs a second member or a sent invitation. Reload the page after creating the record. Steps you have no permission for are not shown at all.
Why don't I see any amounts on the dashboard?
Financial figures are only shown to roles with finance access. Other roles see units and tasks instead of money.
Why is Portfolio value marked Estimate?
It mixes signed contract prices with the asking prices of units that are not sold yet. Asking prices can still change, so the total is an estimate rather than secured revenue.
↑ Back to contents

Chapter 8

Land and Feasibility

The land bank, the map, zoning and feasibility studies.

Land portfolio

Register every land parcel you own, are negotiating or are considering, with its location, ownership, acquisition costs and zoning, and see them in a table or on a map.

Who uses it: Organization owner, Administrator and Project manager add, edit and export parcels. Engineer, Accountant, Sales manager and Viewer can view them.

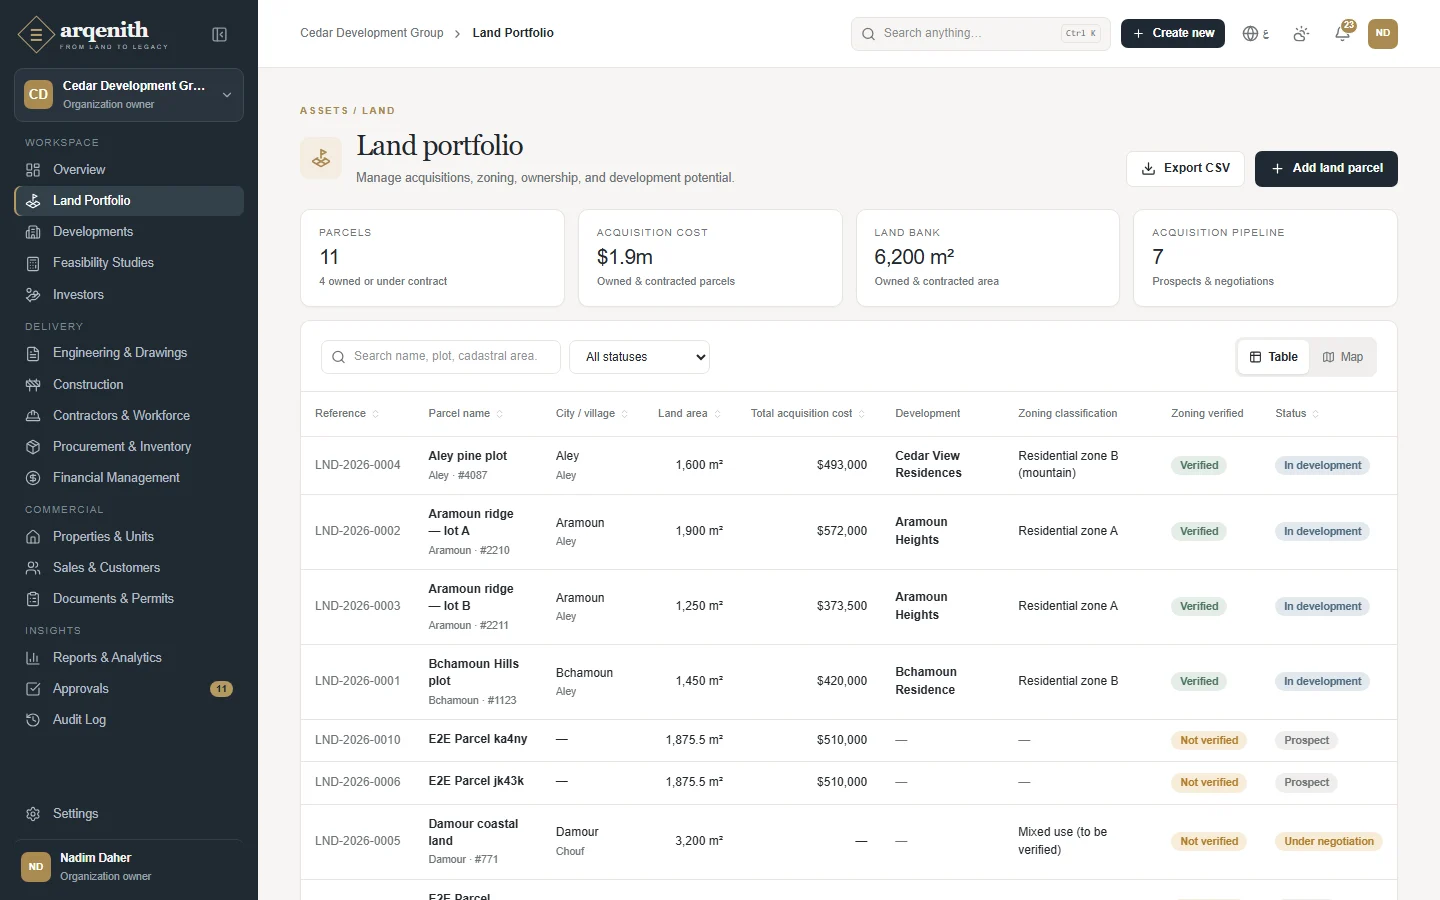
The land bank
Figure 38. The land bank
Plots on the map
Figure 39. Plots on the map

How to use it

  1. 1Open Land Portfolio in the sidebar.
  2. 2Click Add land parcel. Fill in Parcel name, Status and Land area (m²), then the Location, Ownership, Acquisition costs and Zoning & buildability sections.
  3. 3To place the parcel on the map, click Pick on map and click the location; Latitude and Longitude are filled in for you.
  4. 4Click Save. The parcel gets its reference and its page opens.
  5. 5Back on the list, search by name, plot or cadastral area, or filter by status. Switch between Table and Map to see the parcels as rows or as markers coloured by status.
  6. 6Click Export CSV to download the list. Use Show archived parcels at the bottom of the table to include archived ones.

Rules and details

  • Every parcel gets a reference such as LND-2026-0001.
  • Statuses: Prospect, Under negotiation, Under contract, Acquired, In development, Sold and Archived. You choose the status yourself; a parcel moves to In development automatically when it is linked to a development while Acquired or Under contract.
  • Total acquisition cost is calculated: purchase price + acquisition expenses + legal fees + registration fees. Each amount must be zero or more and is recorded in the parcel's currency (USD, LBP, EUR, AED, SAR or GBP; your company's base currency by default).
  • Permitted construction area, if left empty, is calculated as land area × floor area ratio. Building coverage ratio must be between 0 and 100%, and permitted floors between 0 and 200.
  • Tiles: Parcels counts parcels that are not archived; Acquisition cost and Land bank add up the cost and area of parcels that are Acquired, In development or Under contract (the cost tile only includes parcels in your base currency); Acquisition pipeline counts parcels that are Prospect or Under negotiation.
  • The map shows up to 500 parcels that match your search and filter. Parcels without coordinates are counted under the map instead of being shown.
  • The country list covers Lebanon, United Arab Emirates, Saudi Arabia and Cyprus.

Questions

Why is my parcel missing from the map?
It has no latitude and longitude. Open the parcel, click Edit, use Pick on map to set its position and save.
Why is the Acquisition cost tile lower than the sum of my parcels?
The tile only counts owned or contracted parcels (Acquired, In development, Under contract) whose currency is your company's base currency. Prospects and parcels in other currencies are left out.
How do I delete a parcel?
Parcels are not deleted; they are archived. Open the parcel and click Archive. It disappears from the list and can be brought back at any time with Restore.

Land parcel page

Everything about one parcel: identity, location, zoning and buildability checks, acquisition costs, the developments built on it, its feasibility studies and its documents.

Who uses it: Organization owner, Administrator and Project manager edit, archive and assign the parcel to developments. Roles with document rights upload attachments. Anyone who can view land can read the page and comment.

A plot with its zoning figures and documents
Figure 40. A plot with its zoning figures and documents

How to use it

  1. 1Open a parcel from the Land portfolio list.
  2. 2Click Edit to change any field. To record that the zoning was confirmed with the authority, tick Zoning verified and set the Verification date.
  3. 3Under Attachments, click Upload document to add the deed, survey or zoning certificate; the category starts as Ownership deed.
  4. 4Under Developments on this land, click Assign to development, choose the Development, the Relationship (Primary site, Partial, Option or Access), the Cost allocation % and, if useful, the Area used.
  5. 5Click Run feasibility to start a feasibility study with this parcel already selected.
  6. 6Click Release on a development row to end the link, or Archive at the top to take the parcel out of the active list.

Rules and details

  • Document your due diligence with the Zoning verified flag and date, the zoning figures and the attachments, each of which shows its approval status. If you tick Zoning verified without a date, today's date is used.
  • Maximum footprint = land area × building coverage ratio. Land cost per buildable m² = total acquisition cost ÷ permitted construction area. The cost tile also shows the cost per m² of land.
  • Cost allocation spreads the parcel's cost across the developments that use it. The active allocations of one parcel can never total more than 100%, and a development can only have one active link to the same parcel. Assign to development is hidden once 100% is allocated.
  • Releasing a link keeps it in the table, faded, with the relationship Former and the release date. It frees its allocation but does not change the parcel's status back.
  • Assigning the parcel to a development moves it to In development if it was Acquired or Under contract. Nothing sets Sold automatically.
  • An archived parcel shows a banner and can still be edited; click Restore to make it active again.
  • Activity shows every change to the parcel with who made it and when, and Comments lets the team discuss it.

Questions

Why is Assign to development missing?
Either 100% of the parcel's cost is already allocated, or your role cannot edit developments. Release an existing link or lower its share first, or ask a Project manager or Administrator.
I get The land parcel's cost allocation would exceed 100%. What does it mean?
The shares you have allocated to developments on this parcel would add up to more than 100%. Enter a smaller Cost allocation % so that the total stays at or below 100%.
I released the development but the parcel still says In development.
Releasing a link never changes the parcel's status. Click Edit and set the status you want.

Feasibility studies

Test whether a site is worth developing before committing to it. Each study holds optimistic, base and pessimistic scenarios and shows expected revenue, profit and margin.

Who uses it: Organization owner, Administrator and Project manager create and edit studies. Accountant, Sales manager and Viewer can view them.

Feasibility studies
Figure 41. Feasibility studies

How to use it

  1. 1Open Feasibility Studies in the sidebar.
  2. 2Click New feasibility study. Enter the Study name, optionally choose a Land parcel, pick the Currency and add Notes.
  3. 3Save. The study opens with three scenarios ready: Optimistic, Base case and Pessimistic.
  4. 4Back on the list, search by name or reference, filter by status, and compare studies by their expected revenue, projected profit and profit margin.
  5. 5Turn on Show archived studies to see archived ones.

Rules and details

  • Every study gets a reference such as FSB-2026-0001.
  • Statuses: Draft, Final, Converted to project and Archived.
  • If you choose a land parcel, the scenarios start with its total acquisition cost as the land price (or the purchase price if no total is recorded), its land area, its permitted construction area and permitted floors, and the study uses the parcel's currency.
  • Starting assumptions: the base case uses engineering fees 6%, contingency 7%, marketing 2% and 28 months; the optimistic case 5%, 5% and 24 months with sale price +10% and cost −5%; the pessimistic case 7%, 10%, marketing 3% and 34 months with sale price −12% and cost +10%. Construction cost and sale price per m² start at zero, so you enter them in each scenario.
  • The list's Expected revenue, Projected profit and Profit margin come from the base case's saved assumptions and are marked Estimate.
  • All figures in a study are assumptions and estimates, not accounting records.

Questions

Why does my new study show zero revenue?
Sale price and construction cost per m² start at zero. Open the study, enter them in each scenario and click Save scenario.
I picked USD but the study is in another currency.
When you link a land parcel, the study takes the parcel's currency. The currency cannot be changed after the study is created, so create a new study if it is wrong.

Feasibility study page

Work out a study's scenarios: enter the assumptions, read the results, cash flow and comparison, mark the study final, and convert the chosen scenario into a development.

Who uses it: Organization owner, Administrator and Project manager edit scenarios and change the status; only Organization owner and Administrator can delete custom scenarios and convert a study into a development. Accountant, Sales manager and Viewer can read it.

A feasibility study with scenarios and returns
Figure 42. A feasibility study with scenarios and returns

How to use it

  1. 1Open a study and choose a scenario tab: Optimistic, Base case, Pessimistic or a custom scenario.
  2. 2In Assumptions, fill in Land & site, Areas & programme, Development costs, and Sales & timing, then click Save scenario. Discard changes undoes unsaved edits; a dot on the tab marks unsaved changes.
  3. 3To test another case, click Add custom scenario, give it a Scenario name and choose which scenario to Start from.
  4. 4Read the results, the warnings, the Cash flow (Table view or Chart view), the Scenario comparison and the cost breakdown.
  5. 5When the study is agreed, click Mark as final. Return to draft reopens it as a draft; Archive puts it away and Restore brings it back as a draft.
  6. 6Click Convert to development, choose the Scenario, enter the Development name and Start date, and confirm. The new development opens.

Rules and details

  • Formulas: construction = constructed area × cost per m²; engineering = construction × engineering %; contingency = (construction + engineering) × contingency %; revenue = saleable area × sale price per m²; marketing = revenue × marketing %; total cost = land + construction + engineering + contingency + permits + legal + financing + marketing; profit = revenue − total cost.
  • Profit margin = profit ÷ revenue. Return on cost = profit ÷ total cost. Break-even price per m² = total cost ÷ saleable area. FAR utilisation = constructed area ÷ permitted construction area. A ratio that would divide by zero shows —.
  • Warnings, which never stop you saving: constructed area above the permitted area, saleable area above the constructed area, a loss, and a thin margin below 15%.
  • Cash flow is spread over the development duration (1 to 120 months): land and legal fees go out in month 1, the other costs evenly every month; 20% of revenue comes in evenly over the months and the remaining 80% in the last month. Peak funding need is the lowest point of the cumulative balance.
  • Scenario comparison shows each scenario's revenue, total cost, profit, margin, return on cost and break-even next to its difference from the base case, including unsaved edits (marked *).
  • Validation: values cannot be negative, percentages cannot exceed 100, counts are whole numbers, and the duration is required. Results are always recalculated when you save.
  • Mark as final is a label, not an approval: a final study can still be edited. Converting is permanent: the study becomes Converted to project and can no longer be edited.
  • Converting creates a development in the Planning phase with a target completion of start date + duration, links the parcel as its Primary site at 100% allocation, and creates draft budget lines for each cost with an amount above zero.

Questions

Which figures does a study give me?
For each scenario: revenue, total cost, profit, profit margin, return on cost, break-even price per m², cost per constructed m², FAR utilisation and peak funding need, plus a monthly cash flow and a comparison with the base case.
Why can't I convert the study?
Converting creates a development and its budget, so it needs the right to create developments and to edit finance. By default only the Organization owner and Administrator have both. A study that is archived or already converted cannot be converted again.
Conversion fails with a land allocation message.
Converting links the parcel at 100% of its cost. If part of the parcel is already allocated to another development, release that link on the land parcel page first, then convert again.
Will my unsaved changes be used when converting?
No. Conversion uses the scenario's saved results. Click Save scenario first.
↑ Back to contents

Chapter 9

Developments, Units and Engineering

Developments and their workspace, buildings and floors, units, and the drawing register.

Developments

The list of all your projects, and the wizard that creates a new one with its schedule, project manager and land.

Who uses it: Every role can view developments they have access to. Organization owner, Administrator and Project manager create, edit and export them.

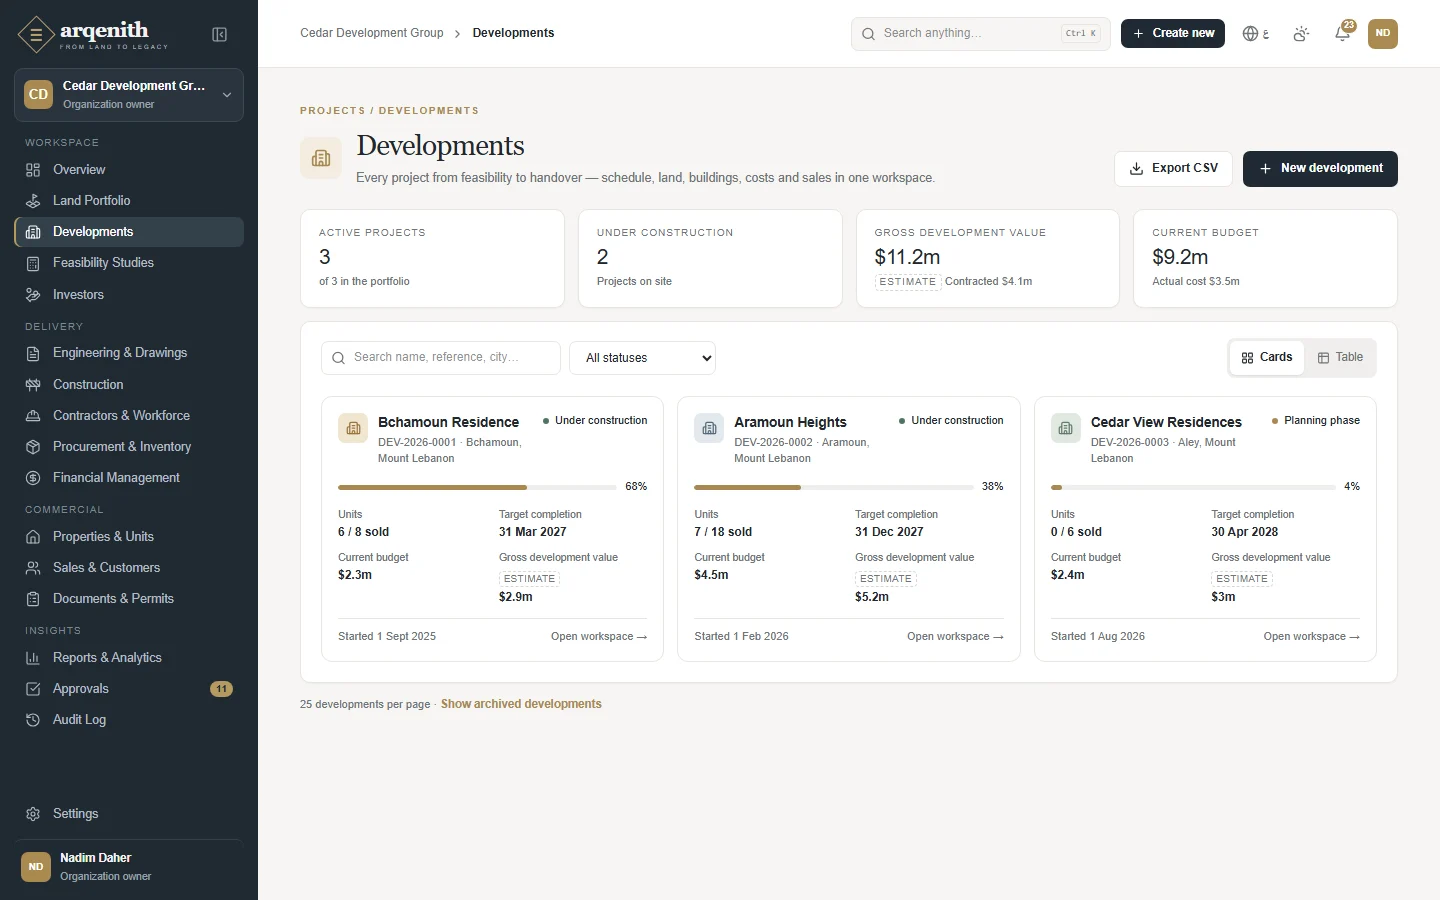
Developments
Figure 43. Developments
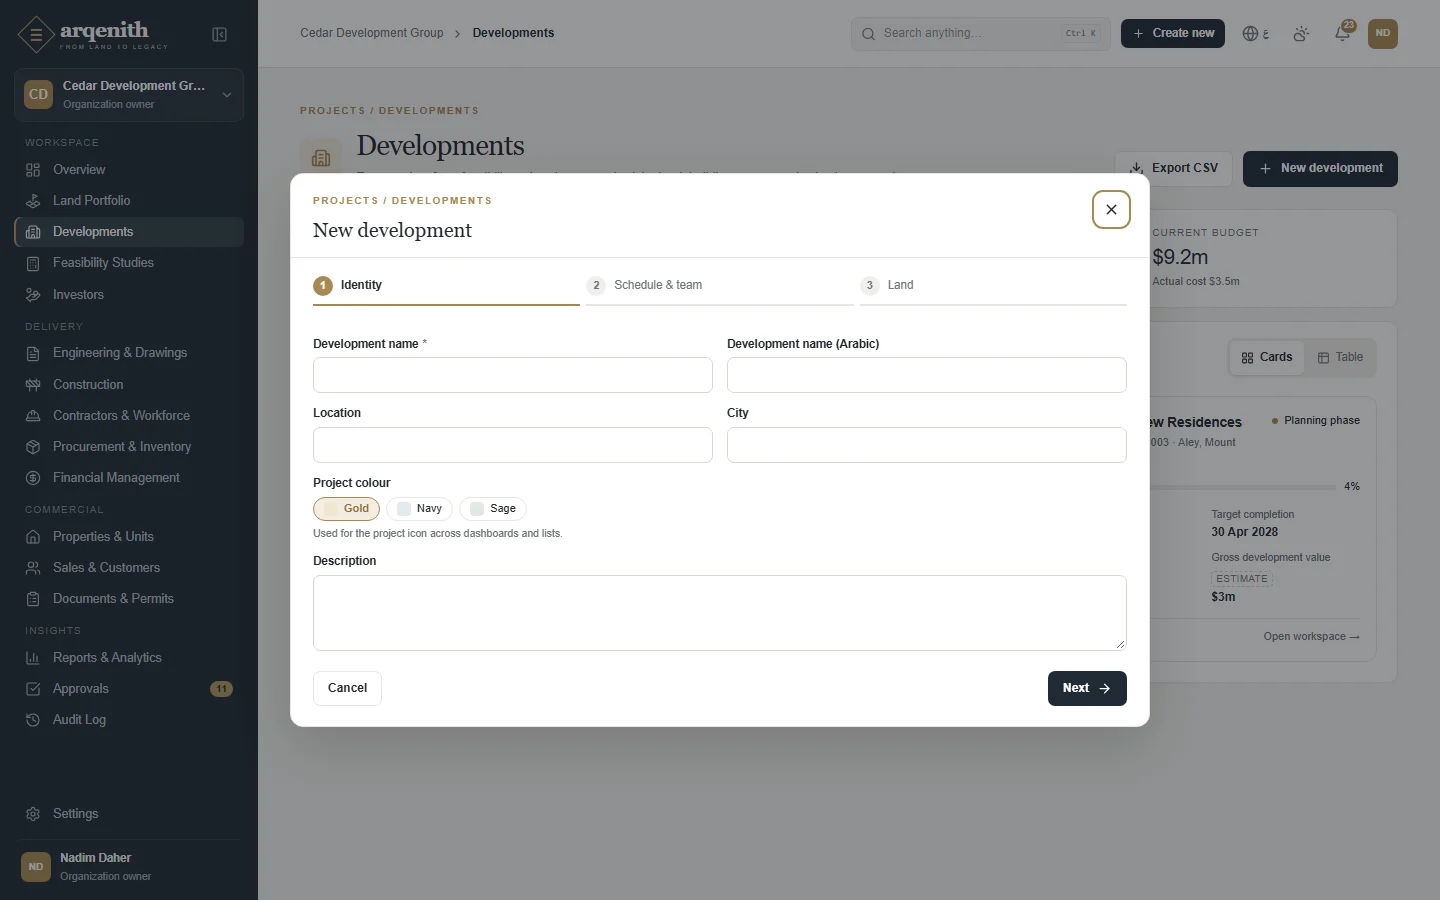
Creating a development
Figure 44. Creating a development

How to use it

  1. 1Open Developments in the sidebar. Search by name, reference or city, filter by Status, and switch between Cards and Table.
  2. 2Click New development. In Identity, enter the Development name (and optionally the Arabic name), Location, City, Project colour and Description, then click Next.
  3. 3In Schedule & team, choose the Status, the Project manager, the Start date and the Target completion, then click Next.
  4. 4In Land, tick the parcels this development uses and set each parcel's Cost allocation and Relationship. This step is optional.
  5. 5Click Create development. The new development's workspace opens.
  6. 6Use Open workspace on a card to enter a development, Export CSV to download the list, and Show archived developments to include archived ones.

Rules and details

  • Every development gets a reference such as DEV-2026-0001.
  • A new development can start as Feasibility, Planning phase, Design, Permitting, Under construction or On hold; it cannot start as Completed, Handed over or Cancelled. Planning phase is the default.
  • Target completion must be on or after the start date. The project manager you choose is also added to the project team.
  • The project currency is set to your company's base currency; you can change it later with Edit in the workspace.
  • Only parcels that are not archived and are Prospect, Under negotiation, Under contract, Acquired or In development are offered. A parcel's active allocations across all developments can never exceed 100%.
  • Tiles: Active projects counts every stage except Completed, Handed over and Cancelled; Under construction counts those on site. Finance users also see Gross development value and Current budget; others see Units and Sell-through (sold and handed-over units as a share of all units).

Questions

The development was created but the land was not linked.
The development is saved even if the land link fails, for example because the parcel's allocation would exceed 100%. Open the development's Land tab and use Link land parcel.
Why is there no New development button?
Creating developments needs the create permission, which Organization owner, Administrator and Project manager have by default.
How do I delete a development?
Developments are not deleted. Open it and click Archive; it leaves the active lists and dashboards and can be restored later.

Development workspace

One place for everything about a development: its stage, team and figures, and a tab for each part of the project, from land and buildings to budget, sales and documents.

Who uses it: Everyone with access to the development can open it; each tab only appears if your role can view that module (for example Budget and Expenses need finance access). Organization owner, Administrator and Project manager edit it and move it between stages.

A development's overview
Figure 45. A development's overview
A development's budget
Figure 46. A development's budget
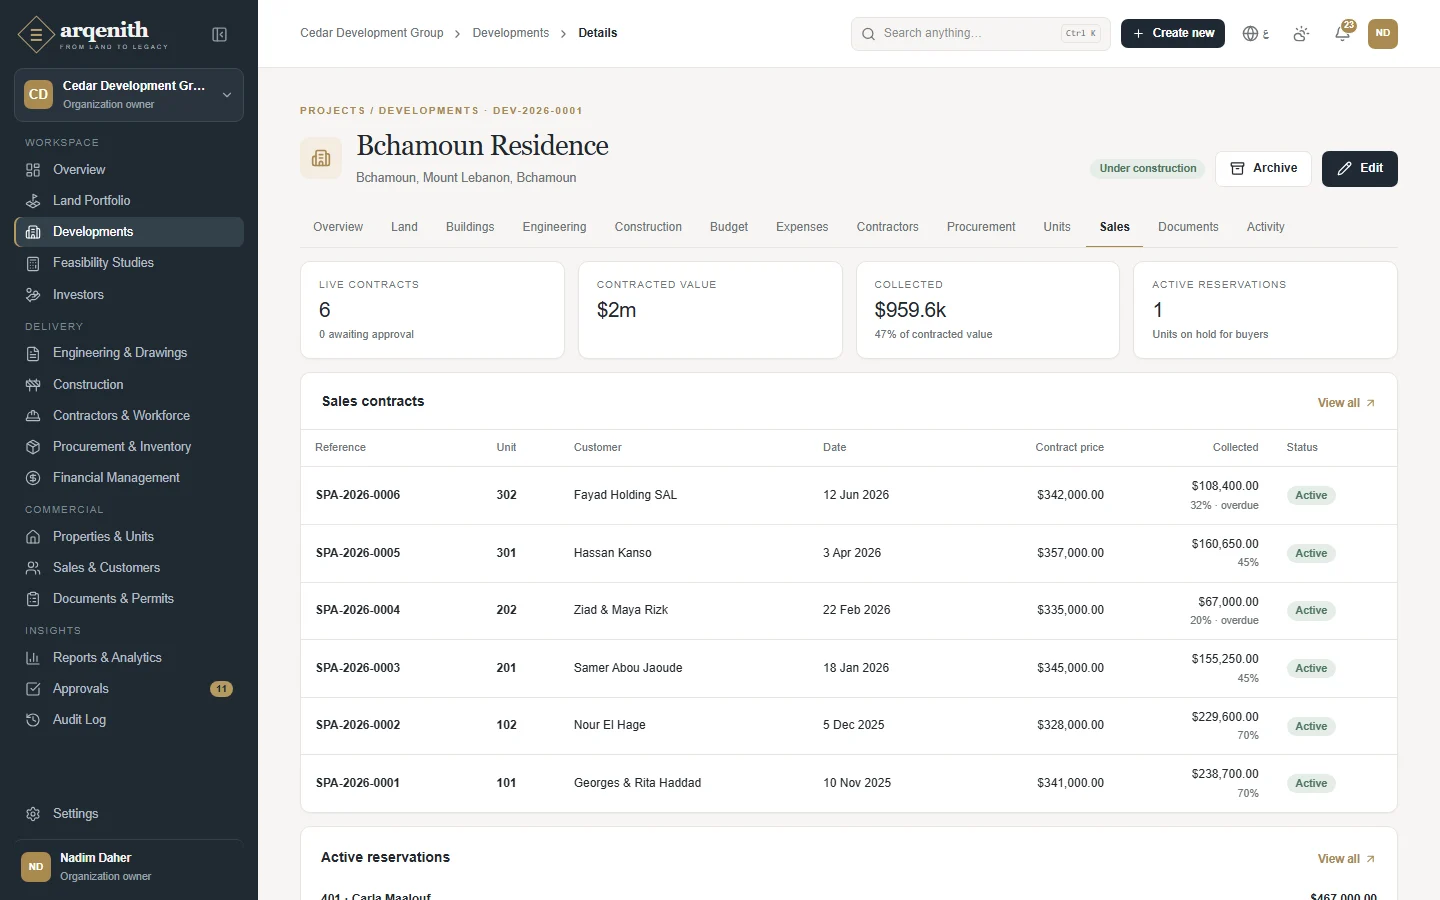
A development's sales
Figure 47. A development's sales
A development's activity history
Figure 48. A development's activity history

How to use it

  1. 1Open a development from the Developments list. Use the tabs: Overview, Land, Buildings, Engineering, Construction, Budget, Expenses, Contractors, Procurement, Units, Sales, Documents and Activity.
  2. 2On Overview, use the Lifecycle panel to move the development to its next stage, for example Move to Design. The panel only offers the stages allowed from the current one.
  3. 3On Overview, under Project team, click Add member, choose the Member and their Project role.
  4. 4Click Edit at the top to change the name, location, Project currency, dates or project manager.
  5. 5Use the action buttons on the tabs to work in context: Link land parcel on Land, Add building on Buildings, Generate units on Units, Record expense on Expenses, New purchase order on Procurement, Upload document on Documents.
  6. 6Click Archive when the project is no longer active; Restore brings it back.

Rules and details

  • Stages and allowed moves: Feasibility → Planning, On hold or Cancelled; Planning → Feasibility, Design, Permitting, Under construction, On hold or Cancelled; Design → Planning, Permitting, Under construction, On hold or Cancelled; Permitting → Design, Under construction, On hold or Cancelled; Under construction → Completed or On hold; Completed → Handed over or back to Under construction; On hold → Planning, Design, Permitting, Under construction or Cancelled. Handed over and Cancelled are final.
  • Moving to Completed sets the actual completion date to today if it is empty. A cancelled development cannot be reactivated.
  • Overview shows construction progress and units sold; finance users also see Current budget, Actual cost, Committed, Estimate at completion, Expected revenue and Collected, and the projected profitability: gross profit = expected revenue − estimate at completion, margin = profit ÷ revenue, return on cost = profit ÷ estimate at completion, break-even price = estimate at completion ÷ saleable m².
  • Budget shows each cost category in base currency with Original, Current budget, Approved budget, Committed, Actual, estimate at completion and Variance. Variance = current budget − estimate at completion, so a negative variance means an expected overrun. Manage budget opens Finance.
  • Engineering and Construction are read-only summaries with links to Open engineering and Open construction. Expenses shows the 25 most recent, Procurement up to 50 purchase orders, Contractors the contracts with their current value, and Sales the live contracts, amounts collected and active reservations.
  • Land shows the linked parcels and their share of land cost, converted to base currency at the rate on the acquisition date. Unlink keeps the row as Former and frees its allocation.
  • Activity lists the 40 most recent changes to the development, its buildings, land links, team and units.
  • Adding a team member needs the create permission for developments; removing one with Remove from team is limited to the Organization owner and Administrator. An archived development shows a banner and hides the lifecycle, team, land and building actions until it is restored.

Questions

Why can't I cancel a development that is under construction?
Under construction can only move to Completed or On hold. Put it On hold first; from On hold it can be cancelled. Cancelling is final.
Why don't I see the Budget or Sales tab?
Each tab follows the permission of its module. Budget and Expenses need finance access, Sales needs sales access, Engineering needs engineering access, and so on.
Where do I change the development's stage?
Not in Edit. Use the Lifecycle panel on the Overview tab, which offers only the stages allowed from the current one.

Buildings and floors

Set up the buildings of a development and the floors inside them, so that units can be placed on the right floor.

Who uses it: Organization owner, Administrator and Project manager add and edit buildings and floors. Everyone with access to the development can view them.

Buildings and floors of a development
Figure 49. Buildings and floors of a development

How to use it

  1. 1Open the development and go to the Buildings tab.
  2. 2Click Add building. Enter the Building code (A, B, C… is suggested), the Building name, its Status, Floors above ground, Basement levels, areas, Parking spaces and Budget allocation, then save.
  3. 3In the building's panel, click Add floor. Enter the Level, Floor type and Floor name, and optionally the Floor area.
  4. 4Use the pencil icon to edit a floor, and Edit on the building panel to edit the building.
  5. 5Click Units on a building to see its units, or Generate units to create them in bulk (floors that do not exist yet are created for you).

Rules and details

  • The building code is required, up to 20 characters and unique within the development.
  • Building statuses: Planned, Design, Under construction, Structure complete, Finishing and Completed. You can set any status at any time.
  • Floor levels go from −10 to 200 and are unique within a building: 0 is the ground floor and negative levels are basements. The next level is suggested for you.
  • Floor types: Basement, Parking, Ground, Mezzanine, Typical, Penthouse and Roof.
  • Budget allocation is a planning figure in base currency; the controlled budget is kept in Finance.
  • Each building panel shows its total units, how many are sold and how many are available.
  • Buildings and floors cannot be deleted. Floor plans are attached to units as documents with the Floor plan category (see Unit page).

Questions

Why can't I add a building?
Either your role cannot create in developments, or the development is archived. Restore it first.
Saving a floor fails because the level exists.
Each level can only be used once per building. Edit the existing floor instead, or pick another level.

Properties and units

See every unit across your buildings floor by floor, add units one at a time or in bulk, and update asking prices for a whole building.

Who uses it: Every role with access to developments or sales can view units. Organization owner, Administrator and Project manager add, generate and reprice them.

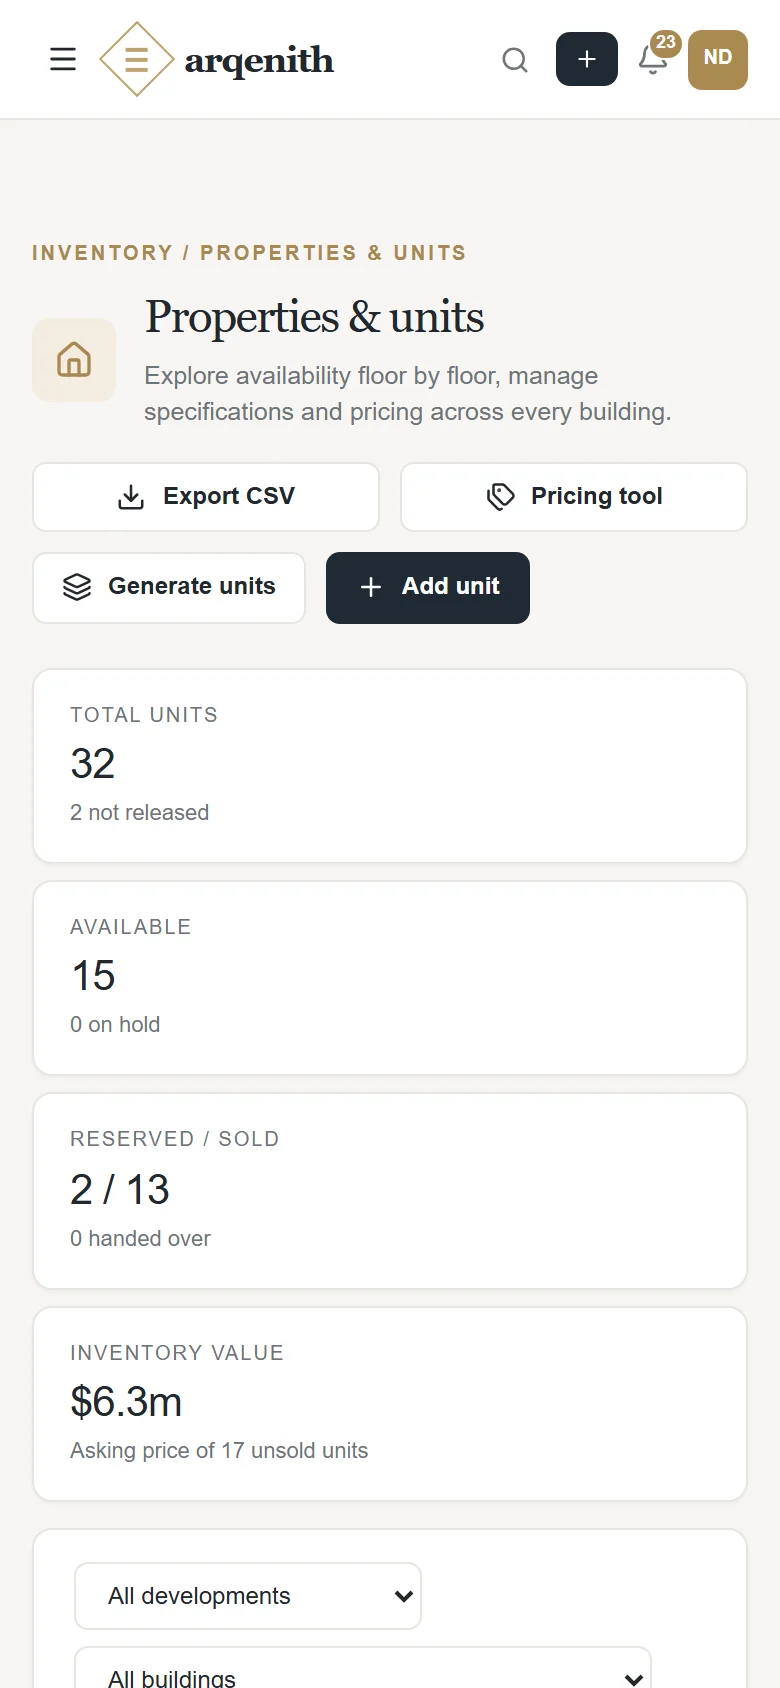
The units explorer
Figure 50. The units explorer

How to use it

  1. 1Open Properties & Units in the sidebar. Filter by Development, Building, Status and Type, and switch between Building explorer and Table (search is available in Table).
  2. 2In the explorer, open a building and choose All floors or a floor chip, then click a unit to open it.
  3. 3To add one unit, click Add unit, choose the Building & floor, and enter the Unit number, Unit type, areas, bedrooms, bathrooms, parking, Asking price and Status.
  4. 4To add many, click Generate units: choose the Building, From level and To level, Units per floor, Unit type, areas, rooms, optional Price per m² and the Numbering pattern, then save.
  5. 5To reprice, click Pricing tool: choose the Building, enter the Price per m², keep Select all or pick units, check the preview of current and new prices, and click Apply prices.

Rules and details

  • Unit statuses: Not released, Available, On hold, Reserved, Sold and Handed over. You can only move a unit between Not released, Available and On hold; Reserved, Sold and Handed over are set by the sales process.
  • Bulk generation: up to 50 units per floor and 1,000 per run. The numbering pattern must contain {seq} (01, 02…) and may contain {floor} (the level), so the default {floor}{seq} gives 101, 102… on level 1. Missing floors are created automatically.
  • Generated units are created as Available, without terrace or parking. Unit numbers that already exist in the building are skipped. With a price per m², asking price = price × (internal area + balcony area).
  • Unit numbers are unique within a building. Internal area must be more than zero and the asking price zero or more.
  • The pricing tool works on one building and up to 500 units at a time. New price = price per m² × saleable area. Only Not released, Available and On hold units are repriced; units reserved in the meantime are skipped and you are told how many.
  • Inventory value adds up the asking prices of Not released, Available and On hold units in your base currency.

Questions

Why are Add unit and Generate units disabled?
Units need a building. Add a building on the development's Buildings tab first. Add unit also needs at least one floor; Generate units creates the floors for you.
Generate units created fewer units than I expected.
Unit numbers that already exist in the building are skipped. Check the numbering pattern, or use a different pattern for the new units.
How do I mark a unit as sold?
Not on the unit. A unit becomes Reserved when a reservation is made and Sold through a sales contract. Use Sales & Customers.

Unit page

The full record of one unit: its specifications, areas, prices, floor plans, sales history, status history and estimated profitability.

Who uses it: Anyone who can view units opens the page. Organization owner, Administrator and Project manager edit it; Sales manager and Sales agent can reserve an available unit; finance roles see its profitability.

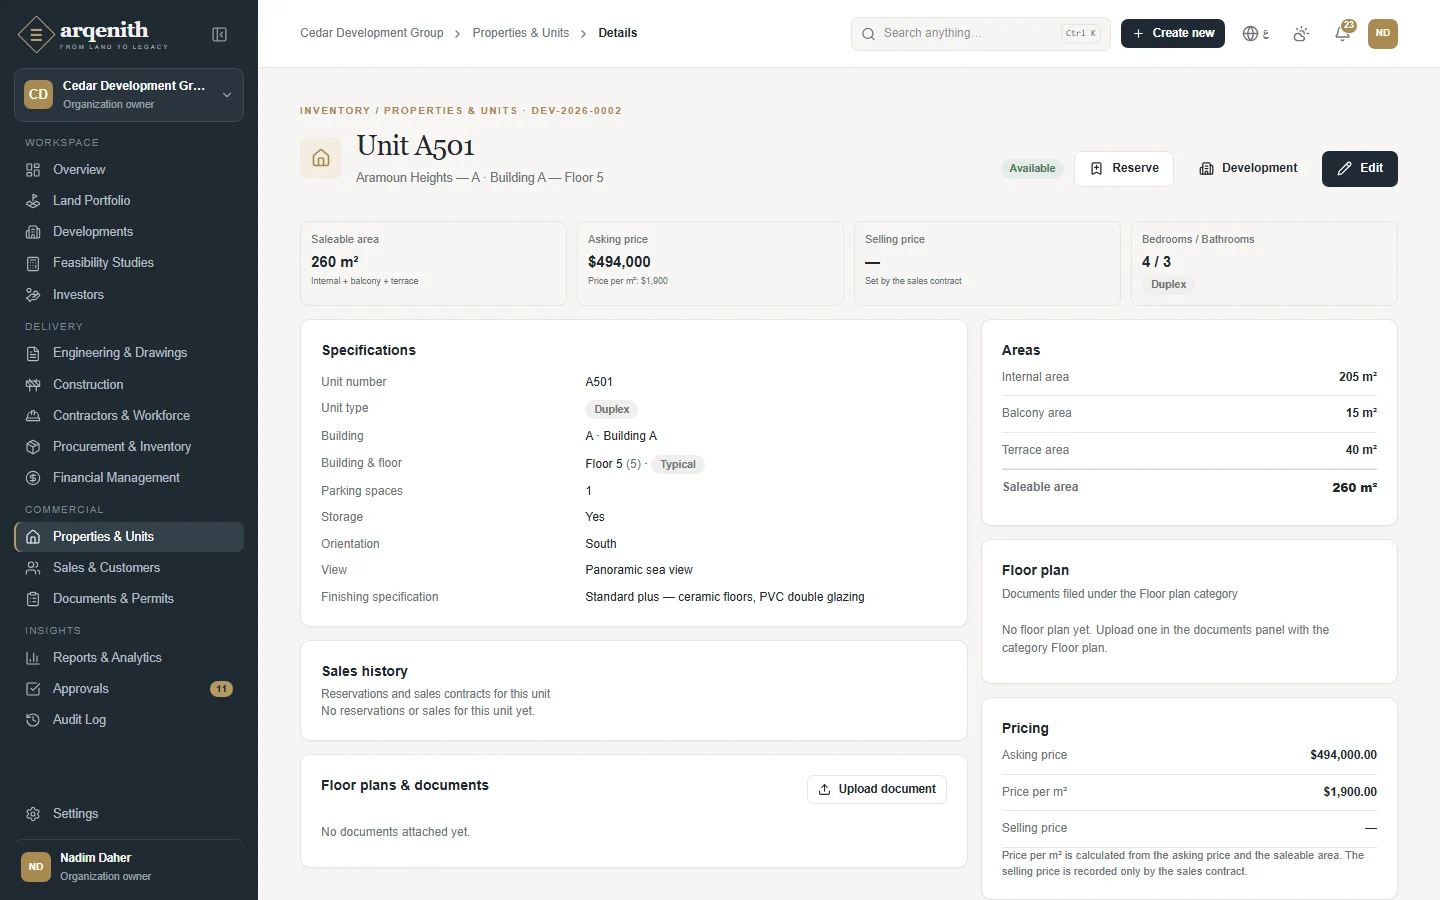
A unit
Figure 51. A unit

How to use it

  1. 1Open a unit from the explorer or the table.
  2. 2Click Edit to change specifications, the asking price or the status.
  3. 3Under Floor plans & documents, upload the unit's plans; the category starts as Floor plan, and they then appear under Floor plan with an Open button.
  4. 4If the unit is Available, click Reserve to start a reservation for it.
  5. 5Check Sales history for its reservations and contracts and Status history for every status change.

Rules and details

  • Saleable area = internal area + balcony area + terrace area. Price per m² = asking price ÷ saleable area. Both are calculated for you.
  • The selling price is set by the sales contract; it cannot be typed on the unit.
  • Once a unit is Reserved, Sold or Handed over, Edit only allows specifications; the price and status are locked.
  • Estimated profitability uses the contracted price if there is a contract, otherwise the asking price, and allocates cost as the project's estimate at completion × this unit's share of the project's saleable area.
  • Status history records who changed the status (or System for automatic changes) and the reason.
  • Units cannot be deleted, and a unit with a reservation or a contract stays linked to it.

Questions

Why can't I change the price of this unit?
It is reserved, sold or handed over. Its price is now governed by the reservation or sales contract.
Why is there no Reserve button?
Reserve appears only for Available units and only for roles that can create sales records.

Engineering and drawings

Keep a controlled register of every drawing by discipline, see which revision is approved for use, and follow engineering contracts, fee milestones and engineering tasks.

Who uses it: Organization owner, Administrator, Project manager and Engineer add and edit drawings; Site supervisor and Viewer can view them. Organization owner, Administrator and Project manager approve revisions and export the register.

The drawing register
Figure 52. The drawing register

How to use it

  1. 1Open Engineering & Drawings in the sidebar.
  2. 2Click New drawing. Choose the Development, Building and Discipline, enter the Drawing number, Scale and Drawing title, and optionally the Author (consultant / engineer).
  3. 3Save; the drawing's page opens, where you upload its first revision.
  4. 4In the Drawing register, filter by development, and use the discipline tabs and the search box to find a drawing by number or title.
  5. 5Under Fee milestones, click Mark achieved when a consultant milestone is reached, and use New engineering task to plan design work.
  6. 6Click Export CSV to download the register.

Rules and details

  • Disciplines: Architectural, Structural, Electrical, Mechanical, Plumbing, Civil, Site plan, Floor plan and Landscape.
  • The drawing number is typed by you (for example BCH-A-101), is up to 60 characters and must be unique within the development.
  • Current revision is the approved revision in use; Latest revision is the newest one uploaded, whatever its status. A drawing with no approved revision shows No approved revision.
  • Tiles show the number of drawings (and how many have an approved revision), revisions in review, engineering fees and open engineering tasks.
  • Engineering contracts show the current fee: original value plus approved amendments. Mark achieved works on pending milestones and records today's date; it needs the right to edit contractors.
  • New engineering task needs at least one construction phase in the development, and its planned finish cannot be before its start.

Questions

What is the difference between Current revision and Latest revision?
Current revision is the one approved for use on site. Latest revision is simply the newest upload, which may still be a draft or in review. Build from the current revision.
Why can't I reuse a drawing number?
Drawing numbers are unique within a development. Upload a new revision to the existing drawing instead of creating a second one.

Drawing page and revisions

Issue new revisions of a drawing, preview them, send them for review and approve or reject them, keeping a complete revision history.

Who uses it: Organization owner, Administrator, Project manager and Engineer upload revisions and submit them for review. Only Organization owner, Administrator and Project manager approve or reject.

A drawing and its revisions
Figure 53. A drawing and its revisions

How to use it

  1. 1Open a drawing from the register and click Upload revision.
  2. 2Choose the Drawing file, check the suggested Revision code, choose what it is Issued for, set the Issue date and add a Revision description, then click Upload & register. The revision is saved as a draft.
  3. 3Click Submit for review on the draft revision.
  4. 4The reviewer opens the drawing, previews the revision and clicks Approve (with an optional comment) or Reject (with a Reason for rejection).
  5. 5Use the eye icon to preview any revision and Download to save its file. Revision history lists all revisions with their status.

Rules and details

  • Revision statuses: Draft, In review, Approved, Rejected and Superseded. When a revision is approved, the previously approved one becomes Superseded and the drawing's current revision changes to the new one.
  • Rejected and superseded revisions are final. To change a drawing, upload a new revision.
  • The revision code is suggested from the newest revision: A for the first, then the next letter (A → B), or the next number keeping its padding (P01 → P02). It must be unique for the drawing.
  • Issued for: For information, For review, For tender, For construction or As built.
  • Accepted files include PDF, images, DWG, DXF, ZIP and Office files, up to 50 MB. PDFs and images are previewed on the page; CAD files are downloaded.
  • Each upload is kept as a permanent version of the drawing's document. A superseded revision carries a warning not to use it for construction.
  • Comments entered while reviewing are saved on that revision.

Questions

I am an engineer. Why can't I approve a revision?
Approval is reserved for the Organization owner, Administrator and Project manager by default. Engineers prepare and submit revisions.
My revision was rejected. Can I fix it?
A rejected revision cannot be reopened. Read the reason, correct the drawing and upload it as a new revision.
Why can't I preview a DWG file?
Only PDFs and images are shown on the page. Use Download to open CAD files in your own software.
↑ Back to contents

Chapter 10

Construction

Planning, tasks, daily reports, issues and change orders, BOQ, payment certificates, workforce and equipment.

Construction control center

A live picture of work on site across all developments or one: progress, phases, overdue and critical work, milestones, open issues and recent site reports.

Who uses it: Every role except Sales manager and Sales agent can view construction. Organization owner, Administrator, Project manager, Engineer and Site supervisor create and edit; Organization owner, Administrator and Project manager approve.

Construction overview
Figure 54. Construction overview

How to use it

  1. 1Open Construction in the sidebar. The tabs across the top lead to Control center, Planning & WBS, Tasks, Site reports, Issues, Bill of quantities, Payment certificates, Workforce and Equipment.
  2. 2Choose a development in the Development filter, or keep All developments.
  3. 3Read the tiles, then the Phase progress, Critical and overdue activities and Upcoming milestones panels. Click a task to open its details.
  4. 4Use Open planning and Open timeline to jump to the plan or the Gantt view, and the Quick actions to reach the task board, site reports, issues, the bill of quantities or payment certificates.
  5. 5Click New site report to record today's report.

Rules and details

  • Weighted progress for one development is its overall progress; for all developments it is the simple average of developments that have at least one phase.
  • Active phases counts phases in progress, and its hint shows how many are delayed (not completed and past their planned finish).
  • Overdue tasks are not done and past their planned finish. Open issues counts issues that are Open, In review or Answered.
  • Critical activities are open tasks marked critical. Milestones (30 days) are open milestone tasks due in the next 30 days.
  • The tiles also show open RFIs and change orders in review.
  • Every day, assignees are reminded of overdue tasks, and approvers of milestones due within 7 days and of phases more than 3 days late.

Questions

The control center says No phases planned yet.
The development has no plan. Click Apply template to go to Planning & WBS, where you can apply a phase template or add phases by hand.
Why does the progress for all developments differ from the portfolio figure I expected?
With All developments selected, progress is a simple average of each development's progress, without weighting by size.

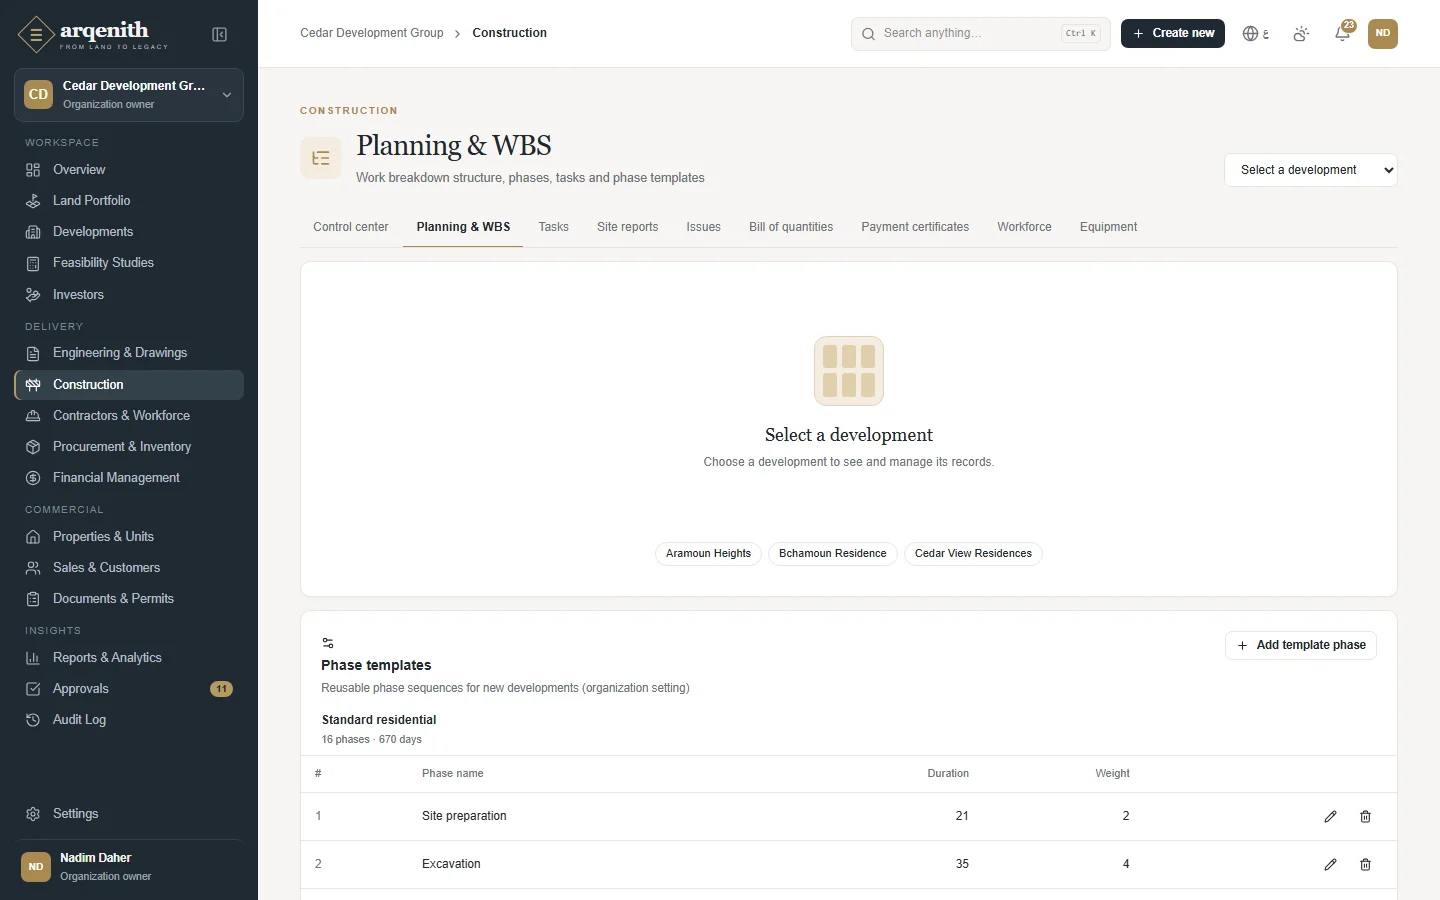
Planning and WBS

Build the work breakdown structure of a development: phases, tasks and sub-tasks with dates and weights, quickly started from a phase template.

Who uses it: Organization owner, Administrator, Project manager, Engineer and Site supervisor create and edit phases, tasks and templates. Only Organization owner and Administrator delete phases.

Phases and milestones
Figure 55. Phases and milestones

How to use it

  1. 1Open Construction, go to Planning & WBS and choose a development.
  2. 2Click Apply template, choose the Template, the Start date and optionally the Building. The template's phases are created one after another from that date.
  3. 3Or click New phase and enter the WBS code, Phase name, Status, Weight and the Schedule dates.
  4. 4Click the + on a phase row (New task in the phase) or New task to add tasks; choose a Parent task to create a sub-task. Tick Milestone for key dates.
  5. 5Use the edit and delete icons on a phase row to change or remove it.
  6. 6Under Phase templates, use Add template phase to build your own templates with a Sequence, Duration, Phase name and Weight.

Rules and details

  • Phase statuses: Not started, In progress, On hold and Completed. You set the phase status yourself.
  • Phase progress = the weighted average of its top-level tasks (each task's progress × its weight). Sub-tasks do not count. A phase without tasks is 100% when Completed, otherwise 0%. You can set a Manual progress override instead; leave it empty to calculate from tasks.
  • Development progress = the weighted average of its phases, using each phase's Weight.
  • The WBS code of a phase is required and unique within the development (for example 3 or 3.2). Planned finish cannot be before planned start. Weights must be greater than zero.
  • Applying a template schedules phases back to back, each lasting its template duration. Applying it again adds a second full set of phases.
  • A milestone is a task with Milestone ticked; it shows as a diamond on the timeline.
  • Deleting a phase removes all its tasks and cannot be undone. Phase templates are shared by the whole company.

Questions

Why doesn't finishing sub-tasks move the phase progress?
Phase progress uses top-level tasks only. Update the parent task's progress as its sub-tasks advance.
I applied the template twice and now have duplicate phases.
Each application adds a full set of phases. Ask an Organization owner or Administrator to delete the extra phases.
All tasks are done but the phase is still In progress.
Phase status is not changed automatically. Edit the phase and set it to Completed.

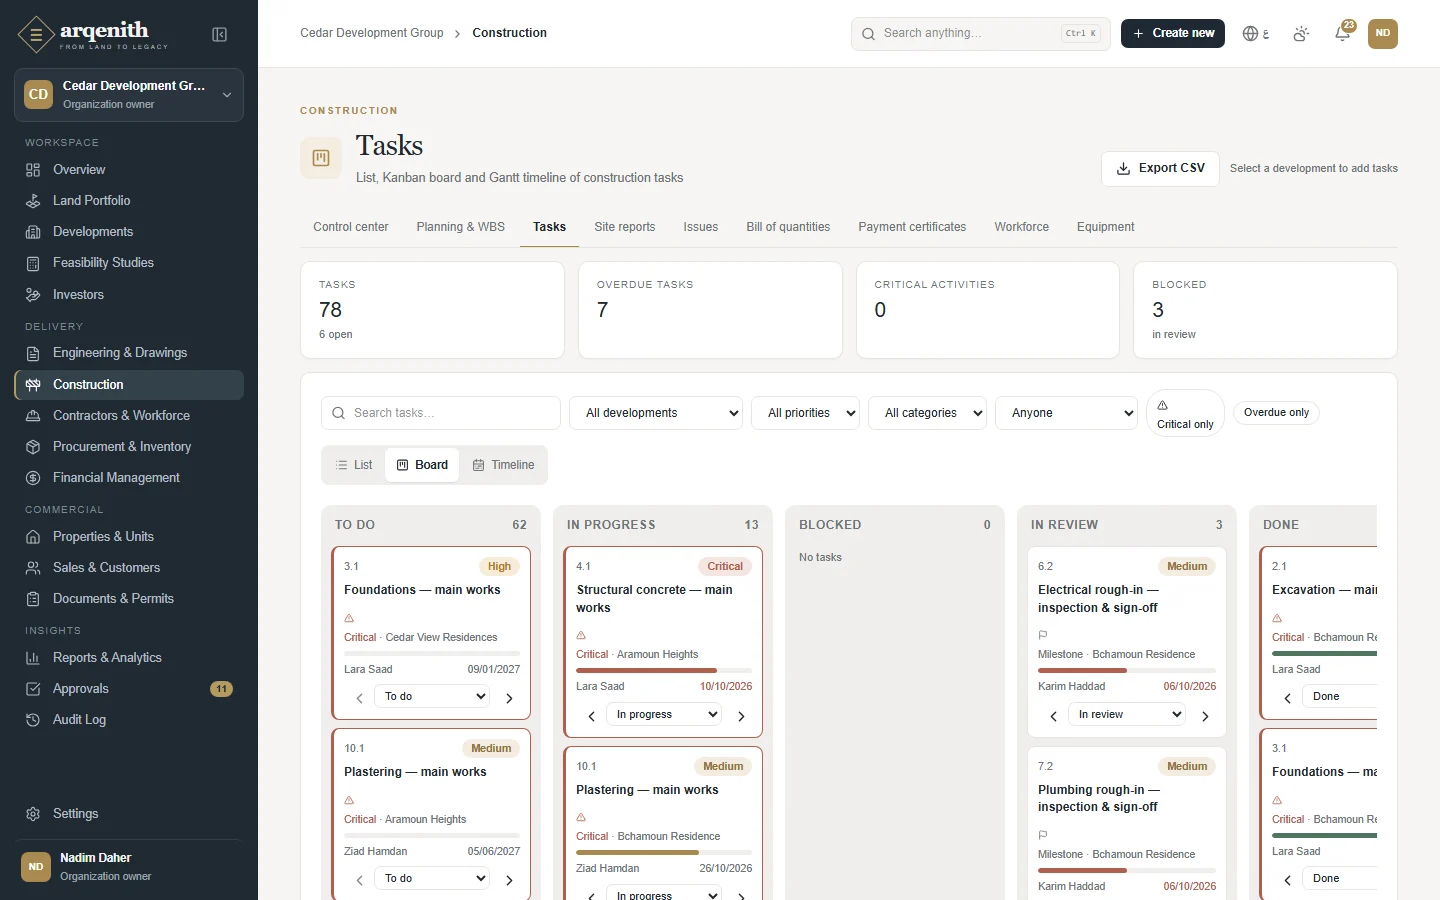
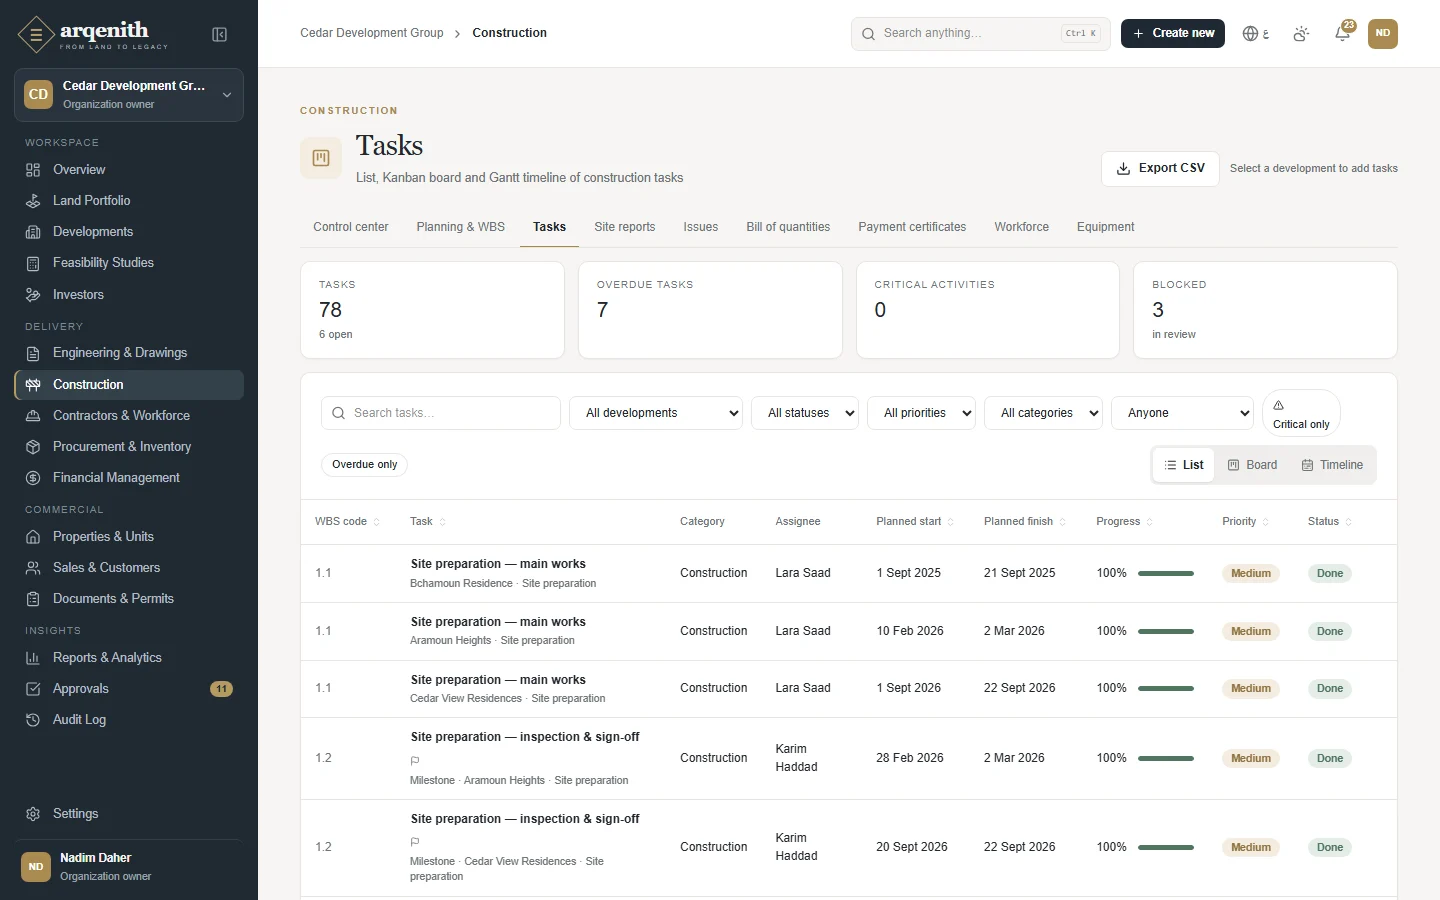
Tasks

Manage the day-to-day work of a development as a list, a board or a timeline, with assignees, priorities, progress and dependencies.

Who uses it: Organization owner, Administrator, Project manager, Engineer and Site supervisor create and edit tasks. Only Organization owner and Administrator delete tasks and remove dependencies. Organization owner, Administrator and Project manager export.

Tasks on the board
Figure 56. Tasks on the board
Tasks as a list
Figure 57. Tasks as a list
The Gantt chart
Figure 58. The Gantt chart

How to use it

  1. 1Open Construction and go to Tasks. Choose List, Board or Timeline.
  2. 2Filter by Development, Phase, Status, Priority, Category and Assignee (Assigned to me shows your own), or use Critical only and Overdue only.
  3. 3With a development selected, click New task. Enter the Task, Phase, Category, Status, Priority, Progress, Assignee, Contractor, Weight, dates, and tick Milestone or Critical as needed.
  4. 4On the Board, move a card with the Move to selector or the arrows to the previous or next stage.
  5. 5Click a task to open it: change its status, click Edit, or click Add predecessor to record a dependency with its type and lag.
  6. 6Click Export CSV to download the tasks.

Rules and details

  • Task statuses: To do, In progress, Blocked, In review and Done. Any status can be chosen from any other.
  • Setting a task to Done sets its progress to 100% and records the actual finish date; setting progress to 100% marks it Done. Moving to In progress or In review records the actual start if it is empty.
  • Categories: Construction, Engineering, Permit, Procurement, Inspection and Handover. Priorities: Low, Medium, High and Critical. New tasks start as To do, Medium, 0% and weight 1.
  • If you leave the WBS code empty, it is numbered automatically from its phase or parent task.
  • Dependency types: Finish to start, Start to start, Finish to finish and Start to finish, with a lag from −365 to 365 days (negative means lead time). Circular links and links between developments are refused. Dependencies are recorded for reference and do not move dates.
  • Critical is a flag you set by hand on tasks on the critical path. A task past its planned finish and not done shows how many days late it is.
  • Deleting a task also removes its sub-tasks and dependencies.

Questions

Why can't I add a task?
Choose a development first; tasks belong to a development's phases. If the development has no phases, create them in Planning & WBS.
I added a dependency but the dates did not change.
Dependencies record the logic between tasks but do not reschedule them. Adjust the planned dates yourself.
How do I move a card on the board?
Use the Move to selector on the card, or its arrows to move it to the previous or next stage.

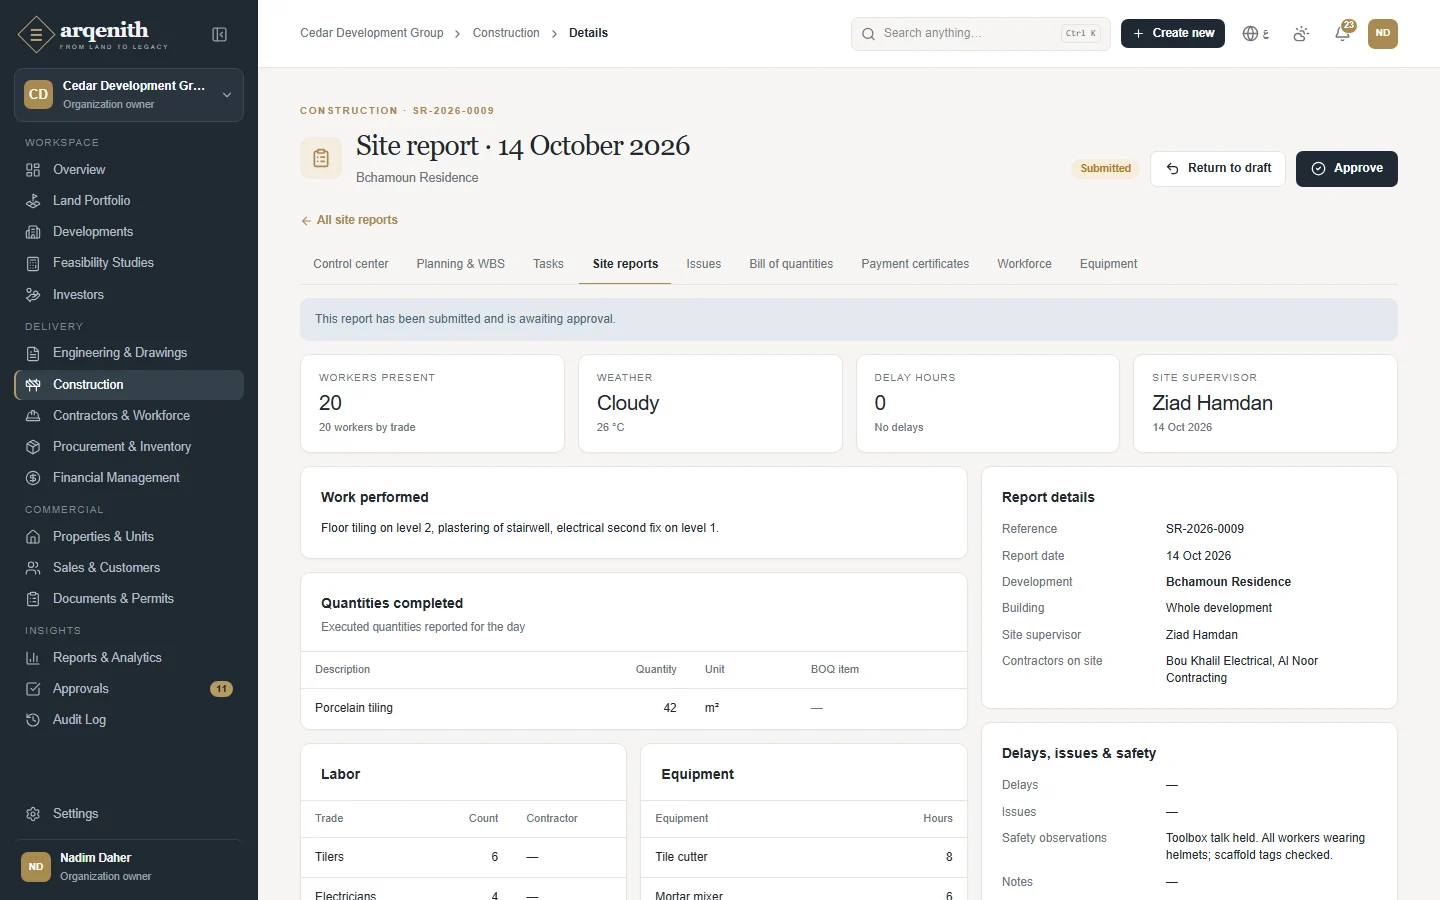
Daily site reports

Record what happened on site each day: weather, workers, contractors, equipment, work done, quantities, delays and safety, and have it approved.

Who uses it: Organization owner, Administrator, Project manager, Engineer and Site supervisor write and submit reports. Organization owner, Administrator and Project manager approve them or return them to draft.

Daily site reports
Figure 59. Daily site reports
A daily report
Figure 60. A daily report

How to use it

  1. 1Open Construction, go to Site reports and click New site report.
  2. 2Enter the Report date, Development, Building, Site supervisor, Weather, Temperature (°C), Workers present and Delay hours.
  3. 3Add rows under Labor (Add trade), Equipment (Add equipment) and Quantities completed (Add quantity); link a quantity to a BOQ item to record progress against the bill of quantities. Fill in Work performed and the Delays, issues & safety section, then save.
  4. 4Open the report and click Submit when it is complete.
  5. 5The approver clicks Approve, or Return to draft if changes are needed.
  6. 6On the report page, record Materials consumed (Item, Warehouse, Quantity) and use Raise an issue to open an issue for the same development.

Rules and details

  • Every report gets a reference such as SR-2026-0001. You can write several reports for the same development on the same day.
  • Statuses: Draft, Submitted and Approved. A report can only be edited as a draft; approval is final.
  • On submit, quantities linked to BOQ items are recorded as measurements. Resubmitting after a return only records the difference, so nothing is counted twice.
  • Recording materials consumed issues the stock from the chosen warehouse to the development, with its cost in base currency. It needs inventory rights.
  • The development cannot be changed after the report is saved. Temperature must be between −60 and 70 °C, and equipment hours at most 744.
  • Rows left without a trade, equipment name or description are not saved. Reports cannot be deleted.
  • The list shows, for the last 30 days, the number of reports, average workers, total delay hours and reports awaiting approval.

Questions

Why can't I edit my report?
It has been submitted or approved. Ask an approver to Return to draft if it is still submitted; an approved report is final.
I entered quantities but the BOQ did not change.
Only quantity rows linked to a BOQ item count, and only when the report is submitted.

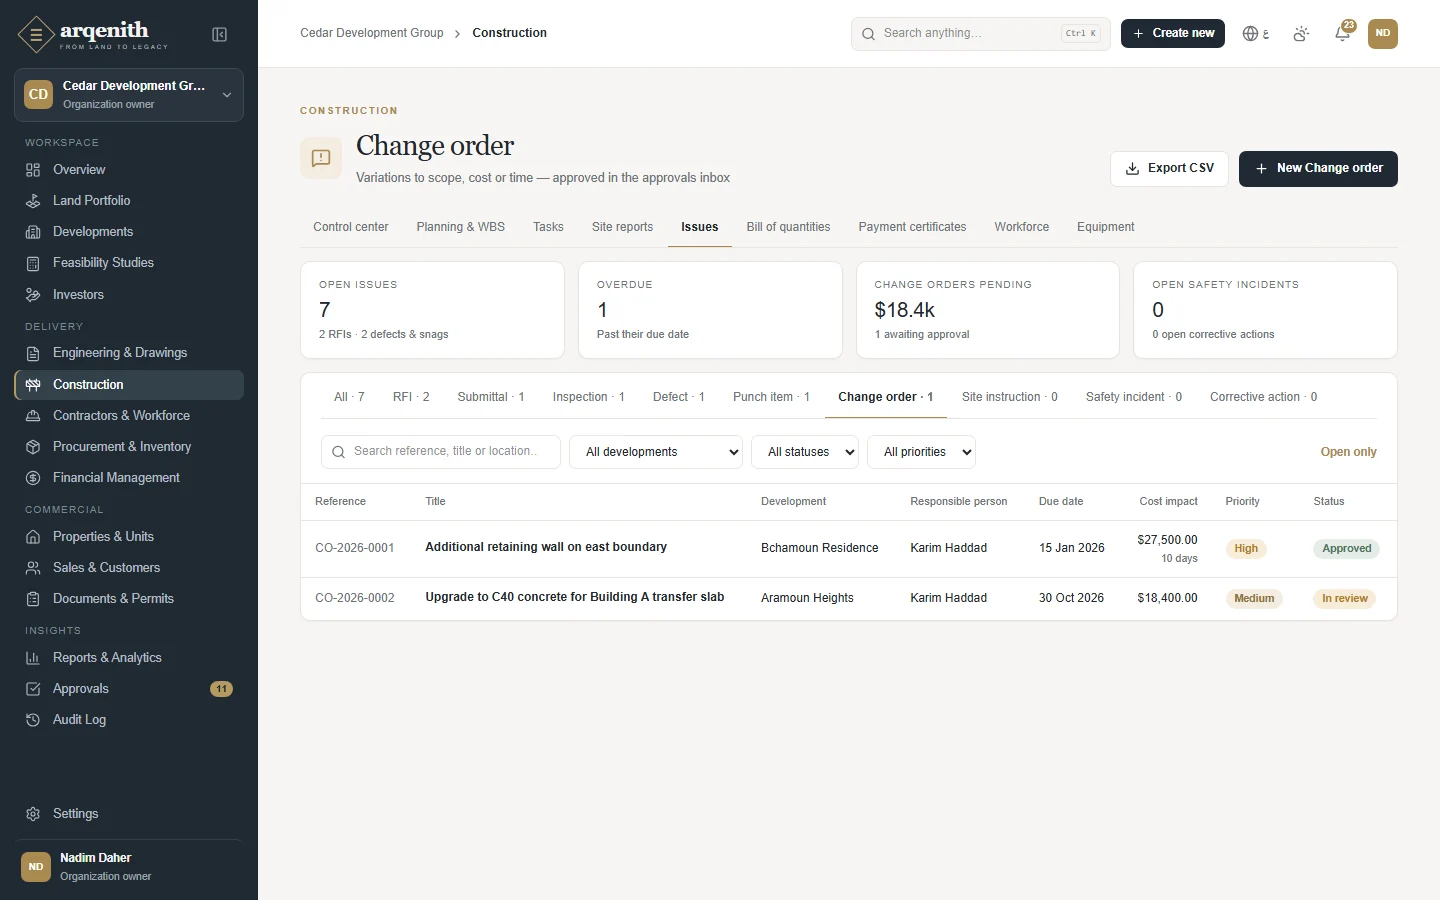
Issues and change orders

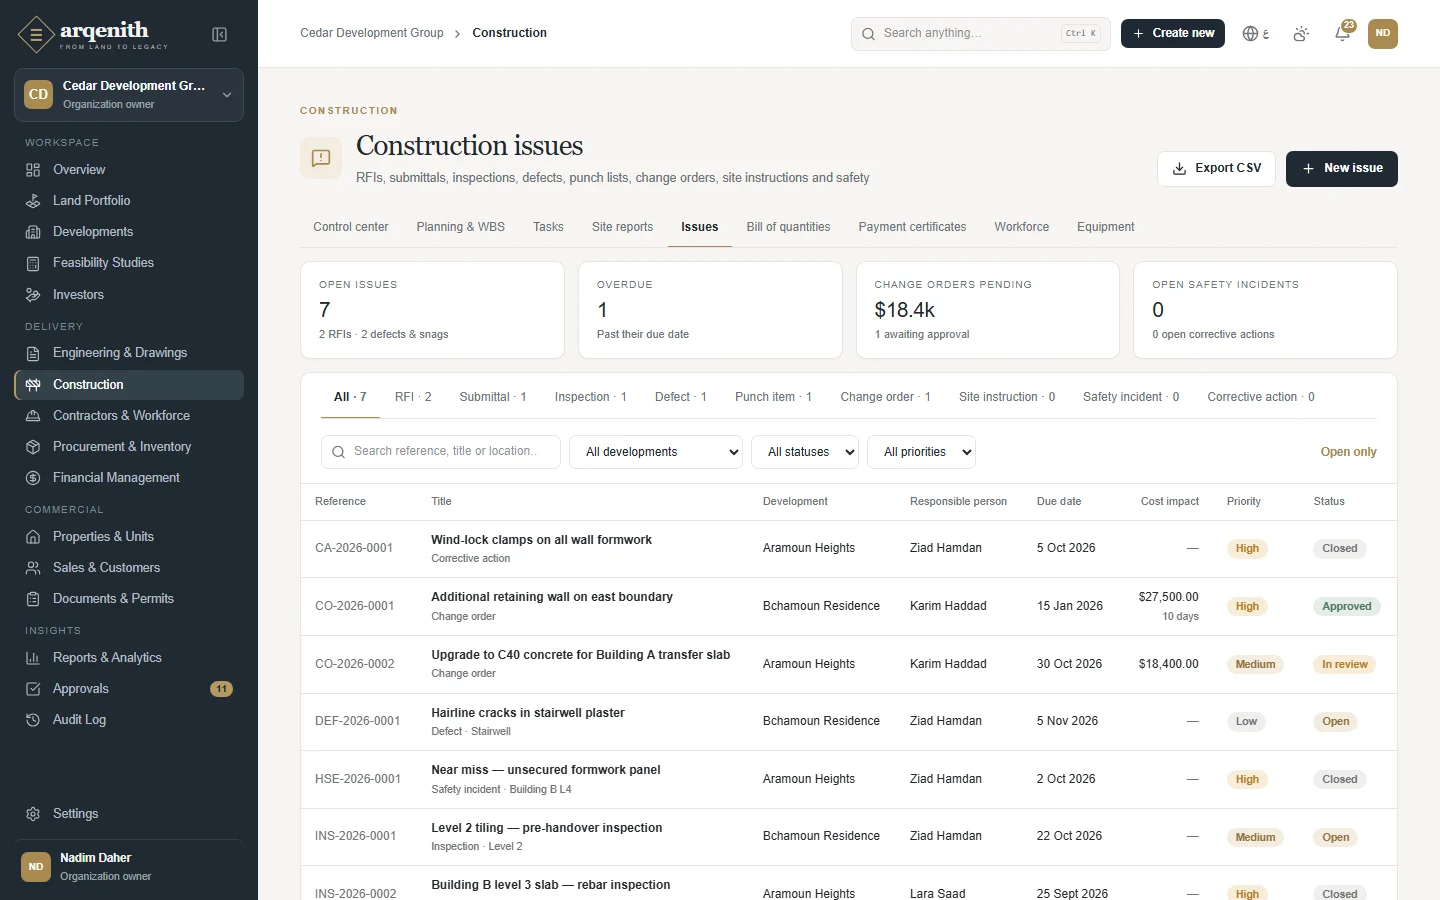
Track everything that needs an answer or a decision on site: RFIs, submittals, inspections, defects, punch items, change orders, site instructions, safety incidents and corrective actions.

Who uses it: Organization owner, Administrator, Project manager, Engineer and Site supervisor raise and update issues. Change orders are decided in Approvals by Organization owner, Administrator or Project manager.

Issues, RFIs and inspections
Figure 61. Issues, RFIs and inspections
Change orders
Figure 62. Change orders
An issue and its history
Figure 63. An issue and its history

How to use it

  1. 1Open Construction and go to Issues. Choose a type tab or All, and filter by development, status and priority; Open only hides closed items.
  2. 2Click New issue (or New followed by the type on a type tab). Enter the Title, Development, Location, Priority and Description, then the Responsible person, Contractor / consultant and Due date.
  3. 3For a change order, fill in Contract impact: the Contract, Cost impact (negative for omissions) and Schedule impact in days.
  4. 4Open the issue to work on it: Mark answered, Close, Void or Reopen. For a change order, click Submit for approval and follow it under Open approvals.
  5. 5On safety incidents, defects, inspections and punch items, click Add corrective action to raise a linked follow-up.
  6. 6Click Export CSV to download the list.

Rules and details

  • References follow the type: RFI-, SUB- (submittal), INS- (inspection), DEF- (defect), PCH- (punch item), CO- (change order), SI- (site instruction), HSE- (safety incident) and CA- (corrective action), for example CO-2026-0003.
  • Statuses: Open, In review, Answered, Approved, Rejected, Closed and Void. Mark answered works from Open; Reopen returns a closed or void issue to Open.
  • Inspections also record an Inspection result: Pass, Fail or Conditional.
  • A submitted change order is In review: its cost, schedule impact, contract and status are locked until it is decided. The approver can Approve with an optional comment or Reject with a required comment, and cannot decide a request they submitted themselves.
  • When a change order with a contract and a cost impact is approved, an approved amendment is added to the contract. Schedule impact is recorded but does not move task dates.
  • Cost and schedule impact are only kept for change orders. Change orders pending shows the total cost impact waiting for a decision.
  • Issues cannot be deleted; use Void instead.

Questions

Why can't I change the cost of my change order?
It is in review or already decided. The cost, schedule impact and contract are locked once it is submitted.
The change order was approved but the contract value did not change.
An amendment is only created when the change order is linked to a contract and has a cost impact other than zero. Time-only change orders do not change the contract value.
What happens if I withdraw a change order from approval?
Withdrawing ends the approval request and the change order is closed as Rejected. To pursue the change, raise a new change order.

Bill of quantities

Keep the priced bill of quantities of a development by section and item, record measured progress, and compare executed work with what has been certified for payment.

Who uses it: Organization owner, Administrator, Project manager, Engineer and Site supervisor create sections, items and measurements. Only Organization owner and Administrator delete. Organization owner, Administrator and Project manager export.

Bill of quantities and measured progress
Figure 64. Bill of quantities and measured progress

How to use it

  1. 1Open Construction, go to Bill of quantities and choose a development.
  2. 2Click New section and enter the Code, Section name and optionally a Cost category.
  3. 3Click New item. Choose the Section, enter the Code, Description, Unit, Planned qty and Unit rate, and optionally link a Contract and a Phase.
  4. 4Click the ruler icon on an item (Record measurement) and enter the Measured on date and Quantity. Use a negative quantity to correct an earlier measurement.
  5. 5Check the totals and Recent measurements, and click Export CSV to download the bill.

Rules and details

  • Section and item codes are required and unique within the development. Units: m³, m², m, kg, ton, nr, lump sum, day, hour and set.
  • Estimated total = planned quantity × unit rate. Executed value = executed quantity × rate. Progress = executed ÷ planned, capped at 100%.
  • Executed quantity is the sum of all measurements, manual or from site reports. Measurements cannot be edited or deleted; you correct them with negative entries.
  • Certified quantity and value come from the latest approved payment certificate for the item. Executed, not certified highlights work done but not yet paid.
  • Grand total shows the estimated total, executed value, certified value and remaining value. Amounts are in the development's currency.
  • An item that appears on a payment certificate cannot be deleted, and neither can its section. Deleting a section removes all its items.

Questions

Why can't I delete this BOQ item?
It is used on a payment certificate, so it must stay for the payment history. Only Organization owner and Administrator can delete items that are not referenced.
I recorded a wrong measurement. How do I fix it?
Record a new measurement with a negative quantity for the difference. Measurements are never edited, so the history stays complete.

Payment certificates

Prepare interim payment certificates that pay contractors for their cumulative progress against a contract, with retention, advance recovery and deductions, and send them for approval.

Who uses it: Organization owner, Administrator, Project manager and Procurement officer prepare certificates and submit them. Organization owner, Administrator and Project manager approve them in Approvals. Only Organization owner and Administrator delete drafts.

Interim payment certificates
Figure 65. Interim payment certificates
A payment certificate with retention
Figure 66. A payment certificate with retention

How to use it

  1. 1Open Construction, go to Payment certificates and click New certificate. Choose the Contract, set the Period start and Period end, and add Notes.
  2. 2The certificate opens with one line for each BOQ item of the contract, starting from the last approved quantities. Enter the Qty to date for each line.
  3. 3Use Add lump-sum / variation for amounts outside the BOQ, and enter any Other deductions.
  4. 4Click Save & calculate and check the figures; the Preview box updates while you type.
  5. 5Click Submit for approval. The approver decides under Open approvals.
  6. 6Click Print for a bilingual printable certificate.

Rules and details

  • Every certificate gets a reference such as IPC-2026-0001 and a number per contract (#1, #2…). Only active contracts that are not supply contracts can be certified.
  • Amounts are cumulative: gross to date = sum of the lines (quantity to date × BOQ rate); this period = gross to date − amounts already certified on approved certificates.
  • Retention = this period × the contract's retention %. Advance recovery = this period × the recovery %, limited to the advance still to recover. Net payable = this period − retention − advance recovery − other deductions.
  • A certificate cannot exceed the current contract value (original plus approved amendments), cannot have a negative period amount or net payable, and cannot be submitted with nothing to pay this period.
  • Statuses: Draft, Submitted, Approved and Rejected. Submitted and approved certificates are locked; a rejected one can be corrected and resubmitted. Only one certificate per contract can await approval at a time, and nobody approves a certificate they submitted.
  • On approval, an approved payable is created in Finance in the contract's currency, due 30 days after the period end, and the Payable panel shows what has been paid and what is outstanding.

Questions

Why can't I submit a new certificate for this contract?
A previous certificate for the same contract is still awaiting approval. Wait for its decision first.
I get Certified value exceeds the current contract amount.
The cumulative value is above the contract value including approved amendments. Reduce the quantities, or have the variation approved as a contract amendment first.
Where do I release retention?
Retention is released from the payable in Finance, not from the certificate.

Workforce

Organise site workers into crews, record their daily hours on weekly timesheets, get them approved, and turn approved hours into labour costs in Finance.

Who uses it: Organization owner, Administrator, Project manager, Engineer and Site supervisor manage crews and fill in timesheets. Organization owner, Administrator and Project manager approve or return weeks. Posting labour costs needs both finance and construction approval rights, which only Organization owner and Administrator have by default.

Workforce and timesheets
Figure 67. Workforce and timesheets
Crews
Figure 68. Crews
Labour cost by development
Figure 69. Labour cost by development

How to use it

  1. 1Open Construction, go to Workforce and choose a development. On Crews, click New crew and enter the Crew name, Trade, Foreman and Responsible supervisor; then use Add member to add workers with their Role in crew.
  2. 2On Timesheets, choose the Crew (or All workers) and the week with Previous week, This week and Next week.
  3. 3Type regular hours and overtime (OT) for each worker and day, use Add worker to add someone, and click Save hours.
  4. 4Click Submit week when the week is complete.
  5. 5The approver clicks Approve week, or Return with a reason.
  6. 6On Labour costs, choose From and To, click Apply, review the totals by worker, and click Post labour costs.

Rules and details

  • Timesheet statuses: Draft, Submitted, Approved and Posted to finance. Only drafts can be changed; Return sends a submitted week back to draft.
  • Each worker can have one entry per day per development. Regular plus overtime must be more than 0 and at most 24 hours. Saving a day with 0 hours removes it.
  • Labour cost = daily rate × (regular hours + overtime hours × overtime multiplier) ÷ standard hours (by default 8 hours and 1.5). The rate is captured when the hours are saved and does not change later.
  • A worker needs a daily rate on their profile before hours can be recorded. Only workers and technicians can be added to crews and timesheets.
  • Weeks run Monday to Sunday. Nobody approves their own timesheet.
  • Posting groups approved, unposted hours into one expense per worker, sends it to Finance for approval, and marks the hours Posted. A period can cover at most 92 days, and the same hours are never posted twice.

Questions

Why is a worker greyed out with no daily rate?
Hours can only be recorded for workers with a daily rate. Set the rate on the worker's partner profile first.
Why can't I change the hours?
The week has been submitted, approved or posted. Ask an approver to Return a submitted week; approved and posted hours are final.
Why can't I post labour costs?
Posting needs both finance create and construction approval rights. By default only the Organization owner and Administrator have both.

Equipment

Keep a company-wide register of owned and rented equipment, assign it to sites, log its usage and maintenance, and see how much it is used.

Who uses it: Organization owner, Administrator, Project manager, Engineer and Site supervisor add equipment, assign it, and log usage and maintenance. Only Organization owner and Administrator delete usage entries.

The equipment register
Figure 70. The equipment register
A machine: assignments, usage and maintenance
Figure 71. A machine: assignments, usage and maintenance

How to use it

  1. 1Open Construction and go to Equipment. Click Add equipment and enter the Code, Name, Category, Ownership, Supplier / lessor, Make & model, Serial / plate number, Currency, Hourly rate and Daily rate.
  2. 2Open an item and click Assign to site: choose the Development, From and, optionally, To.
  3. 3Click Log usage to record the Development, Date, Hours, Fuel (L), Operator and, if useful, the Site report.
  4. 4Click Record maintenance to enter the Date, Type, Performed by, Cost and Next due date.
  5. 5Use Release to end assignments, Send to maintenance and Back in service while it is repaired, and Retire when it leaves the fleet.

Rules and details

  • Equipment statuses: Available, On site, Under maintenance and Retired. Available and On site follow today's assignment automatically.
  • Codes are stored in capitals and are unique in the company. Ownership is Owned or Rented.
  • Assignment dates are inclusive and cannot overlap. A new assignment automatically ends an earlier open-ended one the day before. Releasing ends assignments that have started and removes ones that have not.
  • Retiring releases the item and is permanent: a retired item cannot be assigned or used again. Retired items are hidden unless you click Show retired.
  • Usage cost = hours × hourly rate (or daily rate ÷ 8), captured when logged. Usage and maintenance costs are internal figures and are not posted to Finance.
  • Maintenance shows Overdue, Due soon (within 7 days), Scheduled or Not scheduled from the latest next-due date, and reminders are sent before and after it is due.
  • Utilisation = hours logged in the last 30 days ÷ (working days Monday to Saturday × 8 hours).

Questions

I get This equipment is already assigned for part of that period.
The dates overlap another assignment. Release the current assignment, or choose dates after it ends.
Does Release only end the assignment on the row I clicked?
No. Release ends all current and future assignments of the item as of today.
Can a retired item be brought back?
No. Retiring is permanent: the item can no longer be assigned or used. Use Send to maintenance instead if it is only out of action for a while.
↑ Back to contents

Chapter 11

Contractors and Contracts

Partners and the contracts you sign with them.

Contractors & partners

The directory of everyone you contract or pay on site: contractors, subcontractors, engineers, architects, consultants, workers, technicians and suppliers, with their agreements, performance and account balances.

Who uses it: Everyone except Sales manager and Sales agent can open the directory by default. Organization owner, Administrator, Project manager and Procurement officer add and edit partners. The Invoices and Payments tabs and the balance figures appear only for users with finance access (Organization owner, Administrator, Project manager, Accountant). Assigning a partner to a development needs development create rights (Organization owner, Administrator, Project manager). Permission overrides and project-level access set by an administrator can change any of these defaults.

Contractors, suppliers and consultants
Figure 72. Contractors, suppliers and consultants
A partner
Figure 73. A partner

How to use it

  1. 1Open Contractors & Workforce from the sidebar and use the type tabs (All, Contractors, Subcontractors, Engineers, Architects, Consultants, Workers, Technicians, Suppliers) or the search box to find a partner.
  2. 2Click “Add partner”, choose the Partner type, enter the Name (and Name (Arabic)), Specialization, Discipline, contact details, Tax / VAT number, Payment terms, Daily rate for day-paid workers and an optional Rating, then save. The partner page opens.
  3. 3On the partner page use the tabs Overview, Agreements, Invoices, Payments, Work history, Documents and Activity to see contracts, invoices, outgoing payments, construction tasks and site issues linked to the partner.
  4. 4Click “Rate performance” to update the star rating (1 to 5) and the performance notes.
  5. 5Click “Assign to development”, pick the development, the Role on the project and the date to add the partner to the development team.
  6. 6Click “New contract” on the partner page to start an agreement with this partner already selected.
  7. 7Click “Deactivate” to retire a partner, or “Reactivate” to bring them back.

Rules and details

  • Each partner gets an automatic reference such as PTR-2026-0001.
  • Payment terms default to 30 days and must be between 0 and 365 days. The rating is a whole number from 1 to 5.
  • Inactive partners keep their contracts, invoices and history but are hidden from selection lists, so they cannot be chosen for new contracts or purchase orders. A banner on their page says so.
  • Contract value on the list counts active and completed contracts at their current value (original amount plus approved amendments). If a partner has contracts in several currencies the cell shows “Multiple currencies”.
  • The page header figures add up base-currency contracts only and list any other currencies separately.
  • Account balance (finance users only) is shown in the base currency: Invoiced is approved invoices including tax, Outstanding balance is approved invoices not yet paid, and Retention held is withheld from certificates until it is released.
  • “Export CSV” downloads the directory with the current type and status filters for users with export rights.

Questions

A supplier does not appear when I create a purchase order or contract.
Only active partners are offered. Open the partner and click “Reactivate”. For purchase orders the partner must also be of type Supplier, Contractor or Subcontractor.
How do I remove a partner I no longer work with?
Partners are deactivated, not deleted, so their contracts, invoices and payments stay in the history. Use “Deactivate” on the partner page.
Why can't I see the Invoices and Payments tabs?
They are only shown to users with finance access. Ask an administrator if you need them.

Contracts

Construction, engineering and supply agreements across all developments, with their value, amendments, payment milestones, retention, advance payment, payment certificates and linked invoices.

Who uses it: Everyone with access to Contractors & Workforce can read contracts. Organization owner, Administrator, Project manager and Procurement officer create and edit contracts, amendments and milestones. Amendments are approved by Organization owner, Administrator or Project manager. Only Organization owner and Administrator can delete draft amendments and pending milestones. Recording a contractor advance needs finance create rights (Accountant, Administrator, Organization owner).

Contracts
Figure 74. Contracts
A contract
Figure 75. A contract
A new contract
Figure 76. A new contract

How to use it

  1. 1Open Contractors & Workforce and click “Contracts”, then “New contract”, or start from a partner page.
  2. 2Fill in Development, Contractor / partner, Contract type, Status, Contract title, Cost category, Scope of work, Currency, Original amount, Retention, Advance payment, Advance recovery rate, Payment terms and the dates, then save. The contract opens in Draft.
  3. 3Review the draft, then click “Activate contract”. From then on the contract counts as committed cost against the development budget.
  4. 4To change the value or duration of an active contract, click “New amendment”, enter a Description, the Value change (negative for omissions) and an optional Time extension, then have an approver click “Approve” on the amendment.
  5. 5Click “Add milestone” to set up payment milestones with an amount, due date and status, and update their status as work progresses.
  6. 6If the contract includes an advance, click “Record contractor advance”, check the amount, invoice or guarantee number and dates, then click “Record & submit for approval”.
  7. 7Follow the Payment certificates, Invoices, Payments and Linked BOQ items panels on the same page; use “Edit” to change the remaining editable fields.

Rules and details

  • Contracts are numbered automatically, for example CTR-2026-0001. Contract types are Fixed price, Unit rate, Milestone based, Cost plus, Engineering services and Supply.
  • Status rules: Draft can become Active or Cancelled; Active can become Completed or Terminated. No other change is accepted.
  • Once a contract leaves Draft its development, partner, currency and original amount are locked, and the system also refuses changes to the contract type, retention, advance payment and advance recovery rate. Value changes go through amendments.
  • Current value = original amount + approved amendments. Approving an amendment adds its value and, if a time extension was entered, moves the completion date. Approved amendments cannot be changed or deleted; drafts can be deleted. An approved change order from Construction that is linked to the contract and has a cost impact creates an approved amendment automatically, marked “From change order”.
  • Retention can be at most 50% and the advance cannot exceed the original amount. The cost category is required; a contract without one is not counted in budget commitments and shows a warning.
  • A contractor advance can be recorded only on an Active contract with an agreed advance, only once per contract, and only up to the agreed amount. It is recorded as a payable, not as cost, goes through finance approval and is then paid from the expense. It is recovered through deductions on later payment certificates; the Advance payment panel shows Recovered to date and Remaining to recover.
  • Certified to date is the highest gross-to-date of the approved payment certificates. If milestone amounts add up to more than the current value a warning is shown. Milestone statuses (Pending, Achieved, Invoiced, Paid) are set by hand, and only pending milestones can be deleted.

Questions

Why can't I change the original amount of my contract?
The amount is fixed once the contract is activated. Record the change as an amendment with a positive or negative value change and have it approved; the current value then updates.
My contract does not show in the budget's committed cost.
Only Active and Completed contracts with a cost category are counted. Activate the draft and make sure a cost category is set.
The “Record contractor advance” button is missing.
It appears only when the contract is Active, an advance payment amount was agreed in the contract, no advance has been recorded yet, and you have finance create rights.
↑ Back to contents

Chapter 12

Procurement and Inventory

From the purchase request to the goods in the warehouse.

Procurement overview

A summary of purchasing across all sites: open purchase requests, orders waiting for approval or delivery, spend this year, recent orders and low stock.

Who uses it: Everyone except Sales manager and Sales agent can view procurement by default. Organization owner, Administrator, Project manager and Procurement officer create and edit requests, RFQs and orders. Purchase requests and purchase orders are approved by Organization owner, Administrator or Project manager; the Procurement officer has no approval right. Engineers and Site supervisors can raise purchase requests.

Procurement overview
Figure 77. Procurement overview

How to use it

  1. 1Open Procurement & Inventory from the sidebar. The tabs Overview, Purchase requests, RFQs, Purchase orders and Inventory lead to each part.
  2. 2Read the figures at the top: Open purchase requests (with a link to review submitted ones), POs pending approval (with a link to Approvals), Awaiting delivery and Spend this year.
  3. 3Use “New purchase request” or “New purchase order” in the page header to start a new document.
  4. 4Open a recent order from Recent purchase orders, or a low-stock item from the Low stock panel.

Rules and details

  • The usual flow is purchase request, then RFQ and supplier quotations, then purchase order, approval, goods receipt and supplier invoice. Each step can also be started on its own.
  • Open purchase requests counts requests in Draft, Submitted or Approved.
  • Awaiting delivery counts orders that are Approved, Issued or Partially received, and shows how many are past their expected delivery date.
  • Spend this year adds up approved orders (approved through closed) including tax, converted to the base currency at the rate of each order date.
  • Low stock lists stock lines at or below the item's reorder threshold and is shown only to users with inventory access.

Questions

Where do I approve purchase orders?
In Approvals. The “POs pending approval” figure links there. Purchase requests are approved directly on the Purchase requests page.
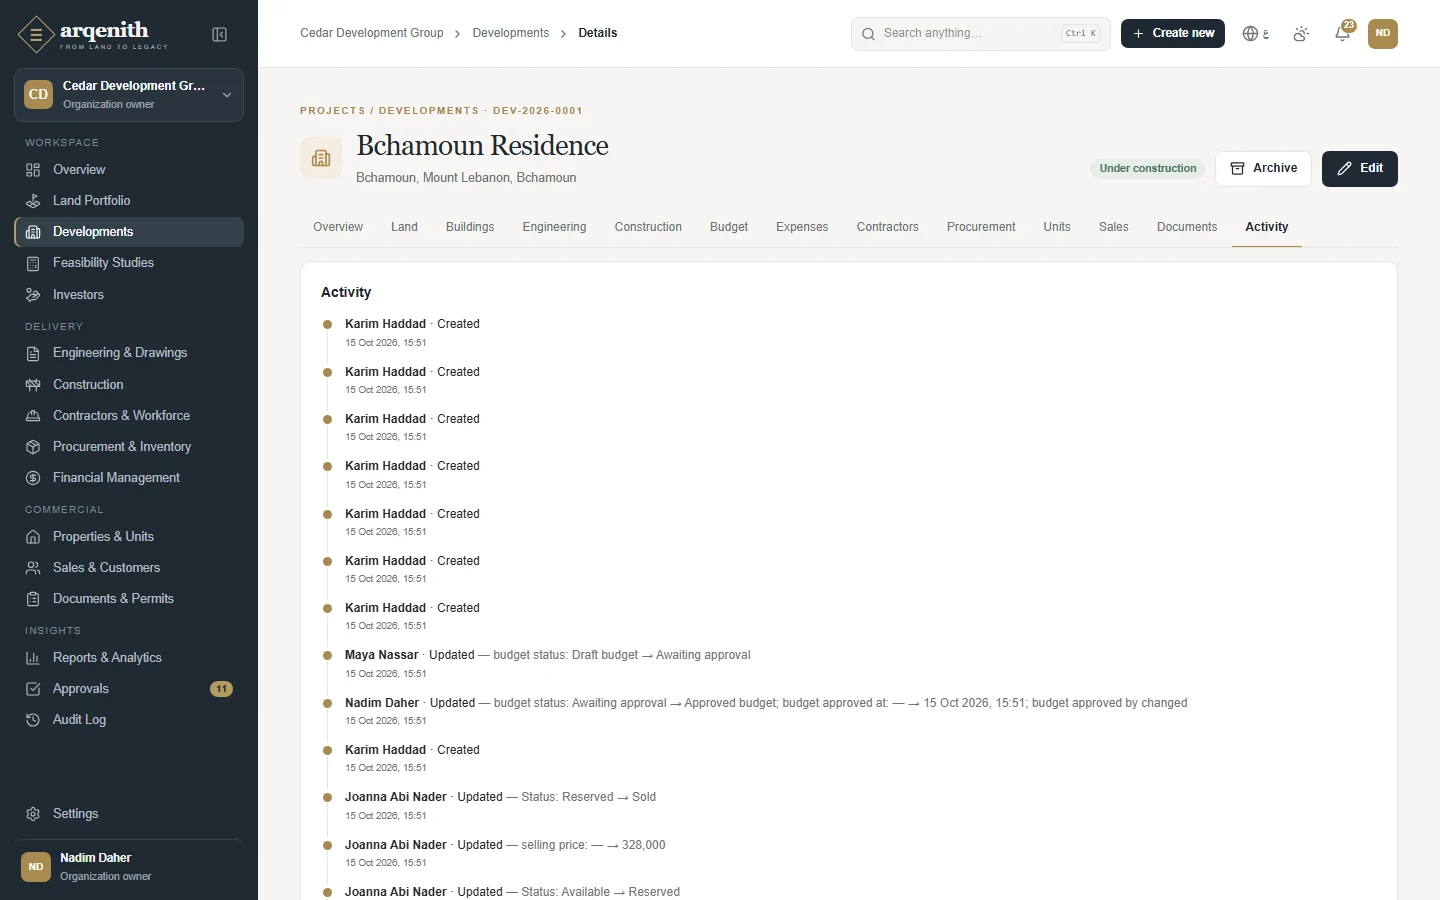
Purchase requests

Material and service needs raised by site and project teams, reviewed and approved before they are turned into RFQs or purchase orders.

Who uses it: Anyone with procurement or construction create rights can raise a request, which includes Engineers, Site supervisors, Project managers and Procurement officers. Submitting and cancelling need procurement edit rights (Procurement officer, Project manager, Administrator, Organization owner). Approving and rejecting need procurement approval rights (Project manager, Administrator, Organization owner).

Purchase requests
Figure 78. Purchase requests

How to use it

  1. 1Open Purchase requests and click “New purchase request”.
  2. 2Choose the development, enter a Title and a Needed by date, then add line items: pick an item from the item master or type a free-text (non-stock) description, and enter the Qty, Unit and Est. unit cost. Use “Add line” for more lines.
  3. 3Save, then click “Submit” on the request to send it for review.
  4. 4An approver clicks “Approve”, or “Reject” and enters the Reason for rejection.
  5. 5On an approved request click “Create RFQ” to copy all lines into a new draft RFQ, or “Create PO” to open a new purchase order prefilled with the lines and estimated costs.

Rules and details

  • Requests are numbered automatically, for example PR-2026-0001. Quantities accept up to three decimals and must be greater than zero.
  • Statuses: Draft, Submitted, Approved, Rejected, Ordered and Cancelled. A rejected request can be submitted again; the rejection reason is added to its notes.
  • You cannot approve a request you raised yourself; another approver must decide it. The Organization owner is the only exception.
  • A request becomes Ordered when a purchase order created from it is approved.
  • Cancel request is possible while the request is Draft, Submitted, Approved or Rejected.
  • The Estimated value column is quantity times estimated unit cost, shown in the base currency and marked as an estimate.

Questions

I created a request but there is no Submit button.
Submitting needs procurement edit rights. Site supervisors and Engineers can create requests; a Procurement officer or Project manager then submits them.
Why do I get an error when I approve my own request?
Requesters cannot approve their own requests. Ask another approver; only the Organization owner may approve their own.

Requests for quotation

Invite suppliers to quote, record their quotations, compare them side by side and award the best one, which creates a draft purchase order.

Who uses it: Procurement viewers can read RFQs and comparisons. Organization owner, Administrator, Project manager and Procurement officer create RFQs, record quotations and award. Only Organization owner and Administrator can delete a recorded quotation.

Requests for quotation
Figure 79. Requests for quotation
Comparing quotations
Figure 80. Comparing quotations

How to use it

  1. 1Create an RFQ with “Create RFQ” on an approved purchase request, or with “New RFQ” on the RFQs page by choosing the development, a Title, a Quotes due date and the line items.
  2. 2Click “Mark as sent” once you have sent the request to suppliers yourself.
  3. 3For each reply click “Record quotation”, select the Supplier and enter the Quotation no., Quotation date, Valid until, currency, Delivery (days), Payment terms and the unit price of each item, then click “Save quotation”. Leave a price blank if the supplier did not quote that item.
  4. 4Compare offers in Quotation comparison. The lowest price per item and the best total are highlighted.
  5. 5Click “Close bidding” when no more quotations are expected, if you wish.
  6. 6Click “Award” under the chosen supplier, select the Cost category, the Delivery warehouse and the Expected delivery date, then click “Award & create draft PO”.

Rules and details

  • RFQs are numbered automatically, for example RFQ-2026-0001. Statuses: Draft, Sent, Closed, Awarded and Cancelled. “Cancel RFQ” is possible until the RFQ is awarded.
  • “Mark as sent” records that you have sent the RFQ to the suppliers yourself and moves it from Draft to Sent.
  • Each supplier can have one quotation per RFQ, and a quotation needs at least one priced line. Quotations can still be recorded and awarded after bidding is closed.
  • Best total is only ranked between complete quotations in the same currency. If quotations are in different currencies, prices are not ranked against each other.
  • If the chosen quotation leaves lines unpriced, you must tick “I understand — award without the unpriced lines”; those lines are left out of the purchase order.
  • Awarding marks the chosen quotation Selected and the others Rejected, sets the RFQ to Awarded and creates a draft purchase order with the supplier's prices and currency. A banner on the RFQ links to the new order.
  • Only quotations still in Received status can be deleted.

Questions

A supplier is missing from the Record quotation list.
Each supplier can quote only once per RFQ, so suppliers who already have a quotation are not offered again. Inactive partners are not offered either.
Why is no best total highlighted?
Totals are ranked only between complete quotations in the same currency. If every quotation is incomplete or currencies differ, no best total is marked.

Purchase orders

Orders to suppliers, from draft and approval through issue, goods receipt, returns and supplier invoicing.

Who uses it: Procurement viewers and finance users can read orders. Organization owner, Administrator, Project manager and Procurement officer create, edit, submit, issue and close orders and post returns. Approval is given in Approvals by Organization owner, Administrator or Project manager. Goods can be received by anyone with procurement or inventory create rights, which includes Site supervisors. Supplier invoices need finance create rights (Accountant, Administrator, Organization owner).

Purchase orders
Figure 81. Purchase orders
A purchase order and its receipts
Figure 82. A purchase order and its receipts

How to use it

  1. 1Click “New purchase order” (or “Create PO” on an approved request, or award an RFQ). Choose the Development, Supplier, Cost category, Delivery warehouse, Order date, Expected delivery, Currency and Tax amount, add the lines with their unit prices, and save.
  2. 2Check the draft and click “Submit for approval”. The approver decides in Approvals.
  3. 3Once approved, click “Issue to supplier” when you send the order, and “Print” for a bilingual printable copy.
  4. 4When goods arrive click “Receive goods”, pick the receiving warehouse, the Receipt date and Delivery note no., enter the received and rejected quantity per line, then click “Post receipt”.
  5. 5To send goods back, click “Return goods”, choose the warehouse, enter the Reason and the Return qty, then click “Post return”.
  6. 6Finance clicks “Supplier invoice”, enters the Invoice no., Invoice date, Amount (net of tax), Tax and Due date, then clicks “Record & submit for approval”.
  7. 7When the order is complete, click “Close PO”.

Rules and details

  • Orders are numbered automatically, for example PO-2026-0001; goods receipts GRN-2026-0001 and purchase returns RTN-2026-0001.
  • Statuses: Draft, Pending approval, Approved, Issued, Partially received, Received, Closed, Cancelled and Rejected. Only a draft can be edited or cancelled. A rejected order cannot be edited; it can only be submitted again.
  • The subtotal is calculated from the saved lines; the total adds the tax amount you enter. An order needs a subtotal above zero to be submitted, and its lines and amounts are locked from submission. The requester cannot approve their own order (except the Organization owner), and the decision is refused if the amount changed after submission.
  • Receipts are accepted while the order is Approved, Issued or Partially received, and a line can never be received beyond its outstanding quantity. Accepted quantities of stock items enter the warehouse at the order price converted to the base currency at the receipt-date rate; free-text lines and rejected quantities are recorded but not stocked. Posting the same receipt twice does not receive the goods twice.
  • A return cannot exceed the net quantity received, and a Received order goes back to Partially received after a return.
  • Supplier invoices are recorded as expenses of type Supplier invoice in the order's currency, development, cost category and supplier, and go to finance approval. The net amount invoiced can never exceed the order subtotal (net of tax) less what is already invoiced. Invoices are checked against the ordered value, not against the quantity received.
  • Approved orders up to Closed count as committed cost in the budget for their cost category and development.

Questions

Why can't I edit my purchase order?
Only drafts can be edited. Once submitted, lines and amounts are locked. A rejected order can be submitted again but not edited.
The supplier invoice is refused as too high.
The net amount of all invoices on an order cannot exceed the order subtotal net of tax. The dialog shows how much is still available to invoice.
Receiving goods fails with an exchange rate error.
Stock is valued in the base currency, so the order's currency needs an exchange rate effective on or before the receipt date. Ask finance to add one in Finance settings.

Inventory

Material items, central and site warehouses, stock balances and valuation, and the stock movement ledger, with transfers, material consumption and stock adjustments.

Who uses it: Everyone except Sales manager and Sales agent can view inventory by default. Organization owner, Administrator, Project manager, Procurement officer and Site supervisor add items and warehouses, transfer stock and post consumption. Adjustments and editing items need inventory edit rights (Organization owner, Administrator, Project manager, Procurement officer). Only Organization owner and Administrator can delete items and warehouses.

Inventory
Figure 83. Inventory
An item and its movements
Figure 84. An item and its movements

How to use it

  1. 1Open Procurement & Inventory and the Inventory tab, then switch between Stock balances, Items, Warehouses and Stock movements.
  2. 2Click “New item” and enter the Code, Name, Category, Unit of measure, Standard cost, Reorder threshold, Preferred supplier and Cost category.
  3. 3Click “New warehouse”, enter the Code and Name and choose the Type: Central warehouse, or Site store (a site store must be linked to a development).
  4. 4To move stock, click “Transfer”, choose the item, From warehouse, To warehouse, Quantity and date, then “Post transfer”.
  5. 5To record material used on site, click “Consume”, choose the item, warehouse, development and quantity, then “Post consumption”.
  6. 6To correct a count, click “Adjust”, choose Increase or Decrease, the quantity and a Reason, then “Post adjustment”.
  7. 7Filter Stock balances by warehouse or “Low stock only”, open an item to see its stock by warehouse and its movements, and use “Export CSV” for a spreadsheet.

Rules and details

  • Stock is created only by movements: Goods receipt, Purchase return, Transfer, Consumption, Adjustment and Opening balance. The movement ledger is append-only; movements cannot be edited or deleted.
  • Stock is valued at a moving weighted-average cost of the inbound movements per item and warehouse, in the base currency. Transfers and consumption leave at that average cost. Increases use the unit cost you enter or the item's standard cost; decreases use the average cost.
  • Negative stock rule: by default a transfer, consumption, return or decrease that would take a warehouse below zero is refused with an “Insufficient stock” message showing what is available. An administrator can allow it under Negative stock in organization settings.
  • Low stock means the quantity on hand is at or below the item's reorder threshold.
  • Consumption reduces stock and records the development it was used on in the movement ledger. It does not post a cost in Finance; material cost reaches the budget through the approved supplier invoice.
  • An item or warehouse can be deleted only if it has no stock movements and is not used on requests, RFQs or orders. Otherwise deactivate it; inactive items are hidden from purchase and stock forms.
  • Every organization starts with a central warehouse, WH-MAIN “Main warehouse”. Item and warehouse codes must be unique.

Questions

I get “Insufficient stock” when consuming material.
The warehouse does not hold enough of the item. Receive or transfer stock first, check that you picked the right warehouse, or ask an administrator whether negative stock should be allowed.
How do I correct a wrong movement?
Movements cannot be edited or deleted. Post an opposite movement instead, for example a transfer back or a stock adjustment with a clear reason.
Why can't I delete an item?
Items with stock movements or used on purchase documents are kept for history. Uncheck Active item to hide it from new forms.
↑ Back to contents

Chapter 13

Finance

Budgets, expenses, payables and receivables, cash flow, loans, the ledger and profitability.

Financial overview

Budget control, commitments, cash and working capital across your developments, in the base currency.

Who uses it: Organization owner, Administrator and Accountant have full finance rights by default. Project manager can view and export finance but not record or approve. Viewer, Engineer, Procurement officer, Site supervisor, Sales manager and Sales agent have no finance access unless an administrator grants it.

Finance overview
Figure 85. Finance overview

How to use it

  1. 1Open Financial Management from the sidebar. The tabs Overview, Budgets, Expenses, Payables, Receivables, Cash flow, Loans & capital, Ledger, Profitability and Settings lead to each part.
  2. 2Use the Development filter to look at one development or all of them.
  3. 3Read the cards: approved or current budget, Committed, Actual cost, Estimate at completion with the variance, Accounts payable with retention held, Accounts receivable with the overdue amount, Net cash position with the realised FX gain/loss, and Collected revenue.
  4. 4Click the realised FX line to open the ledger filtered on FX entries.
  5. 5Use the panels Budget vs actual by cost category, Cash flow · last 12 months, Finance approvals, Upcoming payables and Overdue receivables to jump to the details.

Rules and details

  • Committed = active and completed contracts at current value + approved purchase orders (approved through closed).
  • Actual cost = approved expenses net of tax, in the base currency; contractor advances are excluded.
  • Estimate at completion (EAC) = actual cost + remaining commitments + forecast remaining. Variance = current budget − EAC; a negative variance is an overrun.
  • Payments and receipts are cash movements and are never added to cost.
  • Finance approvals counts the pending requests for expenses, payments, budget baselines and budget revisions; decisions are made in Approvals.
  • Upcoming payables lists overdue invoices and those due within 30 days; Overdue receivables lists customer installments past due.

Questions

I am a project manager. Why can't I record an expense?
By default project managers can view and export finance only. An administrator can grant extra rights through a permission override.
In which currency are the overview figures?
Always in the organization's base currency. Amounts in other currencies are converted at the rate of each transaction date.

Budgets

The baseline budget of each development by cost category, its approved revisions, and budget control against commitments, actual cost and forecasts.

Who uses it: Finance viewers can read budgets. Organization owner, Administrator and Accountant build baselines, revisions and forecasts and submit them. Approval is given in Approvals by finance approvers (Organization owner, Administrator, Accountant), never by the person who submitted, except the Organization owner.

Budgets
Figure 86. Budgets

How to use it

  1. 1Open Finance, then Budgets, and choose the development with “Select development”.
  2. 2In Baseline budget lines click “Add line”, choose the Cost category, optionally a Building (leave empty for the whole development) and enter the amount in the base currency.
  3. 3When the baseline is complete click “Submit baseline for approval”. It is locked and sent to Approvals.
  4. 4After approval, change the budget with “New revision”: enter the Reason, then “Add line” for each category with a positive or negative Change, and click “Submit”.
  5. 5In Budget control, click “Forecast” on a category to enter a forecast to complete for its lines, or “Use automatic”.
  6. 6Use “Export CSV” to download the budget of the selected development.

Rules and details

  • Baseline status is Draft, Pending approval or Approved. A rejected baseline returns to Draft so it can be corrected and resubmitted. A pending or approved baseline is locked; only forecasts and notes can still change.
  • There is one baseline line per cost category and building. A baseline can be submitted only if its total is above zero.
  • Revisions are available only once the baseline is approved. They are numbered automatically, for example BRV-2026-0001, each is approved separately, and only drafts can be edited or deleted. A rejected revision stays rejected; create a new one.
  • Current budget = baseline + approved revisions. Committed, actual cost, remaining commitment, forecast remaining, EAC and variance follow the definitions on the page, per category with parent categories rolled up.
  • Forecast remaining is your manual forecast to complete if one is entered, otherwise current budget − actual − remaining commitment (never below zero). All lines of a category must be filled in or all left blank.
  • Users with finance approval rights receive a budget overrun notification when a development's estimate at completion exceeds its current budget.

Questions

Why can't I edit the baseline lines any more?
The baseline is locked once submitted. Change an approved budget with a budget revision; forecasts stay editable.
The New revision button is missing.
Revisions are available only after the baseline is approved. Check the approval in Approvals.

Expenses

Supplier invoices and other costs (accounts payable), from draft through approval, payment and settlement, including retention and advance recovery.

Who uses it: Organization owner, Administrator and Accountant record, submit and pay expenses by default. Approving expenses and payments, voiding and releasing retention need finance approval rights (the same roles); nobody can approve their own submission except the Organization owner. Project manager can view and export.

Expenses
Figure 87. Expenses
An expense
Figure 88. An expense

How to use it

  1. 1Open Finance, then Expenses, and click “New expense”.
  2. 2Enter the Description and choose the Type (Manual, Supplier invoice, Land acquisition or Contractor advance) and Cost category; optionally the Development, Building, Contractor / supplier, Contract, Invoice number and Land parcel.
  3. 3Enter the Invoice date, Due date, Currency, Amount (net of tax), Tax (VAT) (click “Apply 11%” or the organization rate shown to fill it) and any Other deductions, then save.
  4. 4Open the expense and click “Submit for approval”. The approver decides in Approvals.
  5. 5Once approved, click “Request payment”, enter the Amount, Payment date, Method, Bank reference and notes, and submit. The payment is posted after approval.
  6. 6For a certificate with retention, click “Release retention” when it becomes payable. To cancel an approved expense, click “Void” and give the reason.
  7. 7Filter the list by development, category, supplier, status, payment status or dates, and use “Export CSV”.

Rules and details

  • Expenses are numbered automatically, for example EXP-2026-0001, and payments PAY-2026-0001. Supplier invoices from purchase orders, approved payment certificates, contractor advances and labour costs posted from approved timesheets (under the LAB cost category) appear here automatically; labour costs still go through approval.
  • Statuses: Draft, Pending approval, Approved, Rejected and Void. Drafts can be deleted; rejected expenses can be edited and resubmitted; pending and approved expenses are locked.
  • The currency list holds the base currency and the currencies that have an exchange rate. The rate is taken from the invoice date by the system and is frozen at approval. The invoice number must be unique per supplier, the due date cannot be before the invoice date, and a contract must belong to the same development and supplier.
  • On approval a cost accrual for the net amount is posted to the ledger in the base currency. Contractor advances are excluded from actual cost.
  • Payable = total including tax − advance recovery − other deductions − retention not yet released. A payment request cannot exceed the outstanding amount less payments already pending.
  • An approved payment is posted at the payment-date exchange rate. If it differs from the invoice rate, the difference is posted as a realised FX gain or loss.
  • Voiding is possible only for an approved expense without pending or posted payments, and reverses its cost accrual. A posted payment can be voided on its own, which reverses it and its FX difference.
  • Payment status is Unpaid, Partially paid or Paid, based on posted payments.

Questions

The currency I need is not in the list.
Only currencies with an exchange rate can be used. Add a rate in Finance settings, then create the expense.
Why can't I void an approved expense?
It has payments pending or posted. Void the posted payments first, or wait for pending ones to be decided, then void the expense.
Saving fails with a duplicate invoice number.
Each supplier's invoice number can be used only once, except on voided expenses. Check that the invoice was not already recorded.

Accounts payable

Open supplier and contractor balances, their aging, the payment schedule by due date and the register of outgoing payments.

Who uses it: Finance viewers (Organization owner, Administrator, Accountant, Project manager) can open payables. Payments are requested from the expense page by users with finance create rights.

Payables
Figure 89. Payables

How to use it

  1. 1Open Finance, then Payables, and choose a development or all developments.
  2. 2Read Outstanding payable, Overdue, Due within 30 days and Payments pending approval.
  3. 3Use Aging by contractor / supplier to see who is owed what in each age bracket, and click a name to open the partner.
  4. 4Use Payment schedule to see open invoices by due date, and click a reference to open the expense and click “Request payment”.
  5. 5Filter the Payments register by status and use “Export CSV” to download the payables.

Rules and details

  • Only approved expenses with an outstanding balance appear here; outstanding means payable amount less posted payments.
  • Aging uses the due date: Current, 1–30 days, 31–60 days, 61–90 days and Over 90 days. Invoices without a due date count as current.
  • Figures are converted to the base currency at each expense's frozen rate.
  • Organization-level costs without a development are included in the totals and mentioned in a note, but excluded from development totals.
  • The Payments register lists every outgoing payment with its status: Pending approval, Posted, Rejected or Void.

Questions

How do I pay an invoice from this page?
Click the invoice reference to open the expense, then use “Request payment”. The payment is posted after it is approved in Approvals.

Accounts receivable

Customer installments due on active sales contracts, their aging, overdue installments, customer receipts and refunds.

Who uses it: Finance viewers can open receivables. Customer payments are recorded in Sales by users with sales edit rights (Sales manager, Sales agent, Accountant, Administrator, Organization owner).

Receivables
Figure 90. Receivables

How to use it

  1. 1Open Finance, then Receivables, and choose a development or all developments.
  2. 2Read Outstanding receivable, Overdue, Due within 30 days and Contracts in arrears.
  3. 3Use Receivables aging and the Overdue installments list (oldest first) to plan collections.
  4. 4Filter Customer receipts by status and review Refunds; use “Export CSV” to download the receivables.

Rules and details

  • Only scheduled installments of active and completed sales contracts are counted.
  • Aging uses the installment due date with the same brackets as payables.
  • Contracts in arrears are contracts with at least one overdue installment.
  • Contracts in a currency without an exchange rate are shown at face value, with a note.
  • Receipts are listed as Posted or Void; reservation deposits are marked as such.

Questions

Can I record a customer payment here?
No. Record it from the sales contract, the Installments page or the reservation in Sales; it then appears here.
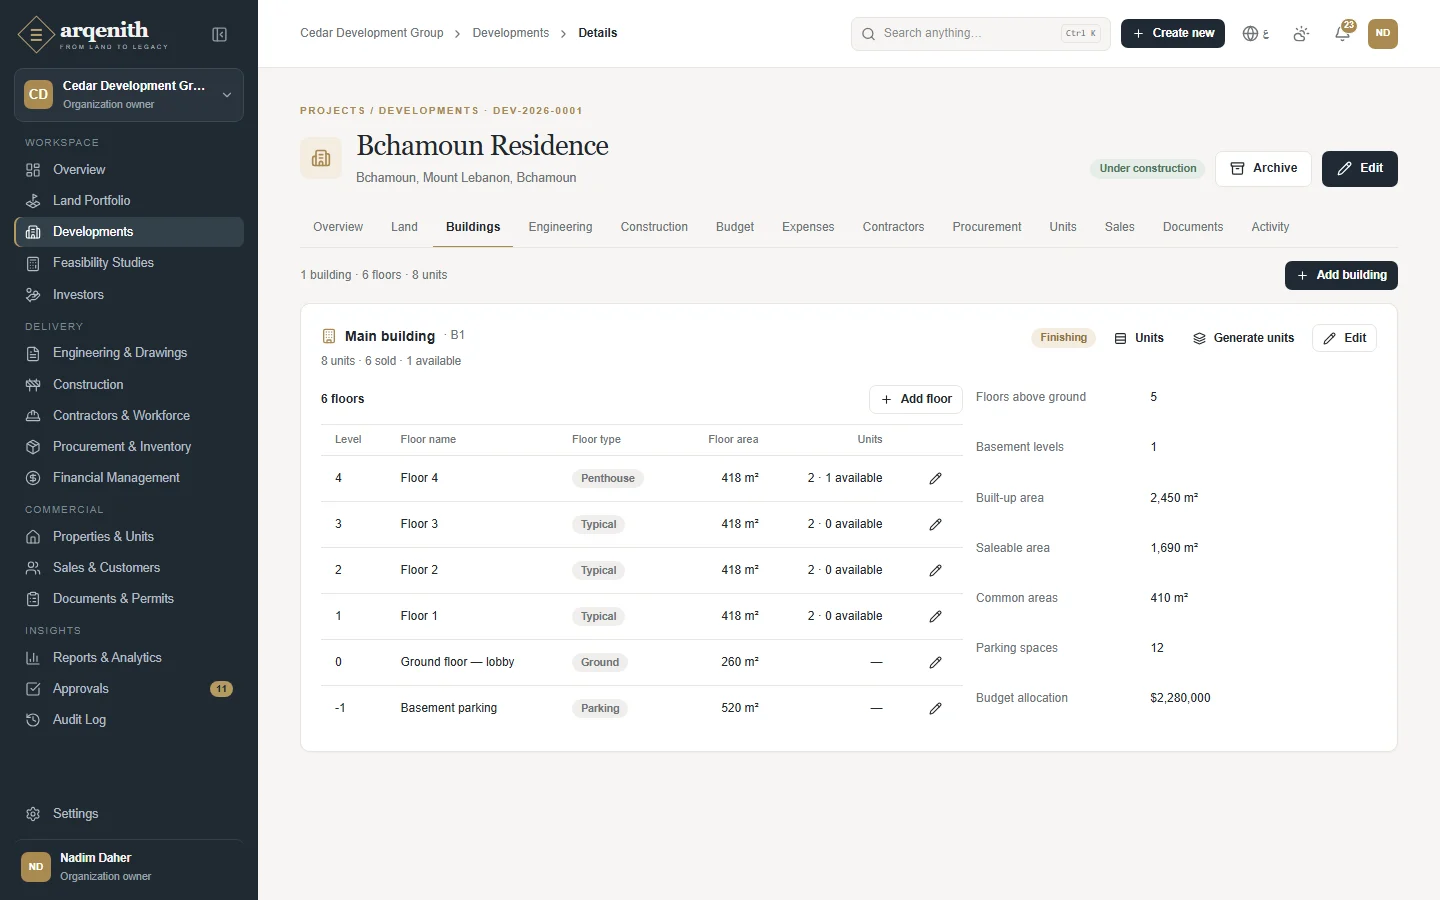
Cash flow

Actual monthly cash movements from the ledger and a forward-looking forecast based on scheduled installments and approved payables.

Who uses it: Finance viewers (Organization owner, Administrator, Accountant, Project manager) can open cash flow and export it.

Cash flow
Figure 91. Cash flow

How to use it

  1. 1Open Finance, then Cash flow.
  2. 2Choose a development or all developments, and a Period of 6, 12, 24 or 36 months.
  3. 3Read the current position, the actual net for the period, the Forecast net and the Projected position.
  4. 4Review the Actual cash flow and Cash flow forecast charts and the monthly tables with their running totals, and use “Export CSV”.

Rules and details

  • Actual cash flow uses only posted ledger entries that move cash: customer receipts, loan drawdowns and capital contributions in; supplier payments, refunds, loan repayments, interest, investor distributions and capital withdrawals out. Voided entries are netted by their reversals.
  • Non-cash entries such as cost accruals and realised FX gains or losses are excluded.
  • The forecast takes the unpaid part of scheduled installments on active contracts (converted at today's rate) as inflows, and approved unpaid payables (at their invoice rate) as outflows. Overdue items fall in the current month.
  • Projected position = current position + forecast net. Forecast figures are marked as estimates.

Questions

An approved expense is not in the actual cash flow.
Approval records a cost, not cash. It shows in the actual cash flow once a payment is posted, and in the forecast until then.

Loans & partner capital

Credit facilities with their drawdowns, repayments and interest, and partner capital contributions and withdrawals, all posted to the ledger.

Who uses it: Finance viewers can read this page. Organization owner, Administrator and Accountant register loans. Recording loan transactions and capital movements needs finance approval rights (the same roles by default).

Loans
Figure 92. Loans

How to use it

  1. 1Open Finance, then Loans & capital, and click “New loan”. Enter the Lender, optional Development (leave empty for a corporate facility), Currency, Facility amount, Interest rate, Start date and Maturity date.
  2. 2On an active facility click “Transaction”, choose Drawdown, Repayment or Interest, the date and the amount, then click “Record loan transaction”.
  3. 3Click “Record capital” to record a partner Contribution or Withdrawal with the Partner name, development, date, currency and amount.
  4. 4Review Loan facilities (drawn, repaid, interest, outstanding balance, utilisation), Loan transactions, Net capital by partner and Partner capital.

Rules and details

  • Loans are numbered automatically, for example LON-2026-0001, and capital movements CAP-2026-0001.
  • Total drawdowns can never exceed the facility amount, and total repayments can never exceed what was drawn.
  • Outstanding balance = drawdowns − repayments. Interest is a financing cost recorded with the amount you enter, and it does not change the principal; the facility interest rate is for reference.
  • Each transaction is posted to the ledger in the loan's currency at the exchange rate of its date; drawdowns are cash in, repayments and interest cash out.
  • Capital contributions are cash in and withdrawals cash out. Contributions recorded here with a free-text partner name can later be attributed to a registered investor from the investor's page.
  • Posted loan transactions and capital movements cannot be edited or deleted.

Questions

A repayment is refused.
Repayments cannot exceed the amount drawn so far. Record the drawdowns first, and record interest as an Interest transaction rather than a repayment.

Ledger

The immutable register of every financial transaction. Corrections are posted as reversal entries, never by editing.

Who uses it: Finance viewers (Organization owner, Administrator, Accountant, Project manager) can read and export the ledger. Nobody can edit or delete an entry.

The ledger
Figure 93. The ledger

How to use it

  1. 1Open Finance, then Ledger.
  2. 2Filter by Type, Development and date range (From, To). The totals reflect the entries matching the filters.
  3. 3Read Cash in, Cash out, Net cash, Cost accruals and Realised FX.
  4. 4Follow the “Reverses” and “Reversed by” notes to pair a correction with its original entry.
  5. 5Use “Export CSV” to download the filtered entries.

Rules and details

  • Entries are created automatically by approved expenses and payment certificates (cost accrual), approved payments, customer receipts, refunds, loan drawdowns, repayments and interest, capital contributions and withdrawals, investor distributions, and realised FX gains and losses. Each is numbered, for example TXN-2026-0001.
  • Each entry keeps its date, type, cash direction, currency, amount, exchange rate, base-currency amount, source and memo.
  • Voiding an expense, payment or customer receipt posts a reversal entry. A reversal is shown as a negative amount under the original type and direction, and each entry can be reversed only once.
  • Realised FX: a supplier payment is posted at the payment-date rate while the invoice was booked at the invoice-date rate; a customer receipt is posted at the receipt-date rate while the contract was booked at the contract-date rate. The difference is posted as a separate non-cash FX gain or loss. Reservation deposits have no FX difference.
  • Adding a new exchange rate never restates entries that are already posted.

Questions

How do I correct a wrong ledger entry?
Void the source record (the expense, payment or receipt). This posts a reversal; then record the correct transaction.
Where does an FX gain or loss entry come from?
From a payment or customer receipt whose exchange rate differed from the rate of the original invoice or contract. Its memo names the payment or receipt.

Development profitability

Total development cost, revenue and margins per development, building and unit, with clear marking of estimates and actuals.

Who uses it: Finance viewers (Organization owner, Administrator, Accountant, Project manager) can open profitability and export it.

Profitability by development
Figure 94. Profitability by development

How to use it

  1. 1Open Finance, then Profitability, and choose the development.
  2. 2Read Total development cost, Expected revenue, Contracted revenue, Collected revenue, Projected gross profit, Gross margin, Return on cost, Break-even price per m², cost per constructed and saleable m², Land cost and the unit mix.
  3. 3Review Profitability by building.
  4. 4Review Profitability by unit and filter it by building.
  5. 5Use “Export CSV” to download the figures.

Rules and details

  • Total development cost (EAC) = actual cost + remaining commitments + forecast remaining.
  • Expected revenue = contracted price for sold units and asking price for the others. Collected revenue = customer receipts less refunds.
  • Gross margin = projected gross profit ÷ expected revenue; Return on cost = projected gross profit ÷ EAC; Break-even price per m² = EAC ÷ total saleable area.
  • Unit and building cost is EAC allocated to units by their share of the saleable area.
  • Land cost comes from the land register for reference. It is part of EAC only when it is budgeted or expensed under the land category.
  • Figures marked Estimate include forecasts or asking prices; Actual figures come from approved costs, signed contracts or cash received.

Questions

Land cost is shown but my margin ignores it.
Land cost is displayed for reference. Add it to the budget or record it as an expense under the land cost category so it enters the estimate at completion.

Finance settings

Exchange rates, the cost category structure used by budgets, expenses and reports, and the default tax rate.

Who uses it: Finance viewers can read the settings. Organization owner, Administrator and Accountant add exchange rates and manage cost categories. The tax rate is changed in organization settings by users with settings rights.

Finance settings
Figure 95. Finance settings

How to use it

  1. 1Open Finance, then Settings.
  2. 2Click “Add rate”, choose the Currency, enter the Rate to the base currency (the value of one unit in the base currency, up to 8 decimals), the Effective date and an optional Source, then save.
  3. 3Click “Add category” to create a cost category with a Code, Name, Name (Arabic), optional Parent category and Sort order.
  4. 4Use “Edit” to change a category, and “Deactivate” or “Reactivate” to control whether it is offered for new budget lines and expenses.

Rules and details

  • Supported currencies are USD, LBP, EUR, AED, SAR and GBP. A transaction in a currency without a rate is rejected until one is added; no rate is needed for the base currency.
  • Each transaction uses the latest rate effective on or before its date. Rates are listed as In use today, Future or Historical, with the inverse “Units per 1” shown for reference. Saving a rate for the same currency and date replaces it.
  • Once an expense is approved its rate and base amount are frozen; new rates do not restate posted figures.
  • Organizations with a USD base currency start with LBP at the Banque du Liban rate of 89,500 and EUR at 1.08, which you can replace.
  • Cost category codes use capital letters, digits and the characters _ . - and must be unique. A category cannot be its own parent or descendant. Fifteen categories are created with the organization, from LAND (Land acquisition) to CONT (Contingency).
  • Deactivated categories stay on existing records but are not offered for new ones.
  • The default tax rate (11% unless changed) is only a suggestion on new expenses; it is set in organization settings.

Questions

I entered a wrong rate. Will fixing it change approved expenses?
No. Save the correct rate for the same date to replace it for future transactions; approved expenses and posted entries keep the rate they were posted with.
↑ Back to contents

Chapter 14

Investors

The investor register, commitments, capital, distributions and statements.

Investors

The register of shareholders, partners and funds that finance your developments, with their capital commitments, contributions and distributions.

Who uses it: Finance viewers (Organization owner, Administrator, Accountant, Project manager) can read the register. Organization owner, Administrator and Accountant add investors, edit and archive them. Commitments, contributions and distributions need finance approval rights (the same roles by default).

The investor register
Figure 96. The investor register

How to use it

  1. 1Open Investors from the sidebar.
  2. 2Click “New investor” and enter the Investor type (Individual, Company or Fund), Legal name, contact details, Country, Nationality / jurisdiction, Tax ID, Registration number, and the KYC & compliance data: ID document, KYC status, verification and expiry dates, Risk rating, Politically exposed person and Source of funds.
  3. 3Search by name, reference, contact or email, filter by type or KYC status, and click “Show archived” to include archived investors.
  4. 4Read Total committed, Capital contributed, Unfunded commitments and Distributed at the top.
  5. 5Use “Export CSV” to download the register.

Rules and details

  • Investors are numbered automatically, for example IVR-2026-0001.
  • KYC status is Pending, Verified, Expired or Rejected. The expiry date cannot be before the verification date, and a warning shows when KYC expires within 60 days.
  • Unfunded commitments (callable capital) = committed − net contributed, never below zero. Each contribution is recorded when it is received.
  • Amounts are shown in the base currency, converted at transaction-date rates.
  • Archived investors keep their full history but cannot receive new contributions or distributions.

Questions

Does an unverified KYC block transactions?
No. The investor page shows a warning until KYC is verified. Only archiving blocks new contributions and distributions.
How much capital can I still call from an investor?
Look at Unfunded commitments: the committed amount less net contributions, shown in total on the register and per development on the investor page. Record each contribution when the money arrives.

Investor page & statement

One investor's commitments per development, capital account, contributions, distributions, returns and a printable capital statement.

Who uses it: Finance viewers can open investor pages and statements. Commitments, contributions, distributions and attributing contributions need finance approval rights (Organization owner, Administrator, Accountant). Editing and archiving need finance edit rights.

An investor
Figure 97. An investor
An investor statement
Figure 98. An investor statement

How to use it

  1. 1Open an investor from the register.
  2. 2Click “Add commitment”, choose the development and enter the Commitment date, Currency, Committed amount, Ownership, optional Profit share and Preferred return (p.a.), and the Status.
  3. 3Click “Record contribution” to post a Capital contribution or Capital withdrawal for a development the investor has committed to.
  4. 4Click “Record distribution” and choose Profit distribution, Return of capital or Interest / preferred return, with the development, date, currency and amount.
  5. 5If contributions were recorded earlier under Loans & capital, use “Attribute” in Unattributed contributions to link them to this investor.
  6. 6Click “Statement”, then “Print / save as PDF” for the investor capital statement.

Rules and details

  • Commitments are numbered automatically, for example CMT-2026-0001. An investor has at most one live commitment per development, and its investor and development cannot be changed afterwards. Commitments are cancelled, never deleted.
  • On each development the ownership shares of all live commitments cannot exceed 100%, and neither can the profit shares (an empty profit share counts as equal to ownership).
  • Contributions and distributions are posted to the ledger at the exchange rate of their date; contributions are cash in, distributions cash out. Distributions are numbered DST-2026-0001 and require a live commitment on the development.
  • Capital account: Committed, Contributed, Withdrawn, Net contributed, Unfunded, Distributed by type and Net invested, in the base currency.
  • Returns: the realised equity multiple and realised IRR use actual cash flows; the projected figures add the investor's share of the projected profit (profit share × projected gross profit of the development) and the projected remaining equity at target completion. Preferred return accrued is a simple daily accrual and is an estimate.
  • The statement shows the summary by development and every transaction with a running net invested balance, and states that projected figures are estimates, not a guarantee.

Questions

Saving a commitment fails because ownership exceeds 100%.
The other live commitments on that development already use the remaining share. The error shows how much is still available; reduce the share or cancel another commitment.
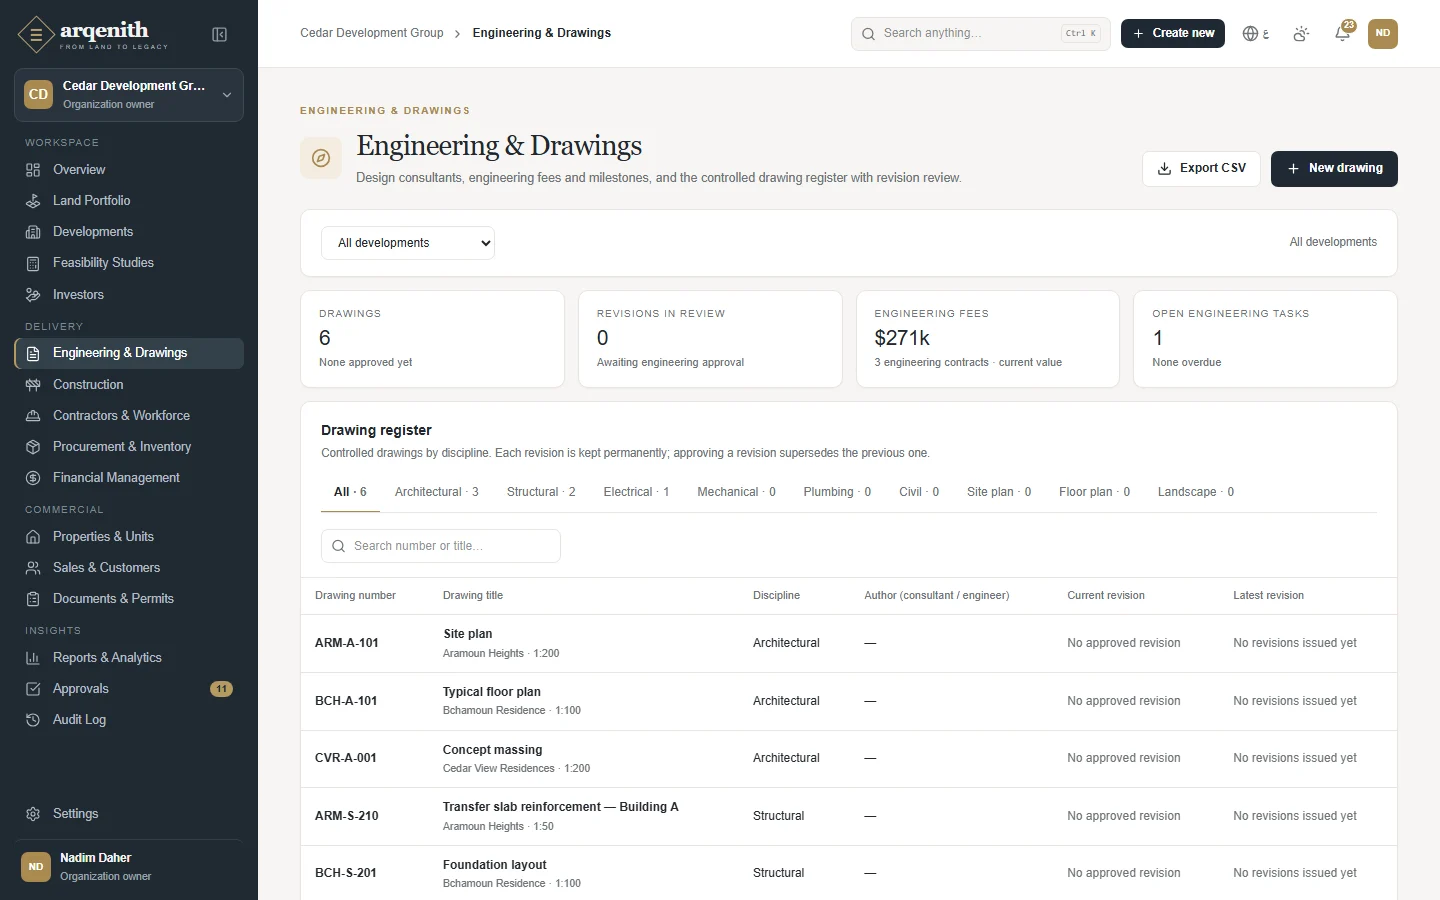
Why is there no Record distribution button?
Distributions and contributions need a commitment on at least one development, finance approval rights, and an investor that is not archived.
I recorded a contribution with the wrong amount.
Posted movements cannot be edited or deleted. Record a correcting capital withdrawal for the excess, or a further contribution for the shortfall, and explain it in the notes.
↑ Back to contents

Chapter 15

Sales

Customers, reservations, sales contracts, installments and commissions.

Sales pipeline

Track every buyer from first enquiry to unit handover on a pipeline board, with weighted value, win rate, reservations and monthly collections.

Who uses it: Sales manager, Sales agent, Organization owner and Administrator work in Sales; Project manager, Accountant and Viewer can view it. Sales agents create and move opportunities. Approvals in Sales (discounts, schedule amendments, reservation extensions, cancellations) belong to the Sales manager.

Sales overview
Figure 99. Sales overview

How to use it

  1. 1Open Sales & Customers from the sidebar. The tabs Pipeline, Customers, Reservations, Sales contracts, Installments and Commissions lead to each part.
  2. 2Click “New opportunity”, choose the Customer, Stage, Probability, Development, Unit of interest, Expected value, Sales agent and Next follow-up, then save.
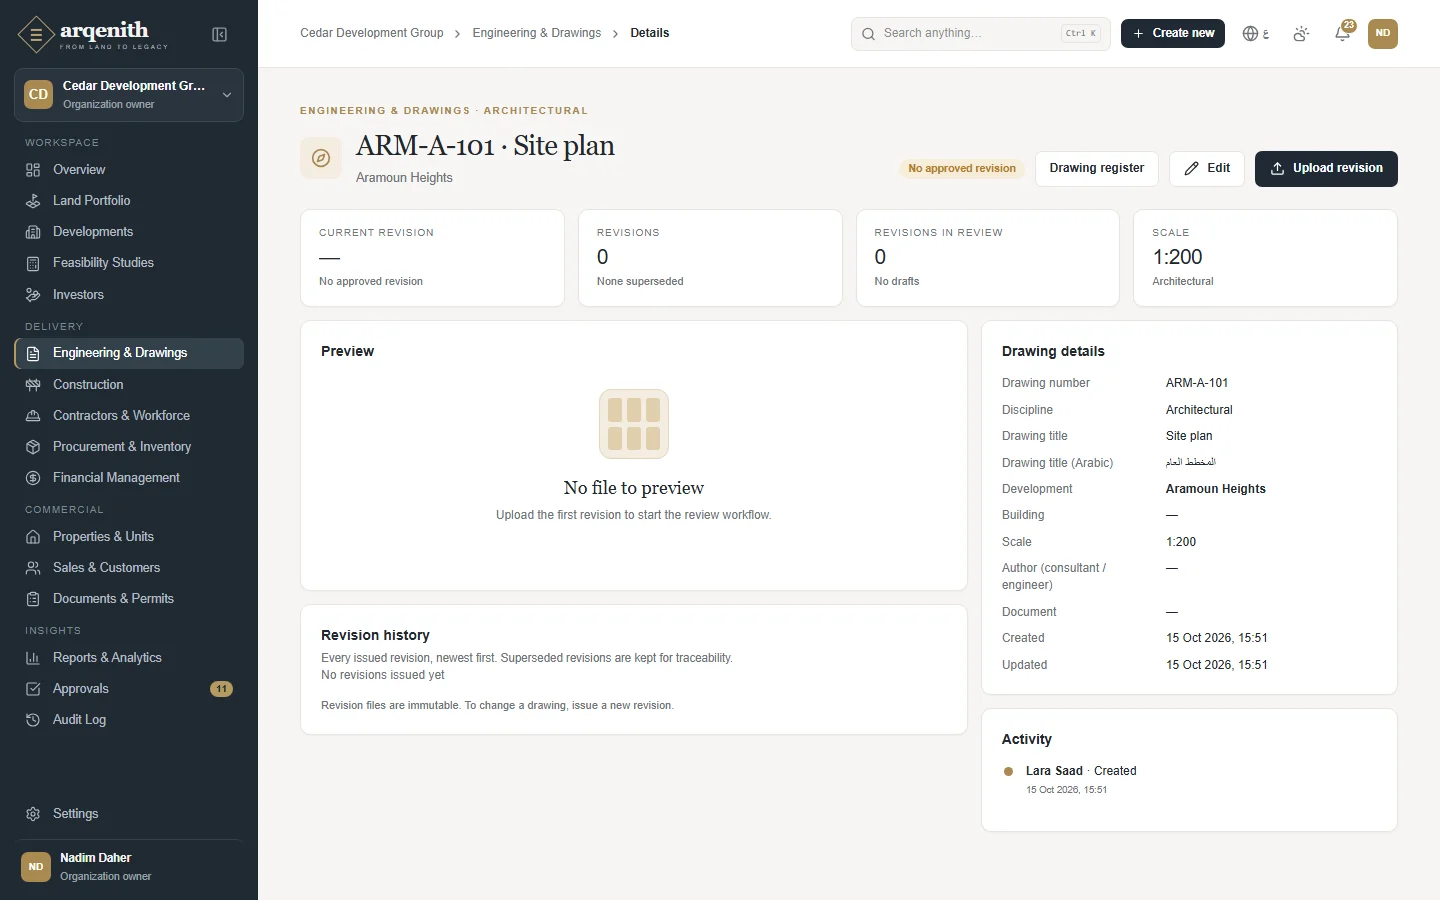
  3. 3On a card use “Move to stage” to move it along. Choosing Lost asks why the opportunity was lost.
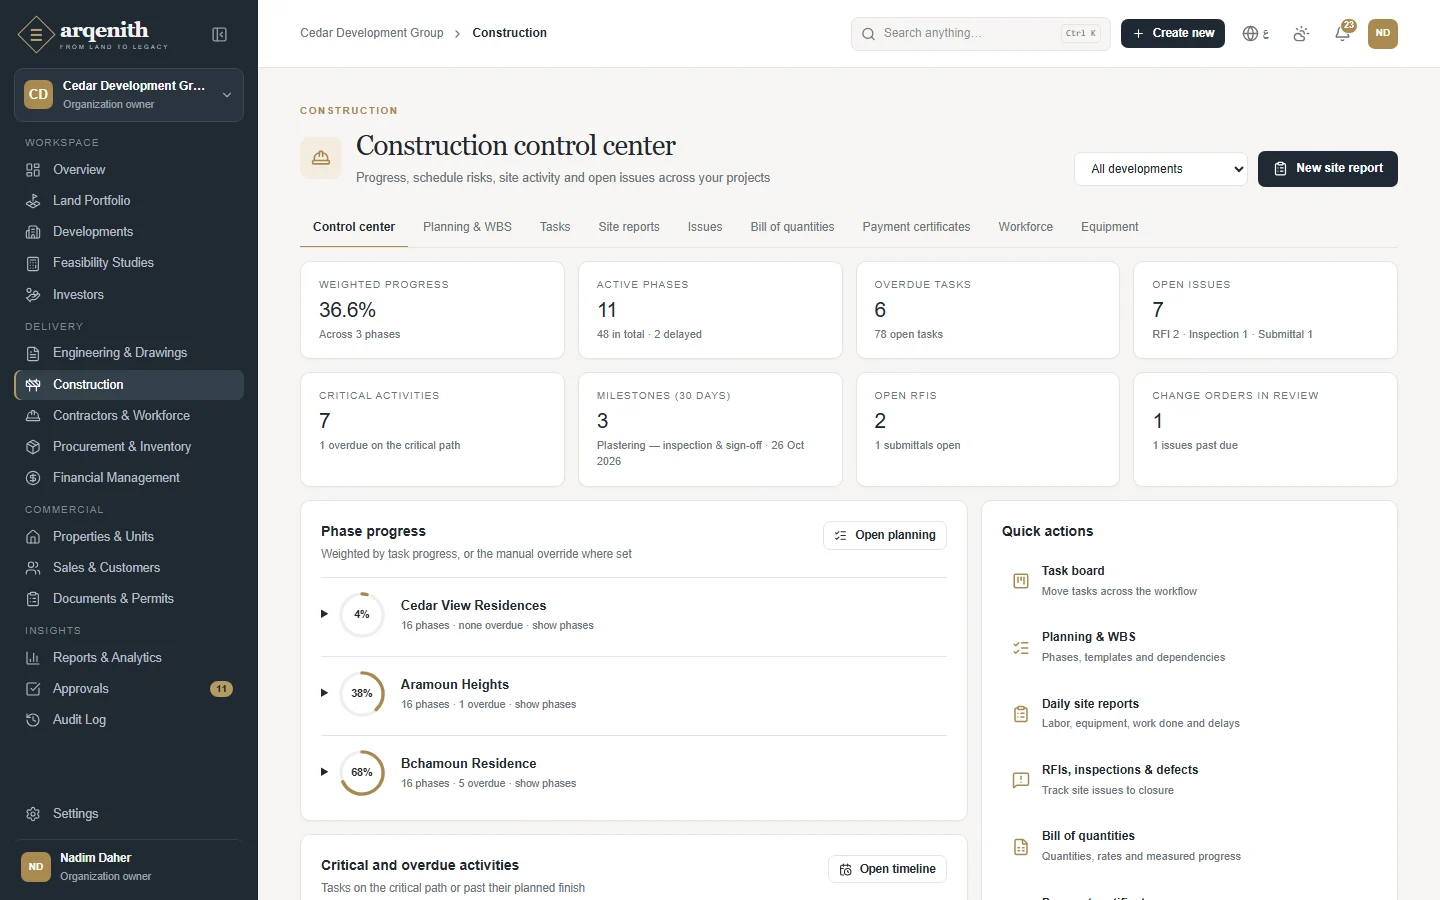
  4. 4Use the pencil on a card to edit the opportunity.
  5. 5Filter by development or agent, or switch between All opportunities and My opportunities.

Rules and details

  • Stages: Lead, Qualified, Viewing, Negotiation, Reservation, Contract, Payment plan, Sold, Handover and Lost. Opportunities are numbered, for example OPP-2026-0001.
  • Moving a card sets the probability to the stage default: Lead 10%, Qualified 25%, Viewing 40%, Negotiation 60%, Reservation 80%, Contract 90%, Payment plan 95%, Sold and Handover 100%, Lost 0%. You can still change it in the edit form.
  • Some moves happen automatically: reserving a unit for the opportunity moves it to Reservation, activating its contract moves it to Contract, and handing the unit over moves it to Handover.
  • Weighted pipeline = expected value × probability of open opportunities, shown as an estimate. Win rate = won ÷ (won + lost).
  • A follow-up date in the past is highlighted on open opportunities.

Questions

An opportunity moved stage by itself.
Reservations, contract activation and handover move the linked opportunity automatically, so the board follows the actual sale.

Customers

Buyers and prospects with their contacts, preferences, communication history, deals and statement of account.

Who uses it: Sales users can view customers. Sales manager, Sales agent, Organization owner and Administrator add customers, edit them and log interactions. Accountants can also edit customer records.

Customers
Figure 100. Customers
A customer
Figure 101. A customer

How to use it

  1. 1Open Sales, then Customers, and click “Add customer”.
  2. 2Enter the Customer type, Full name, Full name (Arabic), Nationality, ID type and ID number, contact details, Lead source, Assigned agent, the budget range, Preferred unit types and Interested in developments, then save.
  3. 3On the customer page use Overview to read the profile, click “Log interaction” to record a call, email, meeting, viewing, WhatsApp message or note, and “New opportunity” to add a deal.
  4. 4Use “Reserve a unit” or “New sales contract” in the header to start a sale for this customer.
  5. 5Open Reservations & contracts for their deals, Customer statement for the account (click “Print statement” for a printable copy) and Documents for files.

Rules and details

  • Customers are numbered automatically, for example CUS-2026-0001. “Budget up to” cannot be lower than “Budget from”.
  • The ID number is shown in full only to users who can edit customers, and only they can search by it; others see it masked.
  • Buyers are customers with an active or completed contract; prospects have no signed contract yet.
  • The customer statement lists, per contract and reservation, the scheduled installments as charges (including future due dates), receipts and refunds, with a running balance. A positive balance is owed by the customer; voided receipts are shown but excluded from the balance.
  • Filter the list by type, lead source or agent, and use “Export CSV” if you have export rights.

Questions

Why is the customer's ID number partly hidden?
Full ID numbers are visible only to users with sales edit rights. This protects personal data from read-only users.

Reservations

Units held for customers against a deposit, with automatic expiry, deposit receipts, extension, cancellation and conversion to a contract.

Who uses it: Sales users can view reservations. Sales agents and managers reserve units, record deposits, convert and cancel. Extending a reservation needs sales approval rights (Sales manager, Administrator, Organization owner). Refunding a deposit needs finance approval rights (Accountant, Administrator, Organization owner).

Reservations
Figure 102. Reservations

How to use it

  1. 1Open Sales, then Reservations, and click “Reserve unit” (or “Reserve a unit” on a customer).
  2. 2Choose the unit and the customer, enter the expected Deposit and the Validity (days), optionally link an Opportunity, then click “Reserve unit”.
  3. 3When the customer pays, click “Deposit” on the reservation and record the receipt.
  4. 4Click “Convert to contract” to open the sales contract wizard with this reservation.
  5. 5If needed, click “Extend” and enter the number of days, or “Cancel” with a Cancellation reason.
  6. 6On a cancelled or expired reservation with money received, click “Refund”. Use the tabs Active, Expired, Converted and Cancelled and the print icon for a printable reservation.

Rules and details

  • Reservations are numbered automatically, for example RES-2026-0001. Only available or on-hold units with an asking price can be reserved, and a unit can have only one active reservation; it becomes Reserved.
  • The quoted price is always the unit's asking price at the time of reservation. The deposit amount is what you expect; only recorded receipts count as received.
  • Validity is 1 to 180 days; the default comes from the organization's Reservation validity setting (14 days unless changed).
  • An extension adds 1 to 90 days to the current expiry.
  • When the expiry passes, the reservation becomes Expired and the unit available again, unless a contract was already created from it. Expiry is checked whenever the sales pages are opened or a sale is created, and by the scheduled notifications run. The creator is notified two days before expiry, and the page warns about reservations expiring within three days.
  • Cancelling makes the unit available again. Deposits received stay recorded; they can be refunded, up to the amount received minus refunds. Once a contract is made from the reservation, deposits are refunded through the contract.
  • On contract activation the deposits are applied to the first installments of the payment plan.

Questions

A reservation expired before the contract was signed.
Expired reservations cannot be revived. Reserve the unit again if it is still available, or ask a sales manager to extend future reservations before they expire.
Can I reserve at a price other than the asking price?
No. The reservation is always quoted at the unit's asking price. A sales manager can override the list price or a discount can be applied when the contract is created.

Sales contracts

Sale and purchase agreements with their price, discount, payment plan and installments, collections, refunds, schedule amendments, handover and cancellation.

Who uses it: Sales agents and managers create contracts and record payments; Accountants can also record payments. Sales managers approve discounts above the threshold, override list prices and commissions, amend schedules, cancel contracts and hand over with an outstanding balance. Voiding receipts and refunds need finance approval rights (Accountant, Administrator, Organization owner).

Sales contracts
Figure 103. Sales contracts
A sales contract and its installments
Figure 104. A sales contract and its installments

How to use it

  1. 1Open Sales, then Sales contracts, and click “New sales contract”, or use “Convert to contract” on a reservation.
  2. 2Unit & customer: start from an Active reservation or an Available unit and choose the customer.
  3. 3Price & terms: check the List price, enter the Discount, Contract date and Agent commission.
  4. 4Payment plan: click “Use default plan” or “Add installment” for each row, set fixed amounts or % of remainder and due dates (days after the base date or an exact date), until the schedule reconciles exactly.
  5. 5Review and click “Create contract”, or “Submit for approval” when the discount needs approval.
  6. 6On the contract page use “Record payment”, “Amend schedule”, “Refund”, “Handover”, “Cancel contract”, and “Print” for the bilingual contract; void a wrong receipt with “Void”.

Rules and details

  • Contracts are numbered automatically, for example SPA-2026-0001, and receipts RCP-2026-0001. A unit can be under only one live contract.
  • The list price is the reservation's quoted price or the unit's asking price; only a sales manager can override it. The discount must be below the list price. Above the threshold (3% of the list price unless changed in organization settings) a contract created by someone without sales approval rights waits in Pending approval with the unit held. Commission defaults to 1.5%, a higher rate needs a sales manager, and 10% is the maximum.
  • The default plan is 5% reservation deposit, 15% at signing after 14 days, 25% at structure after 120 days, 25% at finishing after 300 days and 30% at handover after 480 days. Fixed amounts are taken first and percentage rows share the remainder; installments must add up exactly to the final price.
  • On activation the unit becomes Sold, the reservation Converted, reservation deposits are applied to the schedule, the opportunity moves to Contract and the commission is accrued. A rejected discount cancels the contract's installments and releases the unit unless it came from a reservation.
  • Payments are applied to the oldest open installments first and cannot exceed the outstanding balance; partial payments are allowed. Each receipt is posted to the ledger at its date's rate, with any difference from the contract-date rate posted as realised FX.
  • Amend schedule (active contracts) keeps paid amounts, cancels or shrinks unpaid installments and adds new lines that must equal the unpaid remainder; a reason is required.
  • Handover is blocked while installments before the handover installment are unpaid, unless a sales manager ticks the override. It marks the unit Handed over and the contract Completed.
  • Cancelling (active or pending contracts, not after handover) cancels unpaid installments, withdraws a pending discount approval, cancels unpaid commission and makes the unit available. Money received stays recorded and can be refunded. Apart from notes, a contract cannot be edited after creation.

Questions

My contract is stuck in Pending approval.
The discount is above the approval threshold. A sales manager approves or rejects it in Approvals or with “Approve discount” on the contract page.
Create contract stays disabled.
Usually the payment plan does not add up to the final price. Check the scheduled total and the difference shown under the plan, or click “Convert to fixed amounts” and adjust.
Handover is blocked by an outstanding balance.
All installments before the handover installment must be paid first. A sales manager can hand over anyway by ticking “Hand over despite the outstanding balance”.

Installments

Every installment across all sales contracts with its due date, amount paid and collection status, to follow up dues and overdue payments.

Who uses it: Sales users and finance users can view installments. Users with sales edit rights (Sales manager, Sales agent, Accountant, Administrator, Organization owner) record payments.

Installments
Figure 105. Installments

How to use it

  1. 1Open Sales, then Installments.
  2. 2Choose a view: Open, Overdue, Due this month, Paid or All, and filter by development.
  3. 3Click “Record payment” on an installment to record the customer's payment on its contract.
  4. 4Use “Export CSV” to download the current view.

Rules and details

  • Status per installment: Due, Partially paid, Overdue (past the due date and not fully paid), Paid or Cancelled. Overdue installments show the number of days overdue.
  • A payment is always recorded against the contract and applied to its oldest open installments first, so it may settle a different installment than the one you clicked if earlier ones are still open.
  • Users with finance edit rights and the contract's agent are notified of overdue installments.
  • Installments are created only from the contract's payment plan and change only through a schedule amendment, a cancellation or a rejected discount.

Questions

I recorded a payment for one installment but another one was paid.
Payments are applied to the oldest open installments first by schedule order. To change the plan itself, a sales manager can amend the schedule.

Commissions

Agent commissions accrued on activated sales contracts, with their approval and payment status.

Who uses it: Users with finance view or sales approval rights see all commissions; a Sales agent sees only their own. Approving and marking commissions as paid needs finance approval rights (Accountant, Administrator, Organization owner).

Commissions
Figure 106. Commissions

How to use it

  1. 1Open Sales, then Commissions.
  2. 2Filter by status or development, and read the Accrued, Approved, Paid and Payable totals.
  3. 3Click “Approve” on an accrued commission.
  4. 4Click “Mark paid” once the agent has been paid, and confirm.

Rules and details

  • A commission is accrued automatically when a contract with a commission rate is activated: final price × rate, in the contract currency, one per contract.
  • Statuses: Accrued, Approved, Paid and Cancelled. “Mark paid” is possible from Accrued or Approved.
  • Marking a commission paid only records its status. It does not create a payment or a ledger entry; pay the agent through your usual process.
  • Cancelling the contract cancels its commission unless it is already paid.
  • Payable = accrued + approved, not yet paid.

Questions

A contract has no commission.
Commission accrues only when the contract has a commission rate above zero and is activated. A contract waiting for discount approval accrues it when approved.
↑ Back to contents

Chapter 16

Documents, Approvals and Notifications

Files with versions, everything waiting for a decision, and alerts.

Document library

One secure place for deeds, permits, drawings, contracts, invoices, inspection reports and site photos. Every document is versioned, can carry an expiry date, can go through approval, and can be linked to a development or to a specific record.

Who uses it: Everyone whose role includes Documents · View sees the library; people who can view a module also see the documents attached to that module's records. Uploading needs Documents · Create (all roles except Viewer). Editing details, submitting for approval and archiving need Documents · Edit (Owner, Administrator, Project manager, Engineer, Sales manager). Approving, rejecting and handling confidential documents need Documents · Approve (Organization owner, Administrator, Project manager).

Documents
Figure 107. Documents
A document and its versions
Figure 108. A document and its versions

How to use it

  1. 1Open Documents & Permits in the sidebar. The cards at the top show Active documents, Pending approval, Expiring in 30 days and Confidential.
  2. 2Click Upload document, choose the File and fill in Title, Title (Arabic), Category, Development (or leave Organization-wide), Expiry date, Tags (comma separated) and Description, then click Upload document. If you leave Title empty the file name is used.
  3. 3Find documents with the search box (title, reference, description or an exact tag) and the Category, Development, Status and Expiry date filters (Expiring within 30 days, Expired, No expiry date). Approvers also get a Confidential filter.
  4. 4Open a document to see its Preview, Version history, Details, Associations, Comments and Activity. Use Download for the current file, or Open and Download on any earlier version.
  5. 5To replace the file, click New version and choose the new file (Upload v2, v3…). Earlier versions stay available.
  6. 6When the file is ready, click Submit for approval and optionally add a note for the reviewer. An approver then clicks Approve (comment optional) or Reject (reason required).
  7. 7Use Edit to correct the title, category, expiry date, tags or description, and Archive to take a document out of use; Show archived at the bottom of the library lists archived documents, which can be restored.

Rules and details

  • Every document gets a reference such as DOC-2026-0001, numbered per organization and per year.
  • Approval states: Draft → Pending approval → Approved or Rejected. Submitting is possible only once a file has been uploaded and the document is in Draft or Rejected. Approved by records the approver and the time.
  • Uploading a new version of an approved document returns it to Draft, so the new file is reviewed before it counts as approved again. A rejected document shows a banner: read the comments, upload a corrected version and resubmit.
  • Versions are immutable: each upload is kept as a numbered version with its file name, type, size, uploader and time, and is never overwritten. Allowed files are PDF, images (PNG, JPEG, WebP), Word and Excel files, CSV, DWG/DXF drawings and ZIP archives, up to 50 MB each.
  • PDFs and images preview directly on the page. Files sit in private storage and open through short-lived links; the preview link lasts 10 minutes, so reload the page if it stops working.
  • Confidential documents (marked with a lock) are visible only to people with Documents · Approve. Only they can mark or unmark a document as confidential.
  • Expiry: dates within 30 days are highlighted amber and past dates red, and an expired document shows a banner asking for a renewed version. Document approvers receive a Document expiry notification from 30 days before the date.
  • Documents uploaded from a record (a land parcel, development, unit, drawing, contract, purchase order, expense, customer, sales contract and so on) appear both on that record and in the library, where Linked to opens the record. Archiving hides a document from the library and from record attachments but keeps its files and versions; there is no delete.

Questions

Why did my approved document go back to Draft?
A new version was uploaded. Approval always applies to the current file, so the document returns to Draft and must be submitted and approved again.
A colleague says a document exists but I can't find it.
It may be confidential (only document approvers see those), belong to a development you have no access to, be archived (use Show archived), or be attached to a module your role cannot view.
A building permit was renewed. Should I upload a new document?
No. Open the existing document, click New version and upload the renewed permit, then use Edit to set the new Expiry date. The old permit remains in the version history, and the document goes through approval again if it was approved.
Why is there no Submit for approval button?
The button appears only when the document has a file and is in Draft or Rejected, the document is not archived, and your role includes Documents · Edit. A document that is already Pending approval waits for an approver.

Approvals inbox

Every financial and commercial request that needs a decision, in one inbox: expenses, payments, purchase orders, payment certificates, budget baselines, budget revisions, change orders and sales discounts. Each is decided here or on its own record, and the decision moves the record on.

Who uses it: Approvers decide requests in modules where their role includes Approve: by default the Accountant for finance (expenses, payments, budgets and budget revisions), the Project manager for procurement, contractors and construction (purchase orders, payment certificates, change orders), the Sales manager for sales discounts, and the Organization owner and Administrators for everything. Everyone can follow the requests they submitted under My requests; if Approvals is not in your sidebar (for example as a Sales agent), open it from the Request approved or Request rejected notification.

Approvals
Figure 109. Approvals
An approval request
Figure 110. An approval request

How to use it

  1. 1Open Approvals in the sidebar; the number next to it counts requests waiting for you. The cards show Awaiting my decision, My open requests, and Approved and Rejected in the last 30 days.
  2. 2Pending for me lists the requests within your approval authority, oldest first. My requests lists what you submitted, and Decided lists approved, rejected and withdrawn requests.
  3. 3Narrow the list with Search requests…, the request type filter and the Development filter.
  4. 4Click a request to open its Request summary and Approval history, or Open record to review the expense, order, certificate or contract behind it.
  5. 5Click Approve (a comment is optional) or Reject (a reason is required). Both buttons are also available directly on each row.
  6. 6To take back a request you submitted, click Withdraw. The record returns to draft so it can be edited and resubmitted.

Rules and details

  • Segregation of duties: you cannot decide a request you submitted; another approver must do it. Organization owners are the only exception.
  • The amount shown is the snapshot taken at submission. If the underlying record has changed since, the decision is blocked until the record is resubmitted.
  • Approving continues the record's workflow, for example posting to the ledger or issuing the purchase order. Rejecting returns the record to the requester for correction, together with your reason.
  • A request is withdrawn by its requester, or by an Organization owner or Administrator. Withdrawn requests appear under Decided with the status Withdrawn.
  • Each record can have only one pending request at a time. A request is either for a development or at Organization level, and you see only requests for developments you can access.
  • Notifications: approvers receive Approval required when a request is submitted; it disappears for everyone once the request is decided or withdrawn. The requester receives Request approved or Request rejected (with the reason).
  • Sales discounts reach the inbox only when the discount exceeds the Discount approval threshold set in Organization settings and the person creating the contract is not a sales approver.
  • Documents and engineering drawings have their own approval buttons on their pages and do not appear in this inbox.

Questions

Why can't I approve a request I submitted?
Segregation of duties: requesters cannot decide their own requests, even when their role includes approval. Another approver for that module must decide it. Only an Organization owner may approve their own request.
Approving fails with “The record changed after it was submitted”.
The amount of the expense, order, certificate or other record no longer matches the amount captured at submission. Ask the requester to withdraw the request, review the record and submit it again.
My inbox is empty but a colleague says a request is waiting.
Check that the request is in a module where your role includes Approve, that it is for a development you have access to, and that you did not submit it yourself. Requests submitted by you are under My requests.

Notifications

Alerts about approvals, deadlines, budgets, reservations, installments, documents, payables and equipment maintenance, each linking to the record it is about.

Who uses it: Everyone. Each person sees only their own notifications for the active organization.

Notifications
Figure 111. Notifications

How to use it

  1. 1Click the bell in the top bar to see the latest notifications; the badge counts unread ones. Click an alert to open the record, or View all notifications for the full page.
  2. 2On the Notifications page, switch between the Unread and All tabs, and filter by Severity (Info, Warning, Critical).
  3. 3Mark one alert with Mark as read, all of them with Mark all as read, or, on the All tab, the visible page with Mark this page as read.
  4. 4Click Check for new alerts to scan your projects right away instead of waiting for the automatic hourly run.
  5. 5To choose which alerts you get in the app and by email, open Settings → Notifications.

Rules and details

  • Who receives what: Approval required goes to people who can approve in that module; Request approved and Request rejected go to the requester; Task overdue goes to the task's assignee, or to construction editors when nobody is assigned; Upcoming milestone (within 7 days) and Construction delay (a phase more than 3 days past its planned end) go to construction approvers.
  • Budget overrun forecast (estimate at completion above the current budget, at most once a week per development) and Payment due (approved payables due within 7 days) go to finance approvers; Installment overdue goes to finance editors and the contract's sales agent; Reservation expiring (within 2 days) goes to whoever created the reservation.
  • Document expiry goes to document approvers from 30 days before a document's expiry date, and Maintenance due goes to construction editors. Organization owners and Administrators receive every role-based alert.
  • Severity sets the colour: Info (blue), Warning (amber) and Critical (red), for example an already expired document or overdue maintenance.
  • Each alert is raised only once for the same item, so refreshing never creates duplicates. Approval alerts are removed automatically once the request is decided.
  • The bell updates live while you work. Alerts you have read stay on the All tab with the time you read them.

Questions

Why didn't I get an alert my colleague received?
Alerts go to people by role and responsibility (approvers, editors, the assignee or the requester), so a colleague with a different role may receive alerts you do not. You may also have turned that alert off for the app in Settings → Notifications.
Do I need to press Check for new alerts?
No. Alerts are generated automatically every hour. The button only runs the same check immediately, for example after you have just changed a due date.
↑ Back to contents

Chapter 17

Reports

Ready-made reports, exports and printable documents.

Reports & analytics

Ready-made reports across the portfolio, finance, construction, procurement, inventory and sales, built on the same definitions as the rest of Arqenith, with filters, totals, charts, printing and CSV export.

Who uses it: Roles with Reports · View open the catalogue: by default the Organization owner, Administrator, Project manager, Engineer, Accountant, Procurement officer, Sales manager and Viewer. Each report also needs view access to its area: finance and portfolio reports need Finance · View (Owner, Administrator, Project manager, Accountant). Export CSV needs the Export permission of that area, for example Finance · Export.

Reports
Figure 112. Reports
A report
Figure 113. A report

How to use it

  1. 1Open Reports & Analytics in the sidebar. Reports are grouped into Portfolio, Finance, Construction, Procurement, Inventory and Sales; a padlock means your role lacks the permission named underneath.
  2. 2Click a report. Finance includes Development profitability, Building profitability, Budget vs actual, Cash flow (actual + forecast), Overdue receivables, Contractor balances and Supplier balances; Construction has Construction progress and BOQ progress; Sales has Sales performance, Available units and Customer installments.
  3. 3Use the filters at the top: Development on most reports, From and To dates (then Apply, or Clear dates) on Procurement spending and Sales performance, and options such as Group by or Detail level where offered.
  4. 4Read the indicator cards and the chart, then the Report data table. Click a column header to sort; the totals row is the exact sum of the rows shown.
  5. 5Click Print to print the report or save it as PDF from the print dialog, or Export CSV to download the data with the same filters and sorting.
  6. 6Use All reports to return to the catalogue.

Rules and details

  • All reports share Arqenith's definitions: actual cost is approved, non-advance expenses net of tax; estimate at completion (EAC) is actual cost plus remaining commitments plus forecast to complete.
  • Values marked Estimate (projected profit, expected revenue, forecasts and asking values) are projections, not booked figures. In CSV files these columns carry an “(estimate)” suffix.
  • Amounts are in the organization's base currency unless the report shows a currency per row; in that case totals are given separately for each currency.
  • Each report shows when it was generated and its currency. Reports are limited to 10,000 rows; if that limit is reached a warning appears and you should narrow the filters to get complete totals.
  • Reports respect project access: developments you cannot access are left out of figures, charts and exports.
  • CSV files open correctly in Excel, including Arabic text, and money columns are plain numbers, with the currency in the column header or in a separate Currency column.
  • Printable business documents (Sale and Purchase Agreement, Reservation Agreement, Payment Receipt, Statement of Account, Purchase Order, Interim Payment Certificate, Payment Voucher and Unit Handover Certificate) open from their records on an A4 letterhead with a bilingual title. Their toolbar has a Document language switch (EN / عربي), Print and Download PDF, which opens the print dialog where you choose Save as PDF.

Questions

Why are most reports locked for me?
Each report needs view access to its area. Finance and portfolio reports need Finance · View, which by default only the Organization owner, Administrator, Project manager and Accountant have. An Administrator can grant the permission to you on the Members page.
What does the Estimate tag mean?
The figure is a projection, for example expected revenue from asking prices or profit based on the estimate at completion. It changes as budgets, contracts and prices change, and it is not a ledger amount.
I can open a report but there is no Export CSV button.
Exporting needs the Export permission of the report's area (for example Construction · Export for Construction progress), which is separate from viewing. Ask an Administrator if you need it. You can still print the report.
↑ Back to contents

Chapter 18

Administration

Company settings, members and invitations, roles and the audit log.

Organization settings

The company profile and the business rules applied across all developments: names, reservation period, VAT rate, discount approval threshold, default agent commission and the negative stock rule.

Who uses it: Organization owners and Administrators (Settings · View and Settings · Edit). Someone given only Settings · View sees the values read-only.

Organization settings
Figure 114. Organization settings

How to use it

  1. 1Open Settings in the sidebar, then the Organization tab.
  2. 2Under Identity, edit Organization name, Organization name (Arabic) and Default language.
  3. 3Under Sales & tax, set Reservation validity (days), VAT rate, Discount approval threshold and Default agent commission.
  4. 4Under Inventory, tick Allow stock issues beyond the quantity on hand if your organization accepts negative stock.
  5. 5Click Save changes. The Fixed settings panel beside the form shows the Workspace address, Base currency, Country, Created and Last updated.

Rules and details

  • Reservation validity is 1 to 180 days (default 14): how long a unit reservation holds before it expires, unless a different period is set on the reservation itself.
  • VAT rate (default 11%, Lebanon's VAT) is the default tax applied to invoices and expenses.
  • Discount approval threshold (default 3%): a sales discount above this percentage of the list price is sent to the Approvals inbox, unless the person creating the contract can approve sales.
  • Default agent commission (default 1.5%): only a sales approver, such as the Sales manager, can set a higher commission rate on a contract.
  • Negative stock is not allowed by default: stock cannot be issued beyond the quantity on hand.
  • The workspace address and base currency are set when the organization is created and are locked to keep references and ledgers consistent. Changes to these settings are recorded in the audit log.

Questions

Can we change the base currency?
No. It is fixed when the organization is created, because budgets, ledgers and consolidated reports are kept in it. Individual developments can still work in their own currency.
Does changing the discount threshold affect existing contracts?
No. The threshold is checked when a sales contract is created; contracts already created keep the outcome they had.

Members & invitations

Who can access the organization: invite people, set their role, limit them to selected developments, grant or revoke individual permissions, and deactivate or reactivate them.

Who uses it: All roles except Viewer can see the member list (Members · View). Inviting, changing roles, project access, revoking invitations and deactivating need Members · Create and Members · Edit (Organization owner and Administrator). Permission overrides are set by Owners and Administrators only. Only an Owner can invite Administrators or change Owner and Administrator roles.

Members and invitations
Figure 115. Members and invitations

How to use it

  1. 1Open Settings → Members & invitations. The cards show Active members, Project-restricted, Pending invitations and Deactivated.
  2. 2Click Invite member, enter the Email and choose the Role, then click Create invitation. Copy the Invitation link and send it to the person; when email is set up, the invitation email is sent too. Click Done.
  3. 3Change someone's role with the Role menu on their row; the change applies immediately.
  4. 4Click the Project access button on a row and choose All developments or Only selected developments, tick the developments, then Save.
  5. 5Click the Permission overrides button and set any permission (per module: View, Create, Edit, Delete, Approve, Export) to Grant or Revoke, or leave it on the role default (Role: yes or Role: no), then Save.
  6. 6Click Deactivate to remove a member's access immediately; use Show deactivated to list them and Reactivate to restore access.
  7. 7Under Pending invitations, check who invited whom and when each invitation expires, and click Revoke to cancel a link.

Rules and details

  • Invitations are valid for 14 days. The link is shown only once, so copy it straight away. Creating a new invitation for the same email revokes the previous link.
  • The invited person opens the link, enters a full name and chooses a password; the email address comes from the invitation. Someone who already has an Arqenith account signs in and clicks Accept invitation, and must be signed in with the invited email address.
  • Nobody can be invited as Organization owner. Only an Owner can invite an Administrator or change an Owner's or Administrator's role. You cannot change your own role or deactivate yourself, and the organization always keeps at least one active owner.
  • Project access: a member limited to selected developments sees only those developments' records (budgets, expenses, units, documents and so on) plus organization-level records. With no development selected they see organization-level records only. Nobody can change their own project access.
  • Permission overrides add to or take away from the role: Grant gives a permission the role lacks, Revoke removes one it has, and the role default follows any later role change. The Role column shows how many overrides a member has. Owners cannot receive overrides.
  • Deactivating ends access to this organization immediately but keeps the person's history, and they no longer receive notification emails. Their account and memberships in other organizations are not affected.
  • Every change to memberships, invitations, project access and overrides is recorded in the audit log.

Questions

The invitation link expired or got lost. What now?
Create a new invitation for the same email from Invite member. It replaces any previous link, and you get a fresh link valid for 14 days.
Inviting someone says “This person is already a member of the organization”.
They already have a membership here, possibly a deactivated one. Click Show deactivated, find them and click Reactivate instead of inviting them again.
The invited person sees “This invitation was sent to a different email address”.
They are signed in with another account. They should sign out and sign in (or create the account) with the address the invitation was sent to, or you can invite the address they actually use.
An engineer needs to approve documents, but not everything a project manager can do. How?
Keep the Engineer role and open Permission overrides on their row. Set Documents · Approve to Grant and save. Everything else still follows the Engineer role.

Roles & permissions

A read-only matrix of what each of the ten roles can view, create, edit, delete, approve and export in every module.

Who uses it: Everyone with Members · View, which is every role except Viewer. Changes for individual people are made on the Members page.

Roles and permissions
Figure 116. Roles and permissions

How to use it

  1. 1Open Settings → Roles & permissions.
  2. 2Read down a module (Land, Developments & units, Engineering, Construction, Contractors, Procurement, Inventory, Finance, Sales, Documents, Reports, Feasibility, Members, Settings, Audit log) and across the roles: ✓ means included, — means not included. Your own role's column is highlighted.
  3. 3To give one person a permission their role lacks, or to take one away, use Permission overrides on Settings → Members & invitations.

Rules and details

  • Organization owner and Administrator: every permission in every module.
  • Project manager: view, create, edit, approve and export land, developments, engineering, construction, contractors, procurement, inventory, documents and feasibility (no delete); view and export finance; view sales; view and export reports.
  • Engineer: view, create and edit engineering, construction and documents; view developments, land, contractors, procurement, inventory and reports. Site supervisor: view, create and edit construction; view developments, engineering, contractors, procurement, inventory and documents; create inventory records and documents.
  • Accountant: everything in finance, including approve and delete; view and export procurement, contractors and sales; edit sales; view developments, land, construction, inventory, documents and feasibility; upload documents; view and export reports.
  • Procurement officer: view, create, edit and export procurement and inventory; view, create and edit contractors; view developments, construction and reports; view and upload documents.
  • Sales manager: everything in sales, including approve; view developments, land and feasibility; view, upload and edit documents; view and export reports. Sales agent: view, create and edit sales; view developments; view and upload documents.
  • Viewer: view only, in every module except finance, audit log, members and settings.
  • Every role except Viewer can view the member list. Approvals additionally follow segregation of duties (no self-approval) and project-level access.

Questions

Can we create our own role?
No. The ten roles are fixed. To tailor one person's access, choose the closest role and add Permission overrides for that member.

Audit log

An append-only record of every change in the organization: who did what and when, with the values before and after.

Who uses it: Organization owners and Administrators (Audit log · View; Audit log · Export for the CSV file). Other people see the history of individual records in each record's Activity panel.

The audit log
Figure 117. The audit log

How to use it

  1. 1Open Audit Log in the sidebar.
  2. 2Filter with Record type, Action (Created, Updated, Deleted, Voided, Retention released, Schedule amended, Document submitted, Document approved, Document rejected), User and the From and To dates; paste a record ID into Filter by record ID… to follow a single record.
  3. 3Expand Changes on an entry to see each field's old and new value (“3 fields changed”), or the full set of values for something created or deleted.
  4. 4Click History under a record to list all of its entries, the record link to open it, or a user's name to see everything that person did.
  5. 5Click Export CSV to download the entries matching your filters.

Rules and details

  • Entries cannot be edited or deleted by anyone.
  • Everything that matters is recorded, including members, invitations, project access, permission overrides, approval requests, and records across land, developments, construction, contractors, procurement, finance, investors, sales, documents and feasibility.
  • Secrets such as invitation tokens and passwords are never recorded.
  • System means a change made automatically by Arqenith; Former member means a person who is no longer in the organization.
  • Dates are filtered in UTC, and the CSV gives times in UTC, so an entry made late in the evening in Beirut can fall on the next day.

Questions

How do I find out who changed a unit's price?
Open the unit's entries with History (or filter Record type = Unit and paste the unit's ID into Filter by record ID…), then expand Changes on the Updated entries to see the old and new price, who changed it and when.
↑ Back to contents

Chapter 19

Your Account

Your profile, language, theme, password and notification preferences.

My profile

Your name, phone, language and theme, your password, and your sessions.

Who uses it: Everyone, for their own account.

Your profile
Figure 118. Your profile

How to use it

  1. 1Open Settings → My profile, or click your name at the bottom of the sidebar.
  2. 2Under Personal details, enter Full name, Full name (Arabic) and Phone. Under Preferences, choose Language (English or العربية) and Theme (Light, Dark or Match system), then click Save.
  3. 3To change your password, enter Current password, New password and Confirm new password, then click Change password.
  4. 4Signed in on a shared or lost device? Click Sign out everywhere and confirm. All your sessions end, including this one, and you sign in again.
  5. 5The Account panel shows your Email, Display name, Last sign-in, Member since and the Organizations you belong to with your role in each.

Rules and details

  • Passwords need at least 10 characters, with upper and lower case letters and a number, and must differ from the current one.
  • Forgot your password? On the sign-in page click Forgot password?, enter your email address and click Send reset link. Arqenith emails you a link that works once and expires after one hour; it opens Choose a new password, where you enter and confirm the new password and click Update password.
  • For privacy, the Reset your password page gives the same answer whether or not an account exists for the email you entered.
  • Your language is saved to your profile, so emails from Arqenith (alerts, daily summaries, password resets) arrive in that language. Your Arabic name is used when the interface is in Arabic.
  • Your email address cannot be changed from the profile; it is the address you were invited with.

Questions

The password reset link doesn't work.
Links work once and expire after one hour. Request a new one with Forgot password? and use the most recent email. Check your spam folder if nothing arrives.
How do I change my email address?
It cannot be changed in Arqenith. Ask an Administrator to invite your new address; once you have joined with it, the old membership can be deactivated.

Notification preferences

Choose, alert by alert, what you see in the app and what you receive by email, either one email per alert or a daily digest.

Who uses it: Everyone, for their own account in the current organization.

Notification preferences
Figure 119. Notification preferences

How to use it

  1. 1Open Settings → Notifications.
  2. 2For each alert (Approval required, Request approved, Request rejected, Task overdue, Upcoming milestone, Construction delay, Budget overrun forecast, Reservation expiring, Installment overdue, Document expiry, Payment due), tick or untick In-app and Email.
  3. 3Where Email is ticked, choose Email delivery: Instant (one email per alert) or Daily digest.
  4. 4Click Save preferences. Restore defaults clears your choices and returns every alert to its default.

Rules and details

  • Defaults: every alert is shown in the app. Email is on, delivered instantly, for Approval required, Request rejected, Task overdue, Construction delay, Budget overrun forecast, Reservation expiring, Installment overdue and Document expiry, and off for Request approved, Upcoming milestone and Payment due.
  • The daily digest is sent once a day, in the morning Beirut time, and lists every alert since the previous digest in a single email.
  • Alerts you have already read in the app are not emailed afterwards.
  • With In-app off but Email on, the alert is still emailed and kept on the Notifications page already marked as read. With both off, the alert is not recorded at all.
  • Emails go to the address shown on the page, in your profile language, and include a link to open the record and a link back to these preferences. Email is sent only when it has been set up for your Arqenith workspace.
  • Preferences apply to the current organization only; switch organization to set them for another.

Questions

I'm not receiving any emails.
Check that Email is ticked for that alert here, that you haven't already read the alert in the app (read alerts are not emailed), and look in your spam folder. Everything still appears under the bell.
I get too many emails. What can I do?
Switch the noisiest alerts to Daily digest, so you receive one summary email each morning instead, or untick Email for alerts you only need in the app.
↑ Back to contents

Chapter 20

Languages, Currencies and Dark Mode

Arqenith in English and Arabic, in several currencies, in light and dark.

English and Arabic

Each person chooses their language; the whole interface turns right to left in Arabic, and numbers, dates and amounts follow the language. Companies, developments, units and partners carry Arabic names, and printed documents come in either language.

Several currencies

Each company has a base currency; developments, contracts and transactions can use others. Exchange rates are kept by date, every amount is also stored in the base currency, and realised exchange gains and losses are posted when payments settle.

Light and dark

Light, dark, or following the device: each person picks a theme. Every screen, chart and dialog is designed for both.

Notifications and emails

Alerts for approvals, overdue tasks and installments, budget overruns, expiring reservations and documents, in the app and by email, instantly or as a daily digest, in each person's language.

Light and dark, side by side

The dashboard: portfolio, construction, sales, collections and what needs attention (Light)
Figure 120. The dashboard: portfolio, construction, sales, collections and what needs attention (Light)
The dashboard: portfolio, construction, sales, collections and what needs attention (Dark)
Figure 121. The dashboard: portfolio, construction, sales, collections and what needs attention (Dark)
The units explorer (Light)
Figure 122. The units explorer (Light)
The units explorer (Dark)
Figure 123. The units explorer (Dark)

English and Arabic

A sales contract and its installments (English)
Figure 124. A sales contract and its installments (English)
A sales contract and its installments (العربية)
Figure 125. A sales contract and its installments (العربية)
Finance settings
Figure 126. Finance settings
Your profile
Figure 127. Your profile
↑ Back to contents

Chapter 21

On Any Device

The same Arqenith on a phone on site and on a desktop in the office.

Arqenith is a web application: nothing to install. It adapts to the screen, so supervisors submit daily reports and photos from a phone on site, agents check availability in front of a buyer, and the office works on a desktop.

The dashboard on a phone
Figure 128. The dashboard on a phone
The menu on a phone
Figure 129. The menu on a phone
Units on a phone
Figure 130. Units on a phone
Installments on a phone
Figure 131. Installments on a phone
↑ Back to contents

Chapter 22

Security, Data and Deployment

How each company's data is kept apart and recorded, and where Arqenith runs.

Each company kept apart

Row-level security in the database decides who may read each record, so one company can never see another's data.

Access by invitation

No one can sign up alone: accounts are created from invitation links that expire after 14 days.

Roles and project access

Ten roles, single-permission overrides, and members limited to the developments they work on.

Immutable ledger

Financial transactions are never edited or deleted; corrections are posted as reversals.

Complete audit trail

Every change records who, what, when and the values before and after.

Hosted and backed up

Runs in the cloud on managed infrastructure with encrypted connections, operated by QLS.
The audit log
Figure 132. The audit log
The ledger
Figure 133. The ledger
↑ Back to contents

Chapter 23

Getting Started

From the first conversation to your team working in Arqenith.

  1. 1Talk to QLS: a short call about your company, your developments and how you work today.
  2. 2QLS creates your company in Arqenith and invites your owner.
  3. 3Import or enter your land, developments, buildings and units; set your currencies and cost codes.
  4. 4Invite your team with their roles and the developments they work on.
  5. 5Start with one development end to end, then bring in the rest.

Write to info@qlsystems.net or call +961 76 073 446 for a demo with your own projects, in English or Arabic.

↑ Back to contents